Yamaha CVP-201 Owner's Manual - Page 142
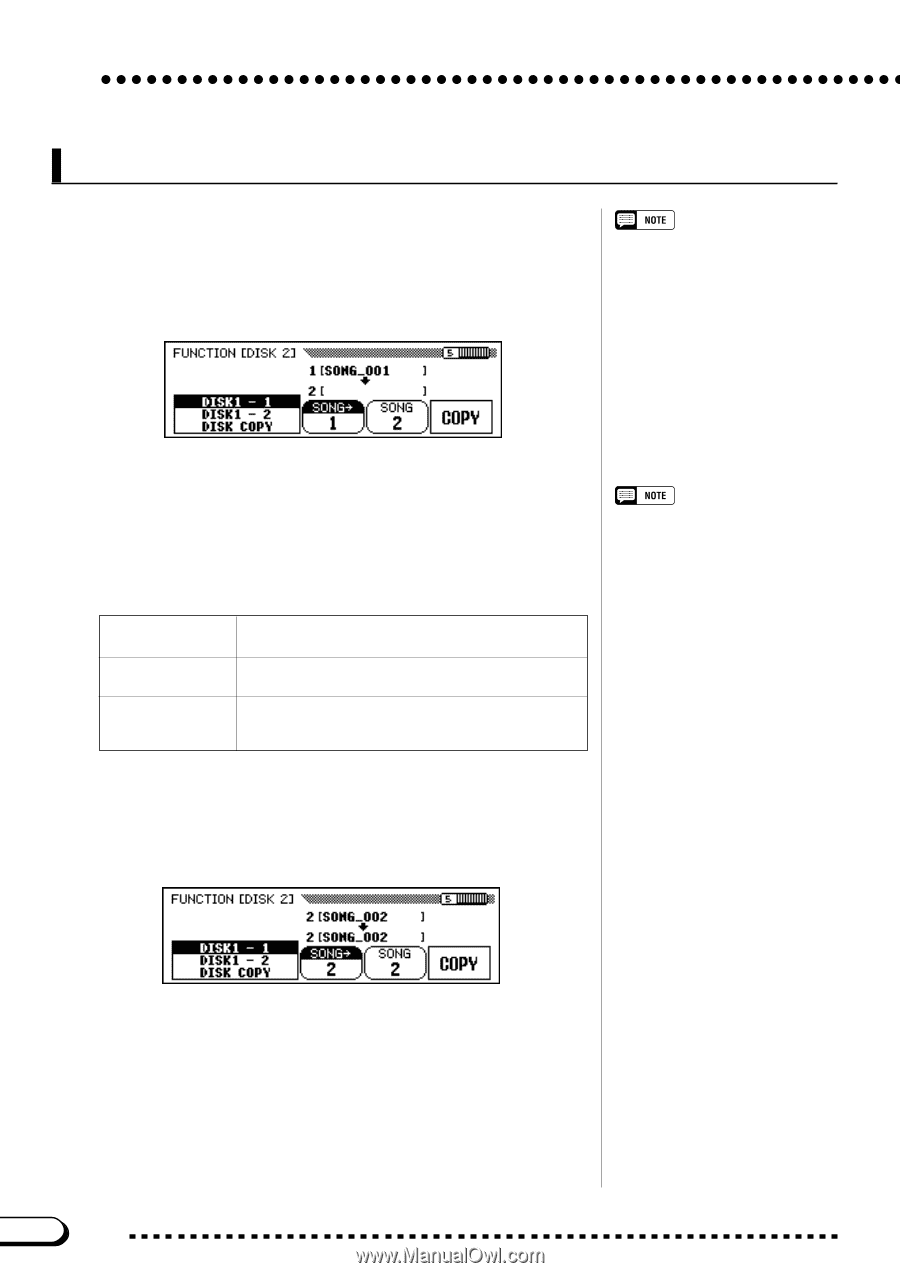
FUNCTION [DISK 2] Display ム Song Copy & Disk Copy
 |
View all Yamaha CVP-201 manuals
Add to My Manuals
Save this manual to your list of manuals |
Page 142 highlights
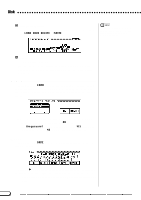
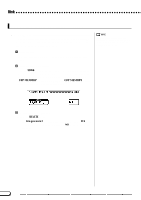
Disk FUNCTION [DISK 2] Display - page 5 s Song Copy & Disk Copy The functions on this page allow you to copy song data recorded by the Clavinova to a different song number on the same disk, or to a different disk. You can also use the Disk Copy function to copy an entire disk. The Song Copy and Disk Copy functions cannot be executed while the [RECORD] lamp is lit. Exit the Song Record mode before attempting to copy a song or disk. Z Select a copy function. First insert the disk containing the source song, or the disk to be copied. ➾ Press either of the leftmost two LCD buttons to select the copy type. Three copy types are available. DISK1 - 1 DISK1 - 2 DISK COPY This function allows you to copy a song to a different song number on the same disk. This function allows you to copy a song to a different disk. This function copies all the data from one disk to another disk. (All data on the destination disk is erased by this process.) X Select the source song. If you selected DISK1 - 1 or DISK1 - 2 in step 1, press the SONG ➔ button, then use the data dial or [-] and [+] buttons to select a song number from 1 to 99. • You will not be able to select DISK1 - 1 as the copy function if the disk you inserted is write protected (page 9). • If the Clavinova's memory contains song data recorded without a disk (page 133), CVP - DISK will automatically be selected as the copy function. If you want to keep the CVP MEMORY song data, you can use this function to copy it to a disk. (Insert the disk, specify a destination song number as described in step 3, then execute the copy function as usual.) You can then use the Song Delete function (page 144) to delete the CVP MEMORY song. Once the song has been deleted, you will be able to use the other copy functions. ➔ The number and name of the selected song are displayed above the third and fourth LCD buttons. 142 CVP-201 140
-
 1
1 -
2
-
3
-
4
-
5
-
6
-
7
-
8
-
9
-
10
-
11
-
12
-
13
-
14
-
15
-
16
-
17
-
18
-
19
-
20
-
21
-
22
-
23
-
24
-
25
-
26
-
27
-
28
-
29
-
30
-
31
-
32
-
33
-
34
-
35
-
36
-
37
-
38
-
39
-
40
-
41
-
42
-
43
-
44
-
45
-
46
-
47
-
48
-
49
-
50
-
51
-
52
-
53
-
54
-
55
-
56
-
57
-
58
-
59
-
60
-
61
-
62
-
63
-
64
-
65
-
66
-
67
-
68
-
69
-
70
-
71
-
72
-
73
-
74
-
75
-
76
-
77
-
78
-
79
-
80
-
81
-
82
-
83
-
84
-
85
-
86
-
87
-
88
-
89
-
90
-
91
-
92
-
93
-
94
-
95
-
96
-
97
-
98
-
99
-
100
-
101
-
102
-
103
-
104
-
105
-
106
-
107
-
108
-
109
-
110
-
111
-
112
-
113
-
114
-
115
-
116
-
117
-
118
-
119
-
120
-
121
-
122
-
123
-
124
-
125
-
126
-
127
-
128
-
129
-
130
-
131
-
132
-
133
-
134
-
135
-
136
-
 137
137 -
 138
138 -
 139
139 -
 140
140 -
 141
141 -
 142
142 -
 143
143 -
 144
144 -
 145
145 -
 146
146 -
 147
147 -
148
-
149
-
150
-
151
-
152
-
153
-
154
-
155
-
156
-
157
-
158
-
159
-
160
-
161
-
162
-
163
-
164
-
165
-
166
-
167
-
168
-
169
-
170
-
171
-
172
-
173
-
174
-
175
-
176
-
177
-
178
 |
 |