Yamaha CVP-201 Owner's Manual - Page 76
Select the part you want to record., Select the voice for the part., after selecting the part.
 |
View all Yamaha CVP-201 manuals
Add to My Manuals
Save this manual to your list of manuals |
Page 76 highlights
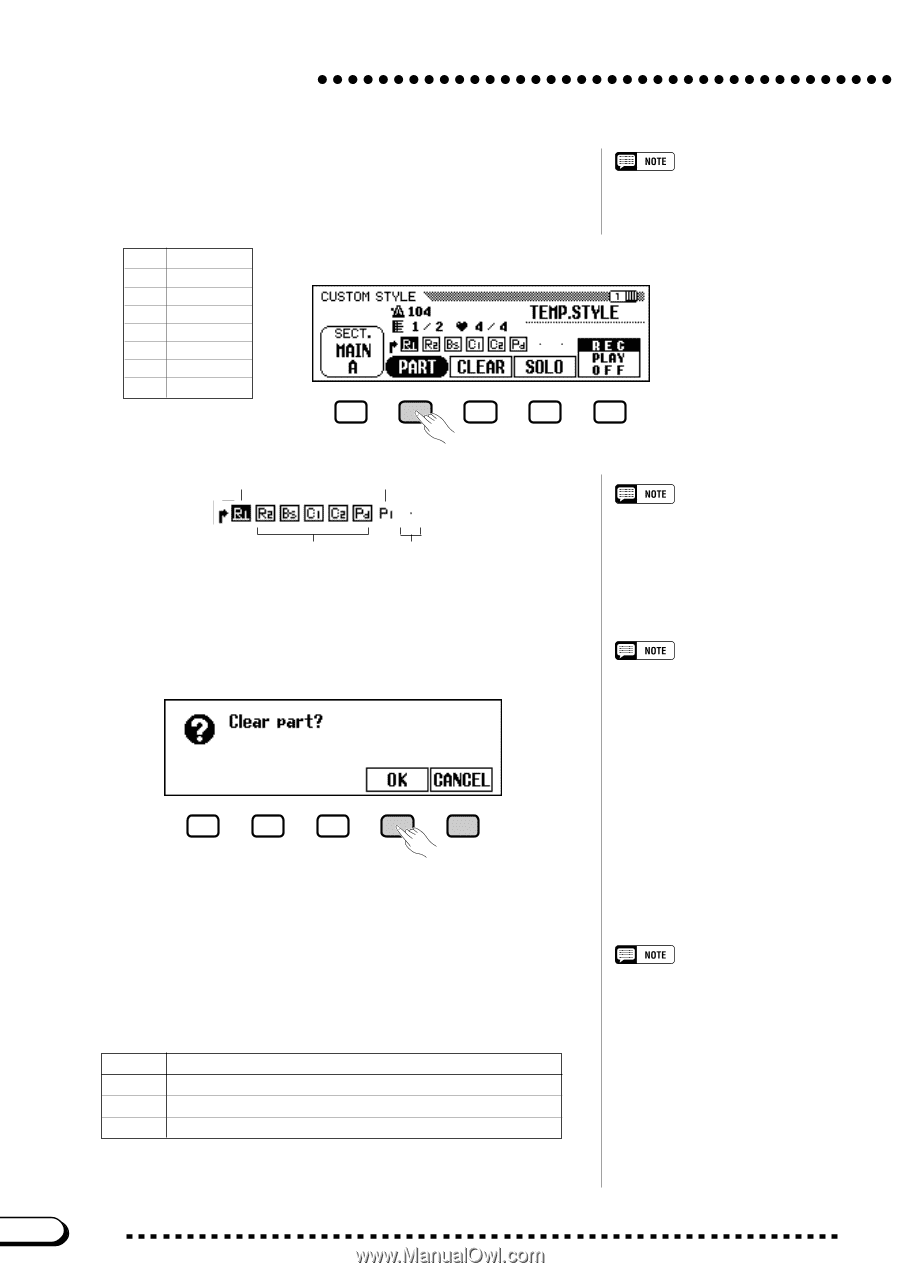
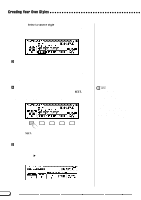
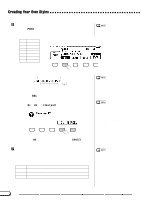
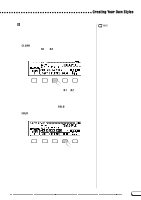
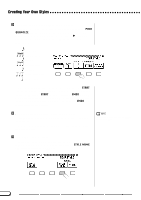
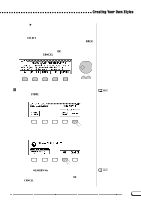
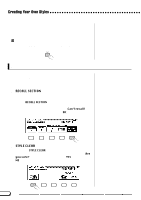
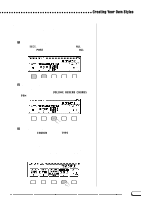
Creating Your Own Styles N Select the part you want to record Use the PART LCD button, the data dial, or [-] and [+] buttons to select the part you want to record. The R1 part is initially selected and set to record. R1 Rhythm 1 R2 Rhythm 2 Bs Bass C1 Chord 1 C2 Chord 2 Pd Pad P1 Phrase 1 P2 Phrase 2 Recording part OFF Playback part Part containing no data Any part you select can be set to record by using the rightmost LCD button to select REC after selecting the part. ➔ The part number is highlighted. If you have selected a part other than R1 or R2, the "Clear part?" message will be displayed. • Only one part can be set to record. • All other parts will be set to PLAY (the part number is surrounded by a box) or OFF (only the part number is displayed). Clear part? • If the source style is a preset style or a style loaded from an optional Style File disk, parts other than R1 and R2 must be cleared before they can be recorded. • The "Clear part?" message will not be displayed if the selected part does not contain any data. ➾ Press OK to clear the part and continue, or CANCEL to abort. M Select the voice for the part At this point you can also select the voice you want to record the part with. Select the voice as you would the main keyboard voice (see page 29). The preset voice for the part being recorded is initially selected. Part R1 R2 Others Voices that can be used Any drum or SFX kit in PERCUSSION group Any Any except a drum kit or SFX kit 74 76 CVP-201
-
 1
1 -
2
-
3
-
4
-
5
-
6
-
7
-
8
-
9
-
10
-
11
-
12
-
13
-
14
-
15
-
16
-
17
-
18
-
19
-
20
-
21
-
22
-
23
-
24
-
25
-
26
-
27
-
28
-
29
-
30
-
31
-
32
-
33
-
34
-
35
-
36
-
37
-
38
-
39
-
40
-
41
-
42
-
43
-
44
-
45
-
46
-
47
-
48
-
49
-
50
-
51
-
52
-
53
-
54
-
55
-
56
-
57
-
58
-
59
-
60
-
61
-
62
-
63
-
64
-
65
-
66
-
67
-
68
-
69
-
70
-
 71
71 -
 72
72 -
 73
73 -
 74
74 -
 75
75 -
 76
76 -
 77
77 -
 78
78 -
 79
79 -
 80
80 -
 81
81 -
82
-
83
-
84
-
85
-
86
-
87
-
88
-
89
-
90
-
91
-
92
-
93
-
94
-
95
-
96
-
97
-
98
-
99
-
100
-
101
-
102
-
103
-
104
-
105
-
106
-
107
-
108
-
109
-
110
-
111
-
112
-
113
-
114
-
115
-
116
-
117
-
118
-
119
-
120
-
121
-
122
-
123
-
124
-
125
-
126
-
127
-
128
-
129
-
130
-
131
-
132
-
133
-
134
-
135
-
136
-
137
-
138
-
139
-
140
-
141
-
142
-
143
-
144
-
145
-
146
-
147
-
148
-
149
-
150
-
151
-
152
-
153
-
154
-
155
-
156
-
157
-
158
-
159
-
160
-
161
-
162
-
163
-
164
-
165
-
166
-
167
-
168
-
169
-
170
-
171
-
172
-
173
-
174
-
175
-
176
-
177
-
178
 |
 |