Cisco 2950 Hardware Installation Guide
Cisco 2950 - Catalyst Switch Manual
 |
UPC - 746320454504
View all Cisco 2950 manuals
Add to My Manuals
Save this manual to your list of manuals |
Cisco 2950 manual content summary:
- Cisco 2950 | Hardware Installation Guide - Page 1
Catalyst 2950 Switch Hardware Installation Guide August 2004 Corporate Headquarters Cisco Systems, Inc. 170 West Tasman Drive San Jose, CA 95134-1706 USA http://www.cisco.com Tel: 408 526-4000 800 553-NETS (6387) Fax: 408 526-4100 Customer Order Number: Text Part Number: OL-6156-01 - Cisco 2950 | Hardware Installation Guide - Page 2
, if not installed and used in accordance with the instruction manual, may cause harmful interference to radio communications. Operation of a partnership relationship between Cisco and any other company. (0406R) Catalyst 2950 Switch Hardware Installation Guide Copyright © 2004 Cisco Systems, Inc. All - Cisco 2950 | Hardware Installation Guide - Page 3
10/100 Ports 1-7 10/100/1000 Ports 1-8 100BASE-FX and 1000BASE-SX Ports 1-9 LRE Port 1-9 GBIC Module Ports 1-10 SFP Module Slots 1-11 SFP Modules 1-11 LEDs 1-13 System LED 1-16 RPS LED 1-16 Port Mode and Port Status LEDs 1-16 CONTENTS OL-6156-01 Catalyst 2950 Switch Hardware Installation Guide - Cisco 2950 | Hardware Installation Guide - Page 4
Optional AC Ground Kit for Catalyst 2950 Switches 2-19 Installing the GBIC Modules 2-22 Installing and Removing SFP Modules 2-23 Installing SFP Modules into SFP Module Slots 2-23 Removing SFP Modules from SFP Module Slots 2-25 Connecting to 10/100 and 10/100/1000 Ports 2-27 Connecting to 100BASE-FX - Cisco 2950 | Hardware Installation Guide - Page 5
Cable and Adapter Specifications B-6 Two Twisted-Pair Cable Pinouts B-6 Four Twisted-Pair Cable Pinouts for 10/100 Ports B-7 Four Twisted-Pair Cable Pinouts for 1000BASE-T Ports B-8 RJ-21 Cable Pinouts B-8 Adapter Pinouts B-10 Contents OL-6156-01 Catalyst 2950 Switch Hardware Installation Guide v - Cisco 2950 | Hardware Installation Guide - Page 6
Out What You Need D-3 Connecting to the Console Port D-3 Starting the Terminal-Emulation Software D-4 Connecting to a Power Source D-5 Entering the Initial Configuration Information D-5 IP Settings D-5 Completing the Setup Program D-6 Catalyst 2950 Switch Hardware Installation Guide vi OL-6156-01 - Cisco 2950 | Hardware Installation Guide - Page 7
the document online, or click the PDF icon to download and print the document in Adobe Portable Document Format (PDF). You can also contact the Cisco service and support website for assistance: http://www.cisco.com/public/Support_root.shtml. Catalyst 2950 Switch Hardware Installation Guide vii - Cisco 2950 | Hardware Installation Guide - Page 8
, contact your Cisco Sales and Service Representative. Complete the information below, and keep it for reference. Company product purchased from Company telephone number Product model number Product serial number Maintenance contract number Catalyst 2950 Switch Hardware Installation Guide viii OL - Cisco 2950 | Hardware Installation Guide - Page 9
of Ethernet and local area networking. Purpose This guide describes the hardware features of the Catalyst 2950 switch. It describes the physical and performance characteristics of the switch, explains how to install a switch, and provides troubleshooting information and specifications. This guide - Cisco 2950 | Hardware Installation Guide - Page 10
practices for preventing accidents. Use the statement number provided at the end of each warning to locate its translation in the translated safety numéro de l'instruction situé à la fin de chaque avertissement. CONSERVEZ CES INFORMATIONS Catalyst 2950 Switch Hardware Installation Guide x OL-6156- - Cisco 2950 | Hardware Installation Guide - Page 11
llen vertraut. Suchen Sie mit der am Ende jeder Warnung angegebenen Anweisungsnummer nach der jeweiligen perigos envolvidos no manuseio de circuitos elétricos e familiarize-se com as práticas habituais de prevenção de acidentes. Utilize o -6156-01 Catalyst 2950 Switch Hardware Installation Guide xi - Cisco 2950 | Hardware Installation Guide - Page 12
änd det nummer som finns i slutet av varje varning för att hitta dess översättning i de översatta säkerhetsvarningar som medföljer denna anordning. SPARA DESSA ANVISNINGAR Catalyst 2950 Switch Hardware Installation Guide xii OL-6156-01 - Cisco 2950 | Hardware Installation Guide - Page 13
há risco de lesões corporais. Antes de trabalhar com qualquer equipamento, esteja ciente dos riscos que envolvem os circuitos elétricos e familiarize-se com as práticas padrão de prevenção de acidentes. enhed. GEM DISSE ANVISNINGER OL-6156-01 Catalyst 2950 Switch Hardware Installation Guide xiii - Cisco 2950 | Hardware Installation Guide - Page 14
Conventions Preface Catalyst 2950 Switch Hardware Installation Guide xiv OL-6156-01 - Cisco 2950 | Hardware Installation Guide - Page 15
Catalyst 2950 Switch Hardware Installation Guide (not orderable but available on Cisco.com) • Catalyst 2950 Switch Getting Started Guide (order number DOC-7816521=) • Regulatory Compliance and Safety Information for the Catalyst 2950 Switch (order number DOC-786625= OL-6156-01 Catalyst 2950 Switch - Cisco 2950 | Hardware Installation Guide - Page 16
Command Reference (order number DOC-7814984=) • Catalyst 2950 Switch System Message Guide (order number DOC-7814981=) • Release Notes for the Catalyst 2950 LRE Switch (not orderable but available on Cisco.com) For other information about related products, see these documents: • 1000BASE-T Gigabit - Cisco 2950 | Hardware Installation Guide - Page 17
Cisco.com users can order documentation through a local account representative by calling Cisco Systems Corporate Headquarters (California, USA.) at 408 526-7208 or, elsewhere in North America, by calling 800 553-NETS (6387). OL-6156-01 Catalyst 2950 Switch Hardware Installation Guide - Cisco 2950 | Hardware Installation Guide - Page 18
and tools for troubleshooting and resolving technical issues with Cisco products and technologies. The Cisco TAC website is available 24 hours a day, 365 days a year. Accessing all the tools on the Cisco TAC website requires a Cisco.com user ID and password. If you have a valid service contract but - Cisco 2950 | Hardware Installation Guide - Page 19
://www.cisco.com/go/packet • iQ Magazine is the Cisco bimonthly publication that delivers the latest information about Internet business strategies for executives. You can access iQ Magazine at this URL: http://www.cisco.com/go/iqmagazine OL-6156-01 Catalyst 2950 Switch Hardware Installation Guide - Cisco 2950 | Hardware Installation Guide - Page 20
www.cisco.com/en/US/about/ac123/ac147/about_cisco_the_internet_protocol_journal.html • Training-Cisco offers world-class networking training. Current offerings in network training are listed at this URL: http://www.cisco.com/en/US/learning/index.html Catalyst 2950 Switch Hardware Installation Guide - Cisco 2950 | Hardware Installation Guide - Page 21
2950 switches. These are the switch features: • Hardware - Catalyst 2950-12 switch-12 10/100 Ethernet ports - Catalyst 2950-24 switch-24 10/100 Ethernet ports - Catalyst 2950C-24 switch-24 10/100 Ethernet ports and 2 100BASE-FX ports OL-6156-01 Catalyst 2950 Switch Hardware Installation Guide - Cisco 2950 | Hardware Installation Guide - Page 22
-SX ports - Catalyst 2950T-48-SI switch-48 10/100 Ethernet ports and 2 10/100/1000 Ethernet ports - On Catalyst 2950G-12-EI, 2950G-24-EI, 2950G-24-EI-DC, and 2950G-48-EI switches, support for these GBIC modules: 1000BASE-SX GBIC 1000BASE-LX/LH GBIC 1000BASE-ZX GBIC 1000BASE-T GBIC (model WS-5483 - Cisco 2950 | Hardware Installation Guide - Page 23
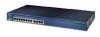
1-24. Figure 1-1 to Figure 1-12 show the switches. Figure 1-1 Catalyst 2950-12 Switch 45568 SYST RPS STAT UTIL DUPLX SPEED MODE 1x 2x 3x 4x 5x 6x 7x 8x 9x 10x 11x 10Base-T / 100Base-TX 12x 10/100 ports Catalyst 2950 SERIES OL-6156-01 Catalyst 2950 Switch Hardware Installation Guide - Cisco 2950 | Hardware Installation Guide - Page 24
1-5 Catalyst 2950G-24-EI Switch SYST RPS STAT UTIL DUPLX SPEED MODE 1 1X 23 45 67 8 9 10 11 12 11X 2X 12X 13 13X 14 15 16 17 18 19 20 21 22 23 24 23X 14X 24X 10/100 ports 1 Catalyst 2950 SERIES 2 GBIC module slots Catalyst 2950 Switch Hardware Installation Guide 1-4 60977 - Cisco 2950 | Hardware Installation Guide - Page 25
Figure 1-6 Catalyst 2950G-24-EI-DC Switch SYST RPS STAT UTIL DUPLX SPEED MODE 1 1X 23 45 67 8 9 10 11 12 11X 2X 12X 13X 13 14 15 16 17 18 19 20 21 22 23 24 23X 14X 24X 10/100 ports 1 Catalyst 2950 SERIES 2 GBIC module slots Figure 1-7 Catalyst 2950G-48-EI Switch SYST RPS - Cisco 2950 | Hardware Installation Guide - Page 26
21 22 23 24 Catalyst 2950 SERIES LRE 1 2 1 2 10/100/1000 ports Figure 1-10 Catalyst 2950ST-24 LRE 997 Switch Power connector LRE port SFP ports - ++ A INPCUUTR:RE3N6T- B 72 V :2-1 A - SYST RPS STAT SPEED MODE CONSOLE 1 2 3 4 5 6 7 8 9 10 11 12 Console port DC ground lug - Cisco 2950 | Hardware Installation Guide - Page 27
1-12 Catalyst 2950T-24 Switch Front-Panel Description 47337 SYST RPS STAT UTIL DUPLX SPEED MODE 1x 2x 3x 4x 5x 6x 7x 8x 9x 10x 11x 10Base-T / 100Base-TX 12x 13x 14x 15x 16x 17x 18x 19x 20x 21x 22x 23x Catalyst 2950 SERIES 24x 10/100/100Base-T 1 2 10/100 ports 10/100 - Cisco 2950 | Hardware Installation Guide - Page 28
fastest line speed that both devices support and full-duplex transmission, if the attached device supports it) and configures itself accordingly. 10/100/1000 Ports The 10/100/1000 ports on Catalyst 2950T-24, Catalyst 2950T-48-SI, and Catalyst 2950 LRE switches use RJ-45 connectors and twisted-pair - Cisco 2950 | Hardware Installation Guide - Page 29
or 2950ST-24 LRE switch. You can connect the Cisco 576 LRE CPE 997 device only to LRE ports on a Catalyst 2950ST-24 LRE 997 switch. You can hot swap the CPE devices without powering down the switch or disrupting the other switch ports. The default mode for each LRE port is speed autosensing and half - Cisco 2950 | Hardware Installation Guide - Page 30
state. Note If you are using a non-Cisco approved CWDM GBIC module, remove the module from the switch, and replace it with a Cisco-approved module. For more information about these GBIC modules, see your GBIC module documentation. 1-10 Catalyst 2950 Switch Hardware Installation Guide OL-6156-01 - Cisco 2950 | Hardware Installation Guide - Page 31
On the Catalyst 2950 LRE switch, the SFP module slots support the SFP modules listed in the Catalyst 2950 LRE switch release notes. The Catalyst 2950 LRE switch has four physical input ports that are logically bundled as two ports. Each logical port consists of a copper 10/100/1000 port and a fiber - Cisco 2950 | Hardware Installation Guide - Page 32
Port Cabling Specifications up to 62 miles (100 km) by using dispersion- 10-dB inline optical attenuator between the fiber-optic cable plant and the receiving port on the 1000BASE-ZX SFP module at each end of the link. Use only Cisco-approved SFP modules on the Catalyst 2950 LRE switch. Note Cisco - Cisco 2950 | Hardware Installation Guide - Page 33
select the port mode also varies by model. See these figures: • Figure 1-15 for the Catalyst 2950-12, 2950-24, 2950C-24, 2950SX-24, and 2950T-24 switches • Figure 1-16 for the Catalyst 2950G-12-EI, 2950G-24-EI, and 2950G-24-EI-DC switches • Figure 1-17 for the Catalyst 2950G-48-EI, Catalyst 2950SX - Cisco 2950 | Hardware Installation Guide - Page 34
2950G-12-EI, 2950G-24-EI, and 2950G-24-EI-DC Switches RPS LED Port status LEDs 65395 System LED Port mode LEDs SYST RPS STAT UTIL DUPLX SPEED MODE 1 1X 23 45 67 8 9 10 11 12 11X 2X 12X Mode button Figure 1-17 LEDs on Catalyst 2950G-48-EI, 2950SX-48-SI, and 2950T-48-SI Switches Port - Cisco 2950 | Hardware Installation Guide - Page 35
-24 LRE 997 Switches System LED Redundant power system LED Port status LEDs -- ++ A INPCUUTR:RE3N6T- B 72 V :2-1 A SYST RPS STAT SPEED MODE CONSOLE STAT LED Speed Mode LED button 1 2 3 4 5 6 7 8 9 10 11 12 89364 OL-6156-01 Catalyst 2950 Switch Hardware Installation Guide - Cisco 2950 | Hardware Installation Guide - Page 36
. Each port has a port status LED, also called a port LED. These LEDs, as a group or individually, display information about the switch and the individual ports. The port modes (see Table 1-5) determine the type of information displayed. 1-16 Catalyst 2950 Switch Hardware Installation Guide OL - Cisco 2950 | Hardware Installation Guide - Page 37
The bandwidth in use by the switch. DUPLX Port duplex mode The port duplex mode: half duplex or full duplex. SPEED Port speed The port operating speed: 10 or 100 Mbps for 10/100 ports and 10, 100, or 1000 Mbps for 10/100/1000 ports. 1. A Catalyst 2950 LRE switch does not have a UTIL or a DUPLX - Cisco 2950 | Hardware Installation Guide - Page 38
After a port is reconfigured, the port LED can remain amber for up to 30 seconds while STP checks the switch for possible loops. DUPLX Off Port is operating in half duplex. (half or full duplex) Green Port is operating in full duplex. 1-18 Catalyst 2950 Switch Hardware Installation Guide OL - Cisco 2950 | Hardware Installation Guide - Page 39
Utilization on Catalyst 2950-12 Switches SYST RPS STAT UTIL DUPLX SPEED MODE 1x 2x 3x 4x 5x 6x 7x 8x 10Base-T / 100Base-TX 9x 10x 11x 12x Catalyst 2950 SERIES 47267 0-0.0487%+ 6.25-12.4%+ 12.5-24%+ 25-49%+ 50%+ OL-6156-01 Catalyst 2950 Switch Hardware Installation Guide 1-19 - Cisco 2950 | Hardware Installation Guide - Page 40
24-EI and 2950G-24-EI-DC Switches 65396 12 34 56 78 9 10 11 12 13 14 15 16 17 18 19 20 21 22 23 24 1X SYST RPS 11X 13X 15X 1 STAT UTIL DUPLX SPEED 2X 12X 14X 16X MODE < 25% + 25% - 49% + 50% + Catalyst 2950 2 If all LEDs on a Catalyst 2950G-48-EI, 2950SX-48-SI, or 2950T - Cisco 2950 | Hardware Installation Guide - Page 41
2950G-24-EI-DC switch and the Catalyst 2950 LRE switches, the rear panel of a Catalyst 2950 switch has an AC power connector, an RPS connector, and an RJ-45 console port. (See Figure 1-25 and Figure 1-26.) The rear panel of the Catalyst 2950G-24-EI-DC switch has a DC power connector (also referred - Cisco 2950 | Hardware Installation Guide - Page 42
AC internal power supply, the DC-input power source, or the Cisco RPS. Internal Power Supply Connector The internal AC power supply is an autoranging unit that supports input voltages between 100 and 240 VAC. Other than for the Catalyst 2950G-24-EI-DC and the Catalyst 2950ST-24 LRE 997 switches, use - Cisco 2950 | Hardware Installation Guide - Page 43
Catalyst 2950G-24-EI-DC and 2950ST-24 LRE 997 switches only to a DC-input power source that has an input supply voltage from -36 to -72 VDC. If the supply voltage is not in this range, the switch might not operate properly or might be damaged. Cisco RPS Connector Specific Cisco RPS models support - Cisco 2950 | Hardware Installation Guide - Page 44
order a kit (part number ACS-DSBUASYN=) with that adapter from Cisco. For console-port and adapter-pinout information, see the "Cable and Adapter Specifications" section on page B-6. Management Options Catalyst 2950 switches offer these management options: • Network Assistant • The Network Assistant - Cisco 2950 | Hardware Installation Guide - Page 45
IE2100) The Cisco IE200 Series Configuration Registrar is a network management device that works with embedded Cisco Networking Services (CNS) agents in the switch software. You can automate initial configurations and configuration updates by generating switch-specific configuration changes, sending - Cisco 2950 | Hardware Installation Guide - Page 46
Management Options Chapter 1 Overview 1-26 Catalyst 2950 Switch Hardware Installation Guide OL-6156-01 - Cisco 2950 | Hardware Installation Guide - Page 47
10/100 and 10/100/1000 Ports, page 2-27 • Connecting to 100BASE-FX and 1000BASE-SX Ports, page 2-29 • Connecting to an LRE Port, page 2-30 • Connecting to GBIC Module Ports and Safety Information for the Catalyst 2950 Switch. Warning Attach only the Cisco Redundant Power Supply (RPS) (model PWR300 - Cisco 2950 | Hardware Installation Guide - Page 48
to all national laws and regulations. Statement 1040 Warning When installing the unit, always make the ground connection first and disconnect it last. Statement 42 Catalyst 2950 Switch Hardware Installation Guide 2-2 OL-6156-01 - Cisco 2950 | Hardware Installation Guide - Page 49
Statement 1051 Warning The Catalyst 2950G-24-EI-DC contains no field-replaceable units (FRUs). Do not open the chassis or attempt to remove or replace any components. For information about obtaining service for this unit, contact your reseller or Cisco sales representative. Statement 121C Warning - Cisco 2950 | Hardware Installation Guide - Page 50
feet (100 meters). • For Coarse Wave Division Multiplexing (CWDM) GBIC module ports, the cable length from a switch to an attached device cannot exceed 393,719 feet (120 kilometers). For specific cable lengths, see the CWDM GBIC module documentation. Catalyst 2950 Switch Hardware Installation Guide - Cisco 2950 | Hardware Installation Guide - Page 51
save them. The switch is shipped with these items: • Catalyst 2950 Switch Getting Started Guide • Regulatory Compliance and Safety Information for the Catalyst 2950 Switch • AC power cord (not shipped with the Catalyst 2950G-24-EI-DC switch or the Catalyst 2950ST-24 LRE 997 switch) • Console cable - Cisco 2950 | Hardware Installation Guide - Page 52
the brackets to a rack Note The DC-switch kit ships only with the Catalyst 2950G-24-EI-DC or Catalyst 2950ST-24 LRE 997 switch. • One RJ-45-to-DB-9 adapter cable • Product ownership registration card If you want to connect a terminal to the switch console port, you need to provide an RJ-45 - Cisco 2950 | Hardware Installation Guide - Page 53
devices, install the stabilizers before mounting or servicing the unit in the rack. Statement 1006 Note Figure 2-1 to Figure 2-15 show the Catalyst 2950-24, 2950G-24-EI-DC, and 2950G-48-EI switches as examples. You can install other Catalyst 2950 switches in a rack as shown in these illustrations - Cisco 2950 | Hardware Installation Guide - Page 54
a Catalyst 2950G-48-EI, Catalyst 2950SX-48-SI, or Catalyst 2950T-48-SI switch in a 19-inch rack, use three Phillips flat-head screws to attach the long side of the 19- or 24-inch bracket to the switch. See Figure 2-4, Figure 2-5, and Figure 2-6. • When mounting a Catalyst 2950G-24-EI-DC or Catalyst - Cisco 2950 | Hardware Installation Guide - Page 55
Brackets on the Switch in a 19-Inch Rack (Rear Panel Forward) CONSOLE 52916 Number-8 Phillips flat-head screws Figure 2-3 Attaching Brackets on the Switch in a 19-Inch Telco Rack CONSOLE Number-8 Phillips flat-head screws 45582 OL-6156-01 Catalyst 2950 Switch Hardware Installation Guide 2-9 - Cisco 2950 | Hardware Installation Guide - Page 56
14 15 16 15X 2X 16X 65512 Figure 2-5 Attaching Brackets on a Catalyst 2950G-48-EI, Catalyst 2950SX-48-SI, or Catalyst 2950T-48-SI Switch in a 19-Inch Rack (Rear Panel Forward) CONSOLE Number-8 Phillips flat-head screws 65513 2-10 Catalyst 2950 Switch Hardware Installation Guide OL-6156-01 - Cisco 2950 | Hardware Installation Guide - Page 57
the Catalyst 2950G-24-EI-DC or 2950ST-24 LRE 997 Switch in a 23-Inch Telco Rack (Front Panel Forward) Number-8 Phillips truss-head screws SYST RPS STAT UTIL DUPLX SPEED MODE 1 1X 23 45 67 8 9 10 11 12 11X 2X 12X 65673 OL-6156-01 Catalyst 2950 Switch Hardware Installation Guide 2-11 - Cisco 2950 | Hardware Installation Guide - Page 58
Panel Forward) CONSOLE 65674 Number-8 Phillips truss-head screws Figure 2-9 Attaching Brackets on the Catalyst 2950G-24-EI-DC or 2950ST-24 LRE 997 Switch in a 23-Inch Telco Rack CONSOLE Number-8 Phillips truss-head screws 65675 2-12 Catalyst 2950 Switch Hardware Installation Guide OL-6156-01 - Cisco 2950 | Hardware Installation Guide - Page 59
SYST RPS STAT UTIL DUPLX SPEED MODE 1 1X 23 45 67 8 9 10 11 12 11X 2X 12X 65666 Figure 2-11 Attaching Brackets on the Switch in a 24-Inch Rack (Rear Panel Forward) CONSOLE Number-8 Phillips truss-head screws 65665 OL-6156-01 Catalyst 2950 Switch Hardware Installation Guide 2-13 - Cisco 2950 | Hardware Installation Guide - Page 60
2950G-48-EI, Catalyst 2950SX-48-SI, or Catalyst 2950T-48-SI Switch in a 24-Inch Rack (Front Panel Forward) Phillips flat-head screws SYST RPS STAT UTIL DUPLX SPEED MODE 1 1X 23 45 67 8 9 10 11 12 13 14 15 16 15X 2X 16X 74528 2-14 Catalyst 2950 Switch Hardware Installation Guide - Cisco 2950 | Hardware Installation Guide - Page 61
2950G-48-EI, Catalyst 2950SX-48-SI, or Catalyst 2950T-48-SI Switch in a 24-Inch Telco Rack 33 34 35 36 37 38 39 40 41 42 43 44 45 46 47 48 47X 48X Catalyst 2950 SERIES 1 2 24" Configuration Phillips flat-head screws 74530 OL-6156-01 Catalyst 2950 Switch Hardware Installation Guide - Cisco 2950 | Hardware Installation Guide - Page 62
21x 22x 23x Catalyst 2950 SERIES 24x 45572 Number-12 Phillips machine screws After mounting the switch in the rack, start the terminal-emulation software, and provide power to the switch. See the getting started guide for instructions. Attaching the Optional Cable Guide We recommend attaching - Cisco 2950 | Hardware Installation Guide - Page 63
to the recessed areas on the switch bottom. Place the switch on a table, shelf, or desk near an AC power source or DC-input power source. Start the terminal-emulation software and provide power to the switch. See the getting started guide for instructions. Installing the Switch on a Wall Warning To - Cisco 2950 | Hardware Installation Guide - Page 64
wall with the front panel facing up. Statement 266 For the best support of the switch and cables, make sure the switch is attached securely to a wall stud or to a firmly attached plywood mounting backboard, as shown in Figure 2-20. 2-18 Catalyst 2950 Switch Hardware Installation Guide OL-6156-01 - Cisco 2950 | Hardware Installation Guide - Page 65
stud Catalyst 2950 SERIES LRE 2A 2B 13 14 15 16 17 18 19 20 21 22 23 24 9 10 11 12 1.01A/000.-51A275/02-R06A00-TI2HN4ZM0GVO~DE SPEESDTAT RPS SYST CONSOLE 1 2 3 4 5 6 7 8 86317 User-supplied screws Face up wall mounting configuration After the switch is mounted on the wall, power the - Cisco 2950 | Hardware Installation Guide - Page 66
the RPS connector cover to the back of the switch as shown in Figure 2-21. end of the ground lug over the exposed area of the 6-gauge wire. Step 4 Using a Panduit crimping tool, crimp the ground lug to the 6-gauge wire, as shown in Figure 2-23. 2-20 Catalyst 2950 Switch Hardware Installation Guide - Cisco 2950 | Hardware Installation Guide - Page 67
, torque each ground-lug screw to 15 lbf-in. (240 ozf-in.) Figure 2-24 Torquing Ground-Lug Screws 12005R@[email protected]~~ [email protected]. CONSOLE Torque to 15 lbf-in. OL-6156-01 Catalyst 2950 Switch Hardware Installation Guide 2-21 - Cisco 2950 | Hardware Installation Guide - Page 68
door 1 Catalyst 2950 SERIES 2 74532 1000BASE-X GBIC module GBIC module slot Figure 2-26 Installing a 1000BASE-T GBIC Module in a Switch Metal flap door 1 Catalyst 2950 SERIES 2 74531 1000BASE-T GBIC module GBIC module slot 2-22 Catalyst 2950 Switch Hardware Installation Guide OL-6156 - Cisco 2950 | Hardware Installation Guide - Page 69
the Catalyst 2950 LRE switch supports. Each port must match the wave-length specifications on the other end of the cable, and for reliable communications, the cable must not exceed the stipulated cable length. Refer to Table 1-2 for cable stipulations for SFP module connections. Use only Cisco SFP - Cisco 2950 | Hardware Installation Guide - Page 70
opening. Insert the SFP module into the slot until you feel the connector on the module snap into place in the rear of the slot. 2-24 Catalyst 2950 Switch Hardware Installation Guide OL-6156-01 - Cisco 2950 | Hardware Installation Guide - Page 71
Figure 2-31 Installing an SFP Module into an SFP Module Slot 19 20 21 22 23 24 Catalyst 2950 LRE SERIES 1 2 1 2 81564 Step 5 For fiber-optic SFP modules, remove the dust plugs from the SFP module optical ports and store them for later use. Caution Do not remove the dust plugs from the SFP - Cisco 2950 | Hardware Installation Guide - Page 72
LRE SERIES 1 2 1 2 Bale clasp 81567 Step 5 Step 6 Grasp the SFP module between your thumb and index finger, and carefully remove it from the module slot. Place the removed SFP module in an antistatic bag or other protective environment. 2-26 Catalyst 2950 Switch Hardware Installation Guide OL - Cisco 2950 | Hardware Installation Guide - Page 73
and duplex, and let the 10/100/1000 ports on the Catalyst 2950G-24-EI-DC switch only autonegotiate speed. • Set the speed and duplex parameters on both ends of the connection. When connecting the ports on the Catalyst 2950G-24-EI-DC and Catalyst 2950ST-24 LRE 997 switches to other devices, follow - Cisco 2950 | Hardware Installation Guide - Page 74
to 10/100 and 10/100/1000 Ports Chapter 2 Installation Step 1 When connecting to servers, workstations, and routers, insert a twisted-pair straight-through cable in a front-panel RJ-45 connector. Figure 2-35 shows the Catalyst 2950-12, 2950-24, 2950C-24, 2950SX-24, and 2950T-24 switch as - Cisco 2950 | Hardware Installation Guide - Page 75
meter, MT-RJ-to-ST multimode cable Cisco Part Number CAB-MTRJ-SC-MM-1M CAB Catalyst 2950 SERIES 24x 100Base-FX 25 26 MT-RJ patch cable Dust plug Step 3 Step 4 Insert the other cable end in an SC or ST port on the target device. Observe the port status LED. The LED turns green when the switch - Cisco 2950 | Hardware Installation Guide - Page 76
LRE or Catalyst 2950ST-24 LRE switch. You can connect only the Cisco 576 LRE CPE 997 device to LRE ports on a Catalyst 2950ST-24 LRE 997 switch. You can hot swap the CPE devices without powering down the switch or disrupting the other switch ports. Connection Guidelines If telephone services, such - Cisco 2950 | Hardware Installation Guide - Page 77
nature of digital PBX switches, some digital PBX switch services use frequencies above 700 kHz. • You can use a Cisco LRE 48 POTS Splitter with a Catalyst 2950ST-8 LRE switch, Catalyst 2950ST-24 LRE switch, Cisco 575 LRE CPE, and Cisco 585 LRE CPE. For installation instructions, see the Installation - Cisco 2950 | Hardware Installation Guide - Page 78
the cable to the switch are shipped with the cable. Contact your Cisco sales representative for more information. Connecting to a Patch Panel or POTS Splitter To connect the LRE port to a patch panel or POTS splitter, follow these steps: Step 1 Step 2 Connect one end of a cable connected to - Cisco 2950 | Hardware Installation Guide - Page 79
Chapter 2 Installation Connecting to an LRE Port Figure 2-38 Connecting to an LRE Port on a Catalyst 2950ST-8 LRE or 2950ST-24 LRE Switch RJ-21 connector 110.00A-1/02R.75A/TA2I0N500G--26400HVZ~ MODE SYST RPS STAT SPEED Screw CONSOLE 1 2 3 4 5 6 7 8 9 10 11 12 13 14 15 16 Screw - Cisco 2950 | Hardware Installation Guide - Page 80
the switch LRE port and the CPE and about the configuration and management of CPE devices, see the switch software configuration guide. For more information about the Cisco LRE CPE devices, see the Cisco LRE CPE Hardware Installation Guide. 2-34 Catalyst 2950 Switch Hardware Installation Guide OL - Cisco 2950 | Hardware Installation Guide - Page 81
the shield for the wiring must be grounded at both ends. Caution The Catalyst 2950G-24-EI-DC or Catalyst 2950ST-24 LRE 997 switch is suitable only for intrabuilding or nonexposed wiring connections. Connecting to 1000BASE-X GBIC Module Ports Caution Do not remove the rubber plugs from the GBIC - Cisco 2950 | Hardware Installation Guide - Page 82
2-40 Connecting to a 1000 BASE-X GBIC Port 1 Catalyst 2950 SERIES 2 Chapter 2 Installation 65296 Step 3 Step 4 Step 5 Insert the other cable end in a fiber-optic receptacle on a target device. Observe the port status LED. The LED turns green when the switch and the target device have an - Cisco 2950 | Hardware Installation Guide - Page 83
steps: Step 1 Insert the GigaStack cable connector in the GBIC (see Figure 2-42). Figure 2-42 Connecting to a GigaStack GBIC Port 1 Catalyst 2950 SERIES 2 65298 Step 2 Insert the other cable end in a port on a target device. OL-6156-01 Catalyst 2950 Switch Hardware Installation Guide 2-37 - Cisco 2950 | Hardware Installation Guide - Page 84
green when the switch and the target device have an established link. The LED turns amber while the STP discovers the network topology and searches for loops. This process takes about 30 seconds, and then the port LED turns green. 2-38 Catalyst 2950 Switch Hardware Installation Guide OL-6156-01 - Cisco 2950 | Hardware Installation Guide - Page 85
the target device. See Chapter 3, "Troubleshooting," for solutions to cabling problems. Figure 2-43 Connecting to a Fiber-Optic SFP Module Port 81568 19 20 21 22 23 24 Cable Catalyst 2950 SERIES LRE 1 2 1 2 Step 5 If necessary, reconfigure and restart the switch or target device. Connecting to - Cisco 2950 | Hardware Installation Guide - Page 86
as a member of a cluster or as an individual switch. See the Catalyst 2950 and Catalyst 2955 Switch Software Configuration Guide and the Catalyst 2950 and Catalyst 2955 Switch Command Reference on Cisco.com for more information. For setup instructions that use the CLI, go to Appendix D, "Configuring - Cisco 2950 | Hardware Installation Guide - Page 87
(IE2100) Series Configuration Registrar, or a SNMP workstation. See the switch software configuration guide, the switch command reference, or the documentation that came with your IE2100 or SNMP application for details. This chapter provides these topics for troubleshooting problems: • Understanding - Cisco 2950 | Hardware Installation Guide - Page 88
12 for SFP cabling guidelines. Bad adapter in attached device. • Excessive errors found in port statistics. STP2 checking for possible loops. • Run adapter card diagnostic utility. Wait 30 seconds for port status LED to turn green. Catalyst 2950 Switch Hardware Installation Guide 3-2 OL-6156-01 - Cisco 2950 | Hardware Installation Guide - Page 89
see the switch software configuration guide. • Check if the fan has failed by using the show env fan privileged EXEC command. If the fan has failed, call Cisco Systems. • Use the show post privileged EXEC command to see which POST test failed. OL-6156-01 Catalyst 2950 Switch Hardware Installation - Cisco 2950 | Hardware Installation Guide - Page 90
" section on page 1-9 for LRE cabling guidelines.) • See the switch software configuration guide for information about verifying LRE port link status. Catalyst 2950 LRE switch does not See the compatibility matrix, support the Cisco LRE CPE. Table 1-1 on page 1-3, for more information. 1. FCS - Cisco 2950 | Hardware Installation Guide - Page 91
-Reach Ethernet (LRE) switches. Table A-8 and Table A-9 list the regulatory agency approvals for the Catalyst 2950 LRE switches. Table A-10 lists the regulatory agency approval only for the Catalyst 2950G-24-EI-DC switch. Table A-1 Technical Specifications for Catalyst 2950-12, 2950-24, 2950C-24 - Cisco 2950 | Hardware Installation Guide - Page 92
m per sec) 100 to 127/200 to 240 VAC (autoranging) 50 to 60 Hz +12 V @4.5 A +12 V @4.5 A 45 W (maximum) 154 Btus per hour 0.075 kVA 10.5 lb (4.8 kg) 1.72 x 17.5 x 13 in. (4.36 x 44.45 x 33.02 cm) Table A-3 Technical Specifications for Catalyst 2950G-24-EI-DC Switch Environmental Ranges Operating - Cisco 2950 | Hardware Installation Guide - Page 93
6156-01 Table A-3 Technical Specifications for Catalyst 2950G-24-EI-DC Switch Shock Power Requirements Power consumption Power rating DC input voltage Wire gauge for power connection Branch circuit protection Physical Dimensions Weight Dimensions (H x W x D) 1. This switch meets ASTM D3332. 2. AWG - Cisco 2950 | Hardware Installation Guide - Page 94
2. RPS = redundant power system Table A-5 Technical Specifications for Catalyst-2950ST-24 997 LRE Switches Environmental Ranges Operating temperature Storage temperature Operating humidity Operating altitude Storage altitude Shock Power Requirements Power consumption Power rating DC input voltage - Cisco 2950 | Hardware Installation Guide - Page 95
Technical Specifications Table A-6 Fiber-Optic Port Specifications for Catalyst 2950C-24, Catalyst 2950SX-24, and Catalyst 2950 LRE Switches Fiber-Port Power Levels Catalyst 2950C-24 A1 through A4 EN55022/CISPR22, Class A, 1998 OL-6156-01 Catalyst 2950 Switch Hardware Installation Guide A-5 - Cisco 2950 | Hardware Installation Guide - Page 96
Immunity to Power Line Transients (Surges) EN61000-4-6/IEC1000-4-6: Immunity to Radio Frequency Induced Conducted Disturbances EN61000-4-11/IEC1000-4-11: Immunity to Voltage Dips, Voltage Variations, and Short Voltage Interruptions Catalyst 2950 Switch Hardware Installation Guide A-6 OL-6156 - Cisco 2950 | Hardware Installation Guide - Page 97
Appendix A Technical Specifications Table A-10 Catalyst 2950G-24-EI-DC Switch Agency Approvals NEBS Bellcore GR-1089-CORE Bellcore GR-63-CORE Bellcore SR-3580 Level 3 OL-6156-01 Catalyst 2950 Switch Hardware Installation Guide A-7 - Cisco 2950 | Hardware Installation Guide - Page 98
Appendix A Technical Specifications Catalyst 2950 Switch Hardware Installation Guide A-8 OL-6156-01 - Cisco 2950 | Hardware Installation Guide - Page 99
to other devices. Connector Specifications These sections describe the connectors used with the Catalyst 2950 switches and contains this information: • 10/100 Ports, page B-1 • 10/100/1000 Ports, page B-2 • 100BASE-FX and 1000BASE-SX Ports, page B-4 • LRE Port, page B-3 • GigaStack GBIC Module - Cisco 2950 | Hardware Installation Guide - Page 100
Label 1 RD+ 2 RD- 3 TD+ 4 NC 5 NC 6 TD- 7 NC 8 NC 12345678 H5318 10/100/1000 Ports The 10/100/1000 Ethernet ports on Catalyst 2950T-24, Catalyst 2950T-48-SI, and Catalyst 2950 Long-Reach Ethernet (LRE) switches use standard RJ-45 connectors. Figure B-2 shows the pinout. Note On - Cisco 2950 | Hardware Installation Guide - Page 101
for 10/100/1000 and 1000BASE-T GBIC Module Ports Pin Label 1 TP0+ 2 TP0- 3 TP1+ 4 TP2+ 5 TP2- 6 TP1- 7 TP3+ 8 TP3- 1234567 8 34751 LRE Port The LRE port uses a single 50-pin RJ-21 connector, as shown in Figure B-3. Each LRE port uses two pins. Because the Catalyst 2950ST-24 LRE - Cisco 2950 | Hardware Installation Guide - Page 102
Cisco part numbers in Table 2-1 to order the patch cables that you need. Figure B-4 MT-RJ Connector 28845 1000BASE-X GBIC Module Ports 1000BASE-X Gigabit Interface Converter (GBIC) module ports . Figure B-6 GigaStack Connector 60536 Catalyst 2950 Switch Hardware Installation Guide B-4 OL-6156-01 - Cisco 2950 | Hardware Installation Guide - Page 103
Appendix B Connectors and Cables Connector Specifications SFP Module Ports The Catalyst 2950 LRE switch uses SFP modules for fiber-optic and copper uplink ports. See the Catalyst 2950 LRE switch release notes for a list of supported SFP modules. See Figure B-7 and Figure B-8. Figure B-7 Fiber- - Cisco 2950 | Hardware Installation Guide - Page 104
B Connectors and Cables Pin 8 H10632 Cable and Adapter Specifications These sections describe the cables and adapters used with Catalyst 2950 switches. • Two Twisted-Pair Cable Pinouts, page B-6 • Four Twisted-Pair Cable Pinouts for 10/100 Ports, page B-7 • Four Twisted-Pair Cable Pinouts for - Cisco 2950 | Hardware Installation Guide - Page 105
- 4 NC 5 NC 7 NC 8 NC 4 NC 5 NC 7 NC 8 NC 65271 Figure B-13 Four Twisted-Pair Crossover Cable Schematic for 10/100 Ports Switch 1 RD+ 2 RD3 TD+ 6 TD- Switch 1 RD+ 2 RD3 TD+ 6 TD- 4 NC 5 NC 7 NC 8 NC 4 NC 5 NC 7 NC 8 NC 65273 OL-6156-01 Catalyst 2950 Switch Hardware Installation Guide B-7 - Cisco 2950 | Hardware Installation Guide - Page 106
Cable and Adapter Specifications Appendix B Connectors and Cables Four Twisted-Pair Cable Pinouts for 1000BASE-T Ports Figure B-14 and Figure B-15 show the schematics of four twisted-pair cables for 10/100/1000 ports on Catalyst 2950T-24 switches, Catalyst 2950 LRE switches, and 1000BASE-T GBIC - Cisco 2950 | Hardware Installation Guide - Page 107
Specifications Table B-1 Catalyst 2950ST-24 LRE and Catalyst 2950ST-24 LRE 997 Switch RJ-21 Cable Pinouts Function Pin Pin Function Port 5 Tip 5 30 Port 5 Ring Port 6 Tip 6 31 Port 6 Ring Port 7 Tip 7 32 Port 7 Ring Port 8 Tip 8 33 Port 8 Ring Port 9 Tip 9 34 Port 9 Ring Port 10 Tip 10 35 Port 10 - Cisco 2950 | Hardware Installation Guide - Page 108
Console Port (DTE) RJ-45-to-DB-9 Adapter Cable Signal RJ-45 Pin DB-9 Pin RTS 1 8 Not connected 2 6 TxD 3 2 GND 4 5 GND 5 5 RxD 6 3 Not connected 7 4 CTS 8 7 Console Device Signal CTS DSR RxD GND GND TxD DTR RTS B-10 Catalyst 2950 Switch Hardware Installation Guide OL - Cisco 2950 | Hardware Installation Guide - Page 109
and Adapter Specifications Table B-4 lists the pinouts for the console port, RJ-45-to-DB-25 female DTE adapter, and the console device. Note The RJ-45-to-DB-25 female DTE adapter is not supplied with the switch. You can order a kit (part number ACS-DSBUASYN=) with that adapter from Cisco. Table - Cisco 2950 | Hardware Installation Guide - Page 110
Cable and Adapter Specifications Appendix B Connectors and Cables B-12 Catalyst 2950 Switch Hardware Installation Guide OL-6156-01 - Cisco 2950 | Hardware Installation Guide - Page 111
the DC-Input Power Source, page C-4 Warning The Catalyst 2950G-24-EI-DC contains no field-replaceable units (FRUs). Do not open the chassis or attempt to remove or replace any components. For information about obtaining service for this unit, contact your reseller or Cisco sales representative - Cisco 2950 | Hardware Installation Guide - Page 112
two number-10-32 screws. The ground lug and screws are on the rear panel of the Catalyst 2950G-24-EI-DC switch or on the front panel of the Catalyst 2950ST-24 LRE 997 switch. Use [mm]) ± 0.02 inch (0.5 mm) as shown in Figure C-1. Catalyst 2950 Switch Hardware Installation Guide C-2 OL-6156-01 - Cisco 2950 | Hardware Installation Guide - Page 113
Catalyst 2950ST-24 LRE 997 switch. Using a ratcheting torque screwdriver, torque each ground-lug screw to 15 lbf-in. (240 ounce-force inches [ozf-in.]). Figure C-3 shows how to torque the ground screws on a Catalyst 2950G-24-EI-DC switch. OL-6156-01 Catalyst 2950 Switch Hardware Installation Guide - Cisco 2950 | Hardware Installation Guide - Page 114
services the DC circuit, switch the circuit breaker to the OFF position, and tape the switch handle of the circuit breaker in the OFF position. Use a voltmeter to test for 0 (zero) voltage at the power terminals on the chassis. Statement 196 Caution You must connect the Catalyst 2950G-24-EI-DC - Cisco 2950 | Hardware Installation Guide - Page 115
wires. The rear panel of the Catalyst 2950G-24-EI-DC switch or the front panel of the Catalyst 2950ST-24 LRE 997 switch identifies the positive and negative positions DC-Input Power Source Wire 0.25 in. (6.3 mm) ± 0.02 in. (0.5 mm) 60531 OL-6156-01 Catalyst 2950 Switch Hardware Installation Guide - Cisco 2950 | Hardware Installation Guide - Page 116
An exposed wire lead from a DC-input power source can conduct harmful levels of electricity. Be sure that no exposed portion of the DC-input power source wire extends from the Captive Screws Torque to 4.5 lbf-in. (72 ozf-in.) 60533 Catalyst 2950 Switch Hardware Installation Guide C-6 OL-6156-01 - Cisco 2950 | Hardware Installation Guide - Page 117
in the terminal block header on the rear panel of the Catalyst 2950G-24-EI-DC switch or on the front panel of the Catalyst 2950ST-24 LRE 997 switch. Figure C-10 shows how to insert the terminal block on a Catalyst 2950G-24-EI-DC switch. Caution Secure the wires coming in from the terminal block so - Cisco 2950 | Hardware Installation Guide - Page 118
Wiring the DC-Input Power Source Appendix C Connecting to DC Power Catalyst 2950 Switch Hardware Installation Guide C-8 OL-6156-01 - Cisco 2950 | Hardware Installation Guide - Page 119
connecting a switch Ethernet port to the Ethernet port of your PC or workstation. To put the switch into Express Setup mode, follow the steps described in the getting started guide for powering on the switch and using Express Setup. OL-6156-01 Catalyst 2950 Switch Hardware Installation Guide D-1 - Cisco 2950 | Hardware Installation Guide - Page 120
to the Console Port" section on page D-3 • "Starting the Terminal-Emulation Software" section on page D-4 • "Connecting to a Power Source" section on page D-5 • "Entering the Initial Configuration Information" section on page D-5 Catalyst 2950 Switch Hardware Installation Guide D-2 OL-6156-01 - Cisco 2950 | Hardware Installation Guide - Page 121
18x 19x 20x 21x 22x 23x Catalyst 2950 SERIES 24x 100BASE-FX 25 26 2 89367 3 1 Catalyst 2950 switch 3 AC power cord 2 RJ-45-to-DB-9 adapter cable Note You need to provide the Category 5 straight-through cables to connect the switch ports to other Ethernet devices. Connecting to the - Cisco 2950 | Hardware Installation Guide - Page 122
Catalyst 2950 switch 3 RJ-45-to-DB-9 adapter cable 2 Power cord Starting the Terminal-Emulation Software Before you power on the switch console port default characteristics: • 9600 baud • 8 data bits • 1 stop bit • No parity • None (flow control) Catalyst 2950 Switch Hardware Installation Guide D-4 - Cisco 2950 | Hardware Installation Guide - Page 123
section has instructions for connecting the switch to AC power. For instructions about connecting the Catalyst 2950G-24-EI-DC or Catalyst 2950ST-24 LRE 997 switch to DC power, see Appendix C, "Connecting to DC Power." For a switch other than a Catalyst 2950G-24-EI-DC or a Catalyst 2950ST-24 LRE 997 - Cisco 2950 | Hardware Installation Guide - Page 124
no]: yes Step 2 Enter a host name for the switch, and press Return. On a command switch, the host name is limited to 28 characters; on a member switch to 31 characters. Do not use -n, where n is the above interface summary: vlan1 Catalyst 2950 Switch Hardware Installation Guide D-6 OL-6156-01 - Cisco 2950 | Hardware Installation Guide - Page 125
! interface GigabitEthernet0/2 ! end Step 10 These choices appear: [0] Go to the IOS command prompt without saving this config. [1] Return back to the setup without saving this config. [2] Save this configuration to nvram and exit. OL-6156-01 Catalyst 2950 Switch Hardware Installation Guide D-7 - Cisco 2950 | Hardware Installation Guide - Page 126
port by using a terminal-emulation program or through the network by using Telnet. For configuration information, see the switch software configuration guide or the switch command reference. To use the Network Assistant, see the Getting Started with Cisco Network Assistant guide. Catalyst 2950 - Cisco 2950 | Hardware Installation Guide - Page 127
-25 B-11 RJ-45-to-DB-9 B-10 addresses, assigning IP 3-40 agency approvals A-5 to A-6, A-7 altitude A-1 to A-2 autonegotiation 10/100/1000 ports 2-8 10/100 ports 2-8 B bandwidth utilization 2-17 to 2-21 brackets See mounting brackets, attaching Catalyst 2950 Switch Hardware Installation Guide IN-1 - Cisco 2950 | Hardware Installation Guide - Page 128
twisted-pair 10/100/1000 ports 2-8 10/100 ports 2-7 to 2-8 See also connectors and cables Catalyst 2950G-24-EI-DC service warning C-1 Catalyst 2950ST-24 LRE 997 service warning C-1 cautions, defined x chassis warnings rack-mounting, servicing 3-7 Cisco IE2100 2-25 Cisco IE2100 Series Configuration - Cisco 2950 | Hardware Installation Guide - Page 129
problems, solving 4-3 features 2-1 to 2-3 feedback to Cisco Systems, web xviii fiber-optic port specifications A-5 front panel 10/100/1000 ports 2-8 10/100 ports 2-7 to 2-8 1000BASE-SX ports 2-9 100BASE-FX ports 2-9 clearance 3-5 described 2-3 Catalyst 2950 Switch Hardware Installation Guide IN - Cisco 2950 | Hardware Installation Guide - Page 130
Catalyst 2950 Switch Hardware Installation Guide H HP OpenView 2-24 humidity A-1 to A-4 I installation assigning the IP Address D-5 cable guide 3-16 connecting to a power source D-5 connecting to LRE ports installing SFP modules 3-23 to 3-25 IOS command-line interface See CLI IP address procedures - Cisco 2950 | Hardware Installation Guide - Page 131
cable B-10 crossover cables four twisted-pair, 10/100 ports B-7 four twisted-pair, 1000BASE-T ports B-8 two twisted-pair B-6 DB-25 adapters B-11 RJ-21 connector B-8 to B-10 RJ-45-to-DB-25 terminal adapter B-11 RJ-45-to-DB-9 adapter cable B-10 Catalyst 2950 Switch Hardware Installation Guide IN-5 - Cisco 2950 | Hardware Installation Guide - Page 132
, related xv to xvi IN-6 Catalyst 2950 Switch Hardware Installation Guide R rack-mounting bracket mounting points 3-8 to 3-15 procedures 3-7 to 3-16 warning 3-7 rear panel clearance 3-5 console port connector 2-24 described 2-21 to 2-22 illustrated 2-21 to 2-22 power connectors 2-22 to 2-23 - Cisco 2950 | Hardware Installation Guide - Page 133
troubleshooting diagnosing problems 4-1 to 4-3 understanding POST results 4-1 OL-6156-01 Index U uplink ports, LRE 2-9 URLs, Cisco xvii utilization bandwidth 2-17 to 2-21 LED 2-17 V verifying package contents 3-5 to 3-6 W warnings DC power C-1 to C-4 installation 3-1 to 3-4 Catalyst 2950 Switch - Cisco 2950 | Hardware Installation Guide - Page 134
Index IN-8 Catalyst 2950 Switch Hardware Installation Guide OL-6156-01
-
 1
1 -
 2
2 -
 3
3 -
 4
4 -
 5
5 -
 6
6 -
 7
7 -
8
-
9
-
10
-
11
-
12
-
13
-
14
-
15
-
16
-
17
-
18
-
19
-
20
-
21
-
22
-
23
-
24
-
25
-
26
-
27
-
28
-
29
-
30
-
31
-
32
-
33
-
34
-
35
-
36
-
37
-
38
-
39
-
40
-
41
-
42
-
43
-
44
-
45
-
46
-
47
-
48
-
49
-
50
-
51
-
52
-
53
-
54
-
55
-
56
-
57
-
58
-
59
-
60
-
61
-
62
-
63
-
64
-
65
-
66
-
67
-
68
-
69
-
70
-
71
-
72
-
73
-
74
-
75
-
76
-
77
-
78
-
79
-
80
-
81
-
82
-
83
-
84
-
85
-
86
-
87
-
88
-
89
-
90
-
91
-
92
-
93
-
94
-
95
-
96
-
97
-
98
-
99
-
100
-
101
-
102
-
103
-
104
-
105
-
106
-
107
-
108
-
109
-
110
-
111
-
112
-
113
-
114
-
115
-
116
-
117
-
118
-
119
-
120
-
121
-
122
-
123
-
124
-
125
-
126
-
127
-
128
-
129
-
130
-
131
-
132
-
133
-
134
 |
 |
Corporate Headquarters
Cisco Systems, Inc.
170 West Tasman Drive
San Jose, CA 95134-1706
USA
Tel: 408 526-4000
800 553-NETS (6387)
Fax: 408 526-4100
Catalyst 2950 Switch
Hardware Installation Guide
August 2004
Customer Order Number:
Text Part Number: OL-6156-01