Cisco 521SG Administration Guide - Page 50
Customizing the Startup Screen, Admin Login, advanced, Voice
 |
UPC - 882658248993
View all Cisco 521SG manuals
Add to My Manuals
Save this manual to your list of manuals |
Page 50 highlights
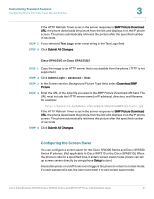
Customizing Standard Features Configuring Phone Information and Display Settings 3 Customizing the Startup Screen You can create a text or 128-by-48 pixel by 1-bit deep image logo to display when the IP phone boots up. (Not applicable to Cisco WIP310 or the Cisco SPA501G.) A logo displays during the boot sequence for a short period after the Cisco logo displays. To configure a custom logo: STEP 1 For the Cisco SPA303 and Cisco SPA5XXG, click Admin Login > advanced > Voice > Phone. For the Cisco SPA525G or Cisco SPA525G2, click Admin Login > advanced > Voice > User. STEP 2 To display a text logo, in the Text Logo field enter text as follows: • Up to two lines of text • Each line must be less than 32 characters • Insert a new line character (\n) and escape code (%0a) between the two lines For example, Super\n%0aTelecom displays: Super Telecom • Use the + character to add spaces for formatting. You can add multiple + characters before and after the text to center it. STEP 3 To display a picture logo: a. In the BMP Picture Download URL field, enter the path, for example: http://192.168.2.244/pictures/image04_128x48.bmp (you can also use a TFTP server) b. Change Select Logo to BMP Picture. STEP 4 Click Submit All Changes. The phone reboots, retrieves the .bmp file, and displays the picture when it next boots. Cisco Small Business SPA300 Series, SPA500 Series, and WIP310 IP Phone Administration Guide 49
-
 1
1 -
2
-
3
-
4
-
5
-
6
-
7
-
8
-
9
-
10
-
11
-
12
-
13
-
14
-
15
-
16
-
17
-
18
-
19
-
20
-
21
-
22
-
23
-
24
-
25
-
26
-
27
-
28
-
29
-
30
-
31
-
32
-
33
-
34
-
35
-
36
-
37
-
38
-
39
-
40
-
41
-
42
-
43
-
44
-
 45
45 -
 46
46 -
 47
47 -
 48
48 -
 49
49 -
 50
50 -
 51
51 -
 52
52 -
 53
53 -
 54
54 -
 55
55 -
56
-
57
-
58
-
59
-
60
-
61
-
62
-
63
-
64
-
65
-
66
-
67
-
68
-
69
-
70
-
71
-
72
-
73
-
74
-
75
-
76
-
77
-
78
-
79
-
80
-
81
-
82
-
83
-
84
-
85
-
86
-
87
-
88
-
89
-
90
-
91
-
92
-
93
-
94
-
95
-
96
-
97
-
98
-
99
-
100
-
101
-
102
-
103
-
104
-
105
-
106
-
107
-
108
-
109
-
110
-
111
-
112
-
113
-
114
-
115
-
116
-
117
-
118
-
119
-
120
-
121
-
122
-
123
-
124
-
125
-
126
-
127
-
128
-
129
-
130
-
131
-
132
-
133
-
134
-
135
-
136
-
137
-
138
-
139
-
140
-
141
-
142
-
143
-
144
-
145
-
146
-
147
-
148
-
149
-
150
-
151
-
152
-
153
-
154
-
155
-
156
-
157
-
158
-
159
-
160
-
161
-
162
-
163
-
164
-
165
-
166
-
167
-
168
-
169
-
170
-
171
-
172
-
173
-
174
-
175
-
176
-
177
-
178
-
179
-
180
-
181
-
182
-
183
-
184
-
185
-
186
-
187
-
188
-
189
-
190
-
191
-
192
-
193
-
194
-
195
-
196
-
197
-
198
-
199
-
200
-
201
-
202
-
203
-
204
-
205
-
206
-
207
-
208
-
209
-
210
-
211
-
212
-
213
-
214
-
215
-
216
-
217
-
218
-
219
-
220
-
221
-
222
-
223
-
224
-
225
-
226
-
227
-
228
-
229
-
230
-
231
-
232
-
233
-
234
-
235
-
236
-
237
-
238
-
239
-
240
-
241
-
242
-
243
-
244
-
245
-
246
-
247
-
248
-
249
-
250
-
251
-
252
-
253
-
254
-
255
-
256
-
257
-
258
-
259
-
260
-
261
-
262
-
263
-
264
-
265
-
266
-
267
-
268
-
269
-
270
-
271
-
272
-
273
-
274
-
275
-
276
-
277
-
278
-
279
-
280
-
281
-
282
-
283
-
284
-
285
-
286
-
287
-
288
-
289
-
290
-
291
-
292
-
293
-
294
-
295
-
296
-
297
-
298
-
299
-
300
-
301
-
302
-
303
-
304
-
305
-
306
-
307
-
308
-
309
-
310
-
311
-
312
-
313
-
314
-
315
-
316
-
317
-
318
-
319
-
320
-
321
-
322
-
323
-
324
-
325
 |
 |
