Cisco 7921G Administration Guide - Page 104
Searching the Phone Book Information, Adding a Contact
 |
UPC - 882658123108
View all Cisco 7921G manuals
Add to My Manuals
Save this manual to your list of manuals |
Page 104 highlights
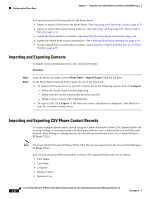
Configuring the Phone Book Chapter 4 Using the Cisco Unified Wireless IP Phone 7921G Web Pages Step 6 To export, click the Export option. Note If a Security Alert window displays, click Yes. Step 7 Step 8 Step 9 Click Open, Save, or Cancel displays. Click Save and specify the filename and location. Then click Save again. Click Import after all options have been specified. Check the Status web page because it displays the number of valid records that were processed. Since the import function duplicates UIDs and names, the total number of created contacts on the phone may be less than the total number of records processed. Searching the Phone Book Information You can search for contacts in the Phone Book by first name, last name, nickname, or company name. To perform a search, follow these steps: Procedure Step 1 Step 2 From the phone web page, choose PHONE BOOK. At the Phone Book page, enter a search string in the text box and click Search. The contact records containing a match will be displayed. Updating Phone Book Information You can update the information for Phone Book from the phone web page. You can perform the following tasks: • Add a contact-See Adding a Contact, page 4-34 • Delete contacts-See Deleting Contacts, page 4-35 • Edit the information for a contact-See Editing Contact Information, page 4-35 Note When entering phone numbers, only numeric characters and the symbols # and * are stored and displayed. Adding a Contact To add a contact to the Phone Book, follow these steps: Procedure Step 1 From the phone web page, choose PHONE BOOK. Step 2 At the Phone Book page, click New. The Phone Book (New Contact) page appears. 4-34 Cisco Unified Wireless IP Phone 7921G Administration Guide for Cisco Unified Communications Manager Release 7.0 OL-15985-01
-
 1
1 -
2
-
3
-
4
-
5
-
6
-
7
-
8
-
9
-
10
-
11
-
12
-
13
-
14
-
15
-
16
-
17
-
18
-
19
-
20
-
21
-
22
-
23
-
24
-
25
-
26
-
27
-
28
-
29
-
30
-
31
-
32
-
33
-
34
-
35
-
36
-
37
-
38
-
39
-
40
-
41
-
42
-
43
-
44
-
45
-
46
-
47
-
48
-
49
-
50
-
51
-
52
-
53
-
54
-
55
-
56
-
57
-
58
-
59
-
60
-
61
-
62
-
63
-
64
-
65
-
66
-
67
-
68
-
69
-
70
-
71
-
72
-
73
-
74
-
75
-
76
-
77
-
78
-
79
-
80
-
81
-
82
-
83
-
84
-
85
-
86
-
87
-
88
-
89
-
90
-
91
-
92
-
93
-
94
-
95
-
96
-
97
-
98
-
 99
99 -
 100
100 -
 101
101 -
 102
102 -
 103
103 -
 104
104 -
 105
105 -
 106
106 -
 107
107 -
 108
108 -
 109
109 -
110
-
111
-
112
-
113
-
114
-
115
-
116
-
117
-
118
-
119
-
120
-
121
-
122
-
123
-
124
-
125
-
126
-
127
-
128
-
129
-
130
-
131
-
132
-
133
-
134
-
135
-
136
-
137
-
138
-
139
-
140
-
141
-
142
-
143
-
144
-
145
-
146
-
147
-
148
-
149
-
150
-
151
-
152
-
153
-
154
-
155
-
156
-
157
-
158
-
159
-
160
-
161
-
162
-
163
-
164
-
165
-
166
-
167
-
168
-
169
-
170
-
171
-
172
-
173
-
174
-
175
-
176
-
177
-
178
-
179
-
180
-
181
-
182
-
183
-
184
-
185
-
186
-
187
-
188
-
189
-
190
-
191
-
192
-
193
-
194
-
195
-
196
-
197
-
198
-
199
-
200
-
201
-
202
-
203
-
204
-
205
-
206
-
207
-
208
-
209
-
210
-
211
-
212
-
213
-
214
-
215
-
216
-
217
-
218
-
219
-
220
-
221
-
222
-
223
-
224
-
225
-
226
-
227
-
228
-
229
-
230
-
231
-
232
-
233
-
234
 |
 |