Cisco 7921G Administration Guide - Page 95
Configuring IP Network Settings, Enabling DHCP
 |
UPC - 882658123108
View all Cisco 7921G manuals
Add to My Manuals
Save this manual to your list of manuals |
Page 95 highlights
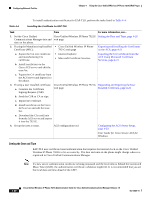
Chapter 4 Using the Cisco Unified Wireless IP Phone 7921G Web Pages Configuring Network Profiles Step 2 Step 3 In the Certificate Options section, choose True in the Validate Server Certificate subsection. Another window displays with available certificates. The displayed fields are Type, Common Name, Issuer Name, Valid From and Valid To. You can install, export, or import certificates as required. If you are importing a certificate to the phone, you can browse the server for the file. If you choose EAP-TLS authentication, the User Certificate Installation page displays. You only have to enter the Common Name field in the first step to use EAP-TLS. There are four steps to complete the EAP-TLS User Certificate Installation. Click Submit when done. Configuring IP Network Settings The Cisco Unified IP Phones enable DHCP, by default, to automatically assign IP addresses to devices when you connect them to the network. If you do not use DHCP in your network, then you must disable DHCP and manually enter network configuration information. For more information, see "Interacting with the DHCP Server" section on page 2-13. When DHCP is disabled in the network, you must configure the following settings in the Static Settings menu: • IP address • Subnet mask • Default Router • DNS server 1 and 2 • TFTP server 1 Use these guidelines when manually configuring the IP settings: • Ensure the TFTP server has an IP address. • Ensure the default router IP address is on the same subnet as the host IP address. Enabling DHCP To enable the use of DHCP in the Network Profile, follow these steps: Procedure Step 1 Step 2 Step 3 Choose the network profile that you want to configure. Under the IP Network Configuration area, choose this option: Obtain IP address and DNS servers automatically Click Save to make the change. OL-15985-01 Cisco Unified Wireless IP Phone 7921G Administration Guide for Cisco Unified Communications Manager Release 7.0 4-25
-
 1
1 -
2
-
3
-
4
-
5
-
6
-
7
-
8
-
9
-
10
-
11
-
12
-
13
-
14
-
15
-
16
-
17
-
18
-
19
-
20
-
21
-
22
-
23
-
24
-
25
-
26
-
27
-
28
-
29
-
30
-
31
-
32
-
33
-
34
-
35
-
36
-
37
-
38
-
39
-
40
-
41
-
42
-
43
-
44
-
45
-
46
-
47
-
48
-
49
-
50
-
51
-
52
-
53
-
54
-
55
-
56
-
57
-
58
-
59
-
60
-
61
-
62
-
63
-
64
-
65
-
66
-
67
-
68
-
69
-
70
-
71
-
72
-
73
-
74
-
75
-
76
-
77
-
78
-
79
-
80
-
81
-
82
-
83
-
84
-
85
-
86
-
87
-
88
-
89
-
 90
90 -
 91
91 -
 92
92 -
 93
93 -
 94
94 -
 95
95 -
 96
96 -
 97
97 -
 98
98 -
 99
99 -
 100
100 -
101
-
102
-
103
-
104
-
105
-
106
-
107
-
108
-
109
-
110
-
111
-
112
-
113
-
114
-
115
-
116
-
117
-
118
-
119
-
120
-
121
-
122
-
123
-
124
-
125
-
126
-
127
-
128
-
129
-
130
-
131
-
132
-
133
-
134
-
135
-
136
-
137
-
138
-
139
-
140
-
141
-
142
-
143
-
144
-
145
-
146
-
147
-
148
-
149
-
150
-
151
-
152
-
153
-
154
-
155
-
156
-
157
-
158
-
159
-
160
-
161
-
162
-
163
-
164
-
165
-
166
-
167
-
168
-
169
-
170
-
171
-
172
-
173
-
174
-
175
-
176
-
177
-
178
-
179
-
180
-
181
-
182
-
183
-
184
-
185
-
186
-
187
-
188
-
189
-
190
-
191
-
192
-
193
-
194
-
195
-
196
-
197
-
198
-
199
-
200
-
201
-
202
-
203
-
204
-
205
-
206
-
207
-
208
-
209
-
210
-
211
-
212
-
213
-
214
-
215
-
216
-
217
-
218
-
219
-
220
-
221
-
222
-
223
-
224
-
225
-
226
-
227
-
228
-
229
-
230
-
231
-
232
-
233
-
234
 |
 |