Cisco SPA525G Administration Guide - Page 179
Configuring the Asterisk Server for the SPA932
 |
UPC - 882658261688
View all Cisco SPA525G manuals
Add to My Manuals
Save this manual to your list of manuals |
Page 179 highlights
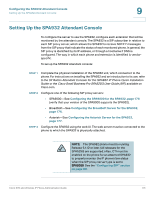
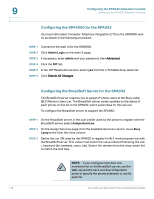
Configuring the SPA932 Attendant Console Setting Up the SPA932 Attendant Console 9 STEP 4 On the Busy Lamp Field page, move users that need to be monitored from the Available Users column to the Monitored Users column. STEP 5 Click the Add (or Add All) button to move each user to the Monitored Users column. The Directory Number (DN) associated with each user account when it is created on the BroadSoft Server is shown in parenthesis in the Monitored Users list. You use this DN to identify the specific phone assigned to each key on the SPA932. STEP 6 Save and enable your configuration changes on the BroadSoft server. See also the "Configuring BroadSoft Busy Lamp Field Auto-Configuration (SPA525G)" section on page 182. Configuring the Asterisk Server for the SPA932 To configure the Asterisk server to allow the SPA932 to register for BLF monitoring: STEP 1 Add a context in the extensions.conf file. STEP 2 Add a Subscribecontext command to point to the context in the sip.conf file. STEP 3 Configure the SPA932 to register with the Asterisk server (see "Configuring the SPA932" section on page 178. The following example context uses "home" for extension 3500. This is entered in the file extensions.conf: [home] exten => 3500,1,Dial(SIP/3500) exten => 3500,hint,SIP/3500 exten => 3500,2,Voicemail,u3500 exten =>3500,1,3,hangup ... (continued) Cisco SPA and Wireless IP Phone Administration Guide 177
-
 1
1 -
2
-
3
-
4
-
5
-
6
-
7
-
8
-
9
-
10
-
11
-
12
-
13
-
14
-
15
-
16
-
17
-
18
-
19
-
20
-
21
-
22
-
23
-
24
-
25
-
26
-
27
-
28
-
29
-
30
-
31
-
32
-
33
-
34
-
35
-
36
-
37
-
38
-
39
-
40
-
41
-
42
-
43
-
44
-
45
-
46
-
47
-
48
-
49
-
50
-
51
-
52
-
53
-
54
-
55
-
56
-
57
-
58
-
59
-
60
-
61
-
62
-
63
-
64
-
65
-
66
-
67
-
68
-
69
-
70
-
71
-
72
-
73
-
74
-
75
-
76
-
77
-
78
-
79
-
80
-
81
-
82
-
83
-
84
-
85
-
86
-
87
-
88
-
89
-
90
-
91
-
92
-
93
-
94
-
95
-
96
-
97
-
98
-
99
-
100
-
101
-
102
-
103
-
104
-
105
-
106
-
107
-
108
-
109
-
110
-
111
-
112
-
113
-
114
-
115
-
116
-
117
-
118
-
119
-
120
-
121
-
122
-
123
-
124
-
125
-
126
-
127
-
128
-
129
-
130
-
131
-
132
-
133
-
134
-
135
-
136
-
137
-
138
-
139
-
140
-
141
-
142
-
143
-
144
-
145
-
146
-
147
-
148
-
149
-
150
-
151
-
152
-
153
-
154
-
155
-
156
-
157
-
158
-
159
-
160
-
161
-
162
-
163
-
164
-
165
-
166
-
167
-
168
-
169
-
170
-
171
-
172
-
173
-
 174
174 -
 175
175 -
 176
176 -
 177
177 -
 178
178 -
 179
179 -
 180
180 -
 181
181 -
 182
182 -
 183
183 -
 184
184 -
185
-
186
-
187
-
188
-
189
-
190
-
191
-
192
-
193
-
194
-
195
-
196
-
197
-
198
-
199
-
200
-
201
-
202
-
203
-
204
-
205
-
206
-
207
-
208
-
209
-
210
-
211
-
212
-
213
-
214
-
215
-
216
-
217
-
218
-
219
-
220
-
221
-
222
-
223
-
224
-
225
-
226
-
227
-
228
-
229
-
230
-
231
-
232
-
233
-
234
-
235
-
236
-
237
-
238
-
239
-
240
-
241
-
242
-
243
-
244
-
245
-
246
-
247
-
248
-
249
-
250
-
251
-
252
-
253
-
254
-
255
-
256
-
257
-
258
-
259
-
260
-
261
-
262
-
263
-
264
-
265
-
266
-
267
-
268
-
269
-
270
-
271
-
272
-
273
-
274
-
275
-
276
-
277
-
278
-
279
-
280
 |
 |