Cisco SPA525G Administration Guide - Page 64
Enabling Paging (Intercom), Customizing Cisco SPA and Wireless IP Phones, Configuring a Phone - headset
 |
UPC - 882658261688
View all Cisco SPA525G manuals
Add to My Manuals
Save this manual to your list of manuals |
Page 64 highlights
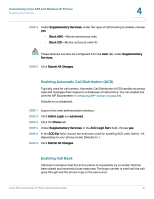
4 Customizing Cisco SPA and Wireless IP Phones Enabling Call Features STEP 1 Log in to the web administration interface. STEP 2 Click Admin Login and advanced. STEP 3 Click the User tab. STEP 4 Under Supplementary Services, in the Log Missed Calls for EXT field, choose yes. STEP 5 Click Submit All Changes. Enabling Paging (Intercom) The paging, or intercom feature, allows two types of paging: Single Page A user can directly contact another user by phone. If the person being paged has configured their phone to automatically accept pages (see Configuring a Phone to Automatically Accept Pages, page 63), the phone does not ring and a direct connection between the two phones is automatically established when paging is initiated. Group Paging (Limited to specific models; see below) Group Paging lets the user page all the client stations at once (SPA9X2/SPA525G), or page groups of phones (SPA525G). If the client station is on an active call while a group page starts, the incoming page is ignored. When paging occurs, the speaker on the paged stations is automatically powered on unless the handset or headset is being used. Group page is one-way only. The paged client stations can only listen to the call from the originator. To enable paging: STEP 1 Log in to the web administration interface. STEP 2 Click Admin Login and advanced. STEP 3 Click the Phone tab. STEP 4 Under Supplementary Services, under Paging Serv, choose yes. 62 Cisco SPA and Wireless IP Phone Administration Guide
-
 1
1 -
2
-
3
-
4
-
5
-
6
-
7
-
8
-
9
-
10
-
11
-
12
-
13
-
14
-
15
-
16
-
17
-
18
-
19
-
20
-
21
-
22
-
23
-
24
-
25
-
26
-
27
-
28
-
29
-
30
-
31
-
32
-
33
-
34
-
35
-
36
-
37
-
38
-
39
-
40
-
41
-
42
-
43
-
44
-
45
-
46
-
47
-
48
-
49
-
50
-
51
-
52
-
53
-
54
-
55
-
56
-
57
-
58
-
 59
59 -
 60
60 -
 61
61 -
 62
62 -
 63
63 -
 64
64 -
 65
65 -
 66
66 -
 67
67 -
 68
68 -
 69
69 -
70
-
71
-
72
-
73
-
74
-
75
-
76
-
77
-
78
-
79
-
80
-
81
-
82
-
83
-
84
-
85
-
86
-
87
-
88
-
89
-
90
-
91
-
92
-
93
-
94
-
95
-
96
-
97
-
98
-
99
-
100
-
101
-
102
-
103
-
104
-
105
-
106
-
107
-
108
-
109
-
110
-
111
-
112
-
113
-
114
-
115
-
116
-
117
-
118
-
119
-
120
-
121
-
122
-
123
-
124
-
125
-
126
-
127
-
128
-
129
-
130
-
131
-
132
-
133
-
134
-
135
-
136
-
137
-
138
-
139
-
140
-
141
-
142
-
143
-
144
-
145
-
146
-
147
-
148
-
149
-
150
-
151
-
152
-
153
-
154
-
155
-
156
-
157
-
158
-
159
-
160
-
161
-
162
-
163
-
164
-
165
-
166
-
167
-
168
-
169
-
170
-
171
-
172
-
173
-
174
-
175
-
176
-
177
-
178
-
179
-
180
-
181
-
182
-
183
-
184
-
185
-
186
-
187
-
188
-
189
-
190
-
191
-
192
-
193
-
194
-
195
-
196
-
197
-
198
-
199
-
200
-
201
-
202
-
203
-
204
-
205
-
206
-
207
-
208
-
209
-
210
-
211
-
212
-
213
-
214
-
215
-
216
-
217
-
218
-
219
-
220
-
221
-
222
-
223
-
224
-
225
-
226
-
227
-
228
-
229
-
230
-
231
-
232
-
233
-
234
-
235
-
236
-
237
-
238
-
239
-
240
-
241
-
242
-
243
-
244
-
245
-
246
-
247
-
248
-
249
-
250
-
251
-
252
-
253
-
254
-
255
-
256
-
257
-
258
-
259
-
260
-
261
-
262
-
263
-
264
-
265
-
266
-
267
-
268
-
269
-
270
-
271
-
272
-
273
-
274
-
275
-
276
-
277
-
278
-
279
-
280
 |
 |