HP LaserJet Enterprise P3015 HP LaserJet P3010 Series - User Guide - Page 106
Wake time, Set the real-time clock, Set the wake time
 |
View all HP LaserJet Enterprise P3015 manuals
Add to My Manuals
Save this manual to your list of manuals |
Page 106 highlights
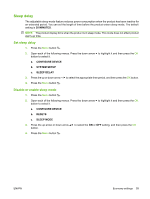
Wake time The wake time feature allows you to instruct the product to wake at a certain time on selected days, to eliminate waiting for the warm-up and calibration periods. You must have the SLEEP MODE setting on to set the wake time. NOTE: Make sure that the real-time clock is set to the correct date and time before you set the wake time. Set the real-time clock Use the real-time clock feature to set the date and time settings. The date and time information is attached to stored print jobs, so you can identify the most recent versions. Access the DATE/TIME menu Set the date Set the date format Set the time Set the time format 1. Press the Menu button . 2. Open each of the following menus. Press the down arrow to highlight it and then press the OK button to select it. a. CONFIGURE DEVICE b. SYSTEM SETUP c. DATE/TIME 1. From the DATE/TIME menu, highlight and select the DATE menu. 2. Use the numeric keypad, or press the up arrow or down arrow / to select the year, month, and day. Press the OK button after each selection. 1. From the DATE/TIME menu, highlight and select the DATE FORMAT menu. 2. Press the up arrow or down arrow / to select the date format, and then press the OK button. 1. From the DATE/TIME menu, highlight and select the TIME menu. 2. Use the numeric keypad, or press the up arrow or down arrow / to select the hour, minute, and AM/PM setting. Press the OK button after each selection. 1. From the DATE/TIME menu, highlight and select the TIME FORMAT menu. 2. Press the up arrow or down arrow / to select the time format, and then press the OK button. Set the wake time 1. Press the Menu button . 2. Open each of the following menus. Press the down arrow to highlight it and then press the OK button to select it. a. CONFIGURE DEVICE b. SYSTEM SETUP c. WAKE TIME 3. Press the up arrow or down arrow / to select the day of the week, and then press the OK button. 4. Press the down arrow to select the CUSTOM setting, and then press the OK button. 94 Chapter 7 Use product features ENWW
-
 1
1 -
2
-
3
-
4
-
5
-
6
-
7
-
8
-
9
-
10
-
11
-
12
-
13
-
14
-
15
-
16
-
17
-
18
-
19
-
20
-
21
-
22
-
23
-
24
-
25
-
26
-
27
-
28
-
29
-
30
-
31
-
32
-
33
-
34
-
35
-
36
-
37
-
38
-
39
-
40
-
41
-
42
-
43
-
44
-
45
-
46
-
47
-
48
-
49
-
50
-
51
-
52
-
53
-
54
-
55
-
56
-
57
-
58
-
59
-
60
-
61
-
62
-
63
-
64
-
65
-
66
-
67
-
68
-
69
-
70
-
71
-
72
-
73
-
74
-
75
-
76
-
77
-
78
-
79
-
80
-
81
-
82
-
83
-
84
-
85
-
86
-
87
-
88
-
89
-
90
-
91
-
92
-
93
-
94
-
95
-
96
-
97
-
98
-
99
-
100
-
 101
101 -
 102
102 -
 103
103 -
 104
104 -
 105
105 -
 106
106 -
 107
107 -
 108
108 -
 109
109 -
 110
110 -
 111
111 -
112
-
113
-
114
-
115
-
116
-
117
-
118
-
119
-
120
-
121
-
122
-
123
-
124
-
125
-
126
-
127
-
128
-
129
-
130
-
131
-
132
-
133
-
134
-
135
-
136
-
137
-
138
-
139
-
140
-
141
-
142
-
143
-
144
-
145
-
146
-
147
-
148
-
149
-
150
-
151
-
152
-
153
-
154
-
155
-
156
-
157
-
158
-
159
-
160
-
161
-
162
-
163
-
164
-
165
-
166
-
167
-
168
-
169
-
170
-
171
-
172
-
173
-
174
-
175
-
176
-
177
-
178
-
179
-
180
-
181
-
182
-
183
-
184
-
185
-
186
-
187
-
188
-
189
-
190
-
191
-
192
-
193
-
194
-
195
-
196
-
197
-
198
-
199
-
200
-
201
-
202
-
203
-
204
-
205
-
206
-
207
-
208
-
209
-
210
-
211
-
212
-
213
-
214
-
215
-
216
-
217
-
218
-
219
-
220
-
221
-
222
-
223
-
224
-
225
-
226
-
227
-
228
-
229
-
230
-
231
-
232
-
233
-
234
-
235
-
236
-
237
-
238
-
239
-
240
-
241
-
242
-
243
-
244
-
245
-
246
 |
 |
