HP LaserJet Enterprise P3015 HP LaserJet P3010 Series - User Guide - Page 148
Remove an EIO card, Loosen the two screws from the EIO card
 |
View all HP LaserJet Enterprise P3015 manuals
Add to My Manuals
Save this manual to your list of manuals |
Page 148 highlights
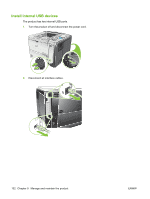
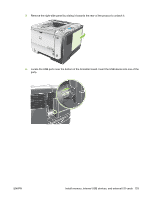
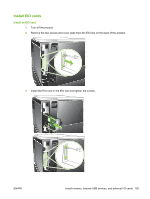
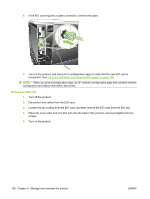
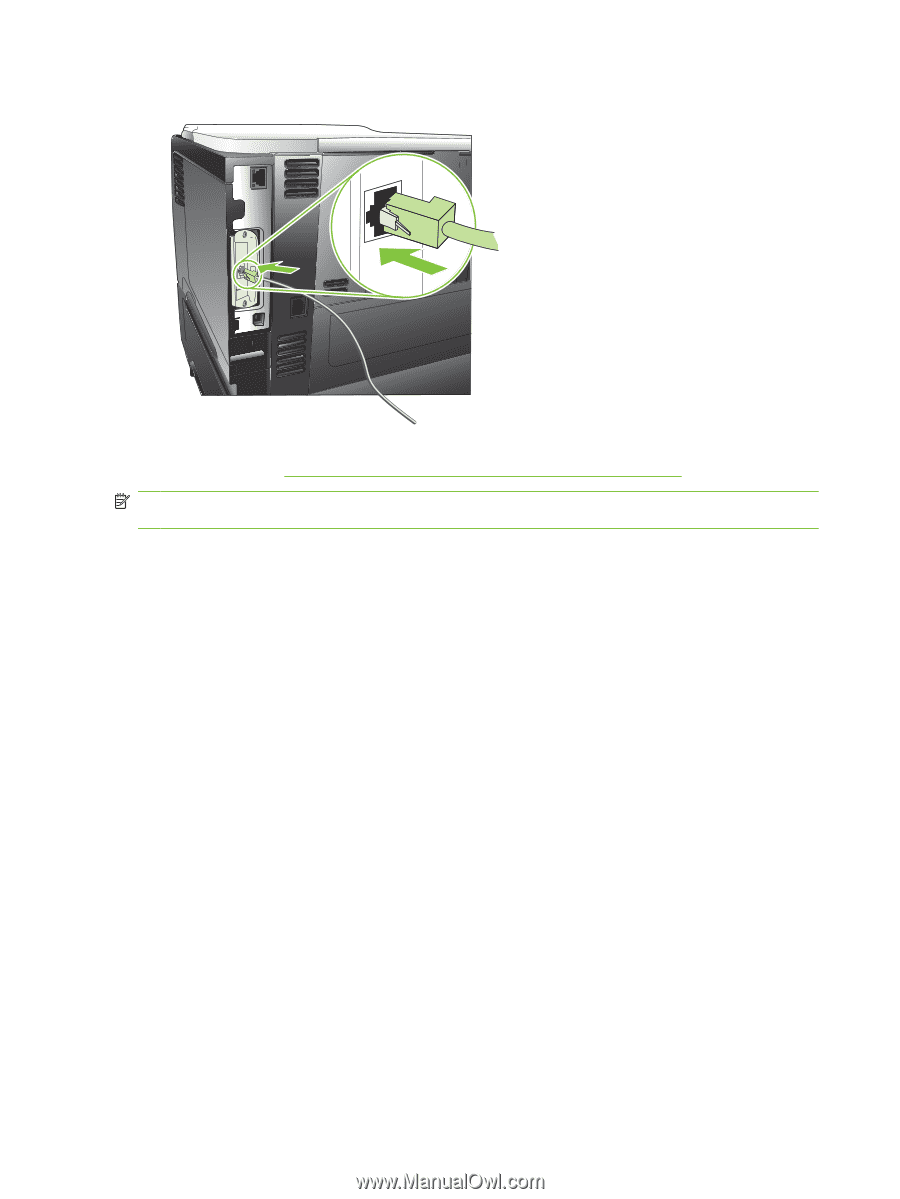
4. If the EIO card requires a cable connection, connect the cable. 5. Turn on the product, and then print a configuration page to verify that the new EIO card is recognized. See Print the information and show-me-how pages on page 108. NOTE: When you print a configuration page, an HP Jetdirect configuration page that contains network configuration and status information also prints. Remove an EIO card 1. Turn off the product. 2. Disconnect any cables from the EIO card. 3. Loosen the two screws from the EIO card, and then remove the EIO card from the EIO slot. 4. Place the cover plate from the EIO slot onto the back of the product. Insert and tighten the two screws. 5. Turn on the product. 136 Chapter 9 Manage and maintain the product ENWW
-
 1
1 -
2
-
3
-
4
-
5
-
6
-
7
-
8
-
9
-
10
-
11
-
12
-
13
-
14
-
15
-
16
-
17
-
18
-
19
-
20
-
21
-
22
-
23
-
24
-
25
-
26
-
27
-
28
-
29
-
30
-
31
-
32
-
33
-
34
-
35
-
36
-
37
-
38
-
39
-
40
-
41
-
42
-
43
-
44
-
45
-
46
-
47
-
48
-
49
-
50
-
51
-
52
-
53
-
54
-
55
-
56
-
57
-
58
-
59
-
60
-
61
-
62
-
63
-
64
-
65
-
66
-
67
-
68
-
69
-
70
-
71
-
72
-
73
-
74
-
75
-
76
-
77
-
78
-
79
-
80
-
81
-
82
-
83
-
84
-
85
-
86
-
87
-
88
-
89
-
90
-
91
-
92
-
93
-
94
-
95
-
96
-
97
-
98
-
99
-
100
-
101
-
102
-
103
-
104
-
105
-
106
-
107
-
108
-
109
-
110
-
111
-
112
-
113
-
114
-
115
-
116
-
117
-
118
-
119
-
120
-
121
-
122
-
123
-
124
-
125
-
126
-
127
-
128
-
129
-
130
-
131
-
132
-
133
-
134
-
135
-
136
-
137
-
138
-
139
-
140
-
141
-
142
-
 143
143 -
 144
144 -
 145
145 -
 146
146 -
 147
147 -
 148
148 -
 149
149 -
 150
150 -
 151
151 -
 152
152 -
 153
153 -
154
-
155
-
156
-
157
-
158
-
159
-
160
-
161
-
162
-
163
-
164
-
165
-
166
-
167
-
168
-
169
-
170
-
171
-
172
-
173
-
174
-
175
-
176
-
177
-
178
-
179
-
180
-
181
-
182
-
183
-
184
-
185
-
186
-
187
-
188
-
189
-
190
-
191
-
192
-
193
-
194
-
195
-
196
-
197
-
198
-
199
-
200
-
201
-
202
-
203
-
204
-
205
-
206
-
207
-
208
-
209
-
210
-
211
-
212
-
213
-
214
-
215
-
216
-
217
-
218
-
219
-
220
-
221
-
222
-
223
-
224
-
225
-
226
-
227
-
228
-
229
-
230
-
231
-
232
-
233
-
234
-
235
-
236
-
237
-
238
-
239
-
240
-
241
-
242
-
243
-
244
-
245
-
246
 |
 |
4.
If the EIO card requires a cable connection, connect the cable.
5.
Turn on the product, and then print a configuration page to verify that the new EIO card is
recognized. See
Print the information and show-me-how pages
on page
108
.
NOTE:
When you print a configuration page, an HP Jetdirect configuration page that contains network
configuration and status information also prints.
Remove an EIO card
1.
Turn off the product.
2.
Disconnect any cables from the EIO card.
3.
Loosen the two screws from the EIO card, and then remove the EIO card from the EIO slot.
4.
Place the cover plate from the EIO slot onto the back of the product. Insert and tighten the two
screws.
5.
Turn on the product.
136
Chapter 9
Manage and maintain the product
ENWW