HP Q7699A HP LaserJet 9040/9050 - User Guide - Page 173
Print quality submenu, APPEND CR TO, LF=NO, SUPRESS BLANK, S=NO, REGISTRATION, PRINT TEST
 |
View all HP Q7699A manuals
Add to My Manuals
Save this manual to your list of manuals |
Page 173 highlights
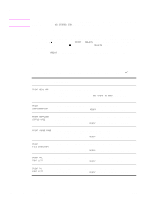
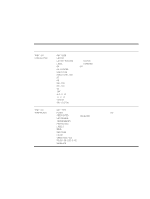
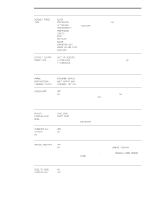
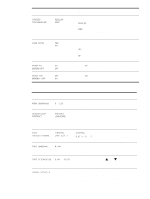
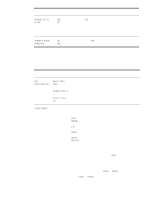
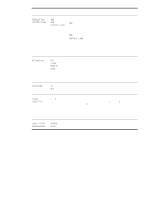
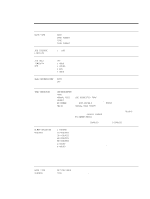
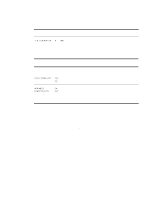
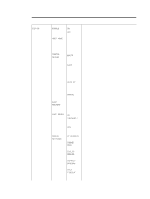
ENWW Item APPEND CR TO LF=NO Values YES NO SUPRESS BLANK NO PAGES=NO YES Explanation Select YES to append a carriage return to each line feed encountered in backward-compatible PCL jobs (pure text, no job control). Some environments, such as UNIX, indicate a new line using only the line feed control code. This option allows the user to append the required carriage return to each line feed. When set to YES, form feeds are ignored if the page is blank. Print quality submenu Some items in this menu are accessible from a software application, or from the driver (if the appropriate driver is installed). Driver and software settings override control-panel settings. For more information, see Using features in the printer driver. Item Values Explanation SET REGISTRATION PRINT TEST PAGE Shift the margin alignment to center the image on the page from top to bottom, and left to right. You can also align the image on the front, with the image printed on the back. SOURCE=TRAY 2 ADJUST TRAY FUSER MODES List of paper types Configure the fuser mode associated with each paper type. The fuser mode can only be changed from this menu option in the control panel. AUTO: Utilizes the optimum mode for that media type. NORMAL: Normal temperature, prints at 50 pages per minute (ppm) (40 ppm for the HP LaserJet 9040). LOW: Low temperature, prints at 50 ppm (40 ppm for the HP LaserJet 9040). HIGH1: Raises the temperature, prints at 50 ppm (40 ppm for the HP LaserJet 9040). HIGH2: Raises the temperature, prints at 32 ppm. SPECIAL: Mode to print at normal speeds with a 40-second delay added to the beginning of the next job. After each 400 pages are printed, the first page of that job is printed at a slower speed in order to clean the fuser. No defects should be noticeable on the printed page. This is not a preferred setting. The default value for each paper type is AUTO. For a complete list of supported paper types, see Paper specifications. CAUTION If you change the fuser mode to HIGH1 or HIGH2, be sure to change it back to the default when you are done printing. Setting a paper type to HIGH1 or HIGH2 might shorten the life of some consumables, such as the fuser, and might cause other failures or jams. Configure device menu 171
-
 1
1 -
2
-
3
-
4
-
5
-
6
-
7
-
8
-
9
-
10
-
11
-
12
-
13
-
14
-
15
-
16
-
17
-
18
-
19
-
20
-
21
-
22
-
23
-
24
-
25
-
26
-
27
-
28
-
29
-
30
-
31
-
32
-
33
-
34
-
35
-
36
-
37
-
38
-
39
-
40
-
41
-
42
-
43
-
44
-
45
-
46
-
47
-
48
-
49
-
50
-
51
-
52
-
53
-
54
-
55
-
56
-
57
-
58
-
59
-
60
-
61
-
62
-
63
-
64
-
65
-
66
-
67
-
68
-
69
-
70
-
71
-
72
-
73
-
74
-
75
-
76
-
77
-
78
-
79
-
80
-
81
-
82
-
83
-
84
-
85
-
86
-
87
-
88
-
89
-
90
-
91
-
92
-
93
-
94
-
95
-
96
-
97
-
98
-
99
-
100
-
101
-
102
-
103
-
104
-
105
-
106
-
107
-
108
-
109
-
110
-
111
-
112
-
113
-
114
-
115
-
116
-
117
-
118
-
119
-
120
-
121
-
122
-
123
-
124
-
125
-
126
-
127
-
128
-
129
-
130
-
131
-
132
-
133
-
134
-
135
-
136
-
137
-
138
-
139
-
140
-
141
-
142
-
143
-
144
-
145
-
146
-
147
-
148
-
149
-
150
-
151
-
152
-
153
-
154
-
155
-
156
-
157
-
158
-
159
-
160
-
161
-
162
-
163
-
164
-
165
-
166
-
167
-
 168
168 -
 169
169 -
 170
170 -
 171
171 -
 172
172 -
 173
173 -
 174
174 -
 175
175 -
 176
176 -
 177
177 -
 178
178 -
179
-
180
-
181
-
182
-
183
-
184
-
185
-
186
-
187
-
188
-
189
-
190
-
191
-
192
-
193
-
194
-
195
-
196
-
197
-
198
-
199
-
200
-
201
-
202
-
203
-
204
-
205
-
206
-
207
-
208
-
209
-
210
-
211
-
212
-
213
-
214
-
215
-
216
-
217
-
218
 |
 |