HP Q7699A HP LaserJet 9040/9050 - User Guide - Page 86
Printing the remaining copies of a held job, Deleting a held job, To create a proof and hold job
 |
View all HP Q7699A manuals
Add to My Manuals
Save this manual to your list of manuals |
Page 86 highlights
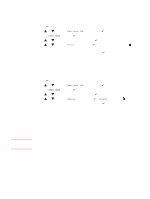
CAUTION To create a proof and hold job If the printer needs additional space to store newer proof and hold jobs, the printer will delete other stored proof and hold jobs, starting with the oldest job. To permanently store the job and prevent the printer from deleting it when space is needed, select the Stored Job option in the printer driver instead of the Proof and Hold option. In the printer driver, select the Proof and Hold option and enter a user name and job name. The printer prints one copy of the job for you to proof. Then, see Printing the remaining copies of a held job. Printing the remaining copies of a held job The user can print the remaining copies of a job held on the printer hard disk accessory from the control panel. To print a proof and hold job 1 Press . 2 Use or to scroll to Retrieve Job and then press . 3 Scroll to USER NAME and press . 4 Use or to scroll to your job and then press . 5 Use or to scroll to Print and then press . The job prints the remaining copies requested from the computer. If Print has next to it, the job requires a PIN to print. See Printing a private job. Deleting a held job When a user sends a proof and hold job, the printer automatically deletes that user's previous proof and hold job. If no proof and hold job already exists for that job name and the printer needs additional space, the printer might delete other proof and hold jobs, starting with the oldest one. To delete a proof and hold job 1 Press . 2 Use or to scroll to Retrieve Job and then press . 3 Scroll to USER NAME and press . 4 Use or to scroll to your job and then press . 5 Use or to scroll to Delete and then press . If Delete has next to it, the job requires a PIN to delete. See Printing a private job. 84 Chapter 3 Advanced printing tasks ENWW
-
 1
1 -
2
-
3
-
4
-
5
-
6
-
7
-
8
-
9
-
10
-
11
-
12
-
13
-
14
-
15
-
16
-
17
-
18
-
19
-
20
-
21
-
22
-
23
-
24
-
25
-
26
-
27
-
28
-
29
-
30
-
31
-
32
-
33
-
34
-
35
-
36
-
37
-
38
-
39
-
40
-
41
-
42
-
43
-
44
-
45
-
46
-
47
-
48
-
49
-
50
-
51
-
52
-
53
-
54
-
55
-
56
-
57
-
58
-
59
-
60
-
61
-
62
-
63
-
64
-
65
-
66
-
67
-
68
-
69
-
70
-
71
-
72
-
73
-
74
-
75
-
76
-
77
-
78
-
79
-
80
-
 81
81 -
 82
82 -
 83
83 -
 84
84 -
 85
85 -
 86
86 -
 87
87 -
 88
88 -
 89
89 -
 90
90 -
 91
91 -
92
-
93
-
94
-
95
-
96
-
97
-
98
-
99
-
100
-
101
-
102
-
103
-
104
-
105
-
106
-
107
-
108
-
109
-
110
-
111
-
112
-
113
-
114
-
115
-
116
-
117
-
118
-
119
-
120
-
121
-
122
-
123
-
124
-
125
-
126
-
127
-
128
-
129
-
130
-
131
-
132
-
133
-
134
-
135
-
136
-
137
-
138
-
139
-
140
-
141
-
142
-
143
-
144
-
145
-
146
-
147
-
148
-
149
-
150
-
151
-
152
-
153
-
154
-
155
-
156
-
157
-
158
-
159
-
160
-
161
-
162
-
163
-
164
-
165
-
166
-
167
-
168
-
169
-
170
-
171
-
172
-
173
-
174
-
175
-
176
-
177
-
178
-
179
-
180
-
181
-
182
-
183
-
184
-
185
-
186
-
187
-
188
-
189
-
190
-
191
-
192
-
193
-
194
-
195
-
196
-
197
-
198
-
199
-
200
-
201
-
202
-
203
-
204
-
205
-
206
-
207
-
208
-
209
-
210
-
211
-
212
-
213
-
214
-
215
-
216
-
217
-
218
 |
 |