Kenmore 18221 Owners Manual
Kenmore 18221 - Drop-In Bobbin Sewing Machine Manual
 |
View all Kenmore 18221 manuals
Add to My Manuals
Save this manual to your list of manuals |
Kenmore 18221 manual content summary:
- Kenmore 18221 | Owners Manual - Page 1
® SEWING MACHINE Owner's Manual MAQUINA DE COSER Manual de Instrucciones MACHINE .ikCOUDRE Manuel d'instructions Model, Modelo, Modele 385.18221 I 0 505-800-226 Sears, Roebuck and Co., Hoffman Estates, IL 60179 U.S.A. www.sears.com - Kenmore 18221 | Owners Manual - Page 2
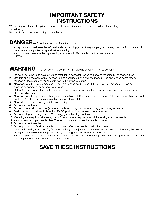
, or dropped into water. Return this sewing machine to the nearest Sears store or service center for examination, repair, electrical or me chanical adjustment. 4. Never operate the appliance with any air opening blocked. Keep ventilation openings of this sewing machine and foot controller free from - Kenmore 18221 | Owners Manual - Page 3
e indicados en este manual del usuario. 3. Nunca utilice esta maquina de coser si tiene un enchufe o un cable en mal estado, si no funciona correctamente, si se ha golpeado o esta da_ada, o si ha caido en agua. Envie esta maquina de coser a la tienda o centro de mantenimiento Sears mas cercano si es - Kenmore 18221 | Owners Manual - Page 4
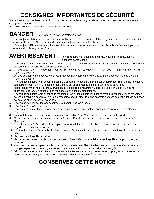
consignes suivantes: Avant d'utiliser cet appareil, lisez toutes ces instructions. DANG ER -.ou r6duire ,es risques d'6lectrocution. 1. ou si elle est tombee dans I'eau. Retournez la machine a coudre au magasin ou au centre de reparation Sears le plus proche, afin de la faire examiner, reparer - Kenmore 18221 | Owners Manual - Page 5
as described in the owner's manual free replacement of belts, light bulbs, needle plates and accessory parts if they are defective in material or workmanship This 90 day warranty does not include sewing machine needles, which are expendable parts. Warranty service is available by returning this - Kenmore 18221 | Owners Manual - Page 6
la compra. Sears proveera: • ajustes mecanicos necesarios gratis para la funci6n apropiada de esta maquina de coser, excepto por el cuidado de mantenimiento normal de la maquina segQn Io descrito en el manual propietario. • reemplazo gratis de correas, focos, platos de aguja y partes accesorias si - Kenmore 18221 | Owners Manual - Page 7
couvre pas les aiguilles, qui font partie des fournitures courantes. Le service de garantie s'effectue suite au retour de cette machine _ coudre au centre de r_paration et pi_ces Sears le plus proche, aux Etats Unis. Si cette machine a coudre est utilis6e a des fins commerciales ou en location, le - Kenmore 18221 | Owners Manual - Page 8
Item Sewing speed (Maximum): Stitch length: Stitch width: Stitch package (Stitch functions): Buttonhole: (Built-in stitches): Machine dimensions: Weight (Net): Machine Specifications Specification Over 730 s.p.m 4 mm (Maximum) 6.5 mm (Maximum) 44 21 1 step built-in buttonhole W 16.3" (415 mm) - Kenmore 18221 | Owners Manual - Page 9
purchase. Your new Kenmore ® product is designed Resolution -phone support from a Sears representative on all products. Think of us as a "talking owner's manual." [] Power 10% discount off the regular price of any non-covered repair service and related installed parts. Once you purchase the Agreement - Kenmore 18221 | Owners Manual - Page 10
una compra inteligente. Su nuevo equipo Kenmore® ha sido disefiado y fabricado para parte de representantes de Sears y para todos los productos. Considerenos un "manual . [] Rabais de 10 % sur te prix regulier de tout service de reparation et pieces installees afferentes non couverts. Une fois que - Kenmore 18221 | Owners Manual - Page 11
Machine Carrying Case 2 Names of Parts 2 Available Accessories and Attachments 4 SECTION II. GETTING READY TO SEW Connecting Machine to Power Supply 6 Before Using Your Sewing Machine 6 For Your Safety 6 Polarized plug 6 Controlling Sewing Speed 6 Pressure Adjusting Lever 8 Presser Foot - Kenmore 18221 | Owners Manual - Page 12
SECCION I. NOMBRE DE LAS PARTES Gabinete y estuche portatit 3 Nombre de tas partes 3 Accesorios y refacciones disponibles ajustar la densidad de los ojales 79 Costura de ojales con cord6n 81 Ojai manual (Opci6n 83 • Para coser 83 Ojai automatico (Opci6n 85-91 • Estito - Kenmore 18221 | Owners Manual - Page 13
machine 7 Les premieres fois que vous utiNsez votre machine Retrait et installation du support de pied 11 • Enfilage de la machine 27 • Enfitage de ta machine 27 • Enfite- couture 39 Utitisation des guides de couture 39 Pour . ENTRETIEN DE VOTRE MACHINE Remplacement de t'ampoule 93 - Kenmore 18221 | Owners Manual - Page 14
SECTION I. NAMES OF PARTS f Cabinets and Sewing Machine Carrying Case ( # 97503) Sewing Machine cabinets and Sewing Machine Carrying Case are available at your nearest Sears retail store. Names of Parts /- _i_ Reverse stitch control _2_Stitch width setting display _3_Stitch length setting - Kenmore 18221 | Owners Manual - Page 15
Sears. PARTIE I. IDENTIFICATION LA MACHINE DES PII_CES DE Des meubles et des boi tiers portables ( # 97503) Sont disponibles dans le magasin Sears le plus proche de chez VOUS. Nombre de las partes point (_ Enrouleur de la canette Porte-bobine Guide du fil superieur Levier releveur du fil Molette - Kenmore 18221 | Owners Manual - Page 16
6 am - 11 pm, CST, 7 days a week *4 5 When ordering parts and accessories, provide the following information: 1. Part Number 2. Part Name 3. Model Number of Machine 6 7 8 9 10 Ref. No. Part No. Description *102869107 10 x Bobbin 102403202 Spool pin felt 650807101 Assorted needle set - Kenmore 18221 | Owners Manual - Page 17
de ta piece 3. Reference du modele de la machine veuillez preparer les NQmero de Referencia la parte Descripci6n *102869107 10 x Canillas 102403202 de porte-bobine 25 *213502003 Plaque-guide pour boutonniere 26 *213501116 Plague support pour boutonniere *213503015 Gabarit (Petite - Kenmore 18221 | Owners Manual - Page 18
not fit, contact a qualified electrician to install the proper outlet. Do not modify the plug in any way. Foot Controller Model YC-482J -1 or TJ C-150 is used with Sewing Machine Model 385.18221. / Controlling Sewing Speed Sewing speed is varied by the foot control. The harder you press on the - Kenmore 18221 | Owners Manual - Page 19
qui installera une prise appropriee. N'essayez pas de modifier la prise. La pedale de contr61e YC-482J -1 ou TJ C-150 s'utilise avec la machine modele 385.18221. Control de la velocidad de costura El pedal de control sirve para regular la velocidad de la costura. La velocidad se regula pulsando el - Kenmore 18221 | Owners Manual - Page 20
the foot. \\\\ \\\\\\\\\ ", J Thread Cutter f -x _i_Thread cutter You do not need a pair of scissors to cut the thread after sewing. Simply use the built-in thread cutter. Extension Table • Detaching the table Pull the table away from the machine, as illustrated, for "free-arm" sewing of - Kenmore 18221 | Owners Manual - Page 21
en el estuche. Rallonge de plateau • I_ur retirer la rallonge ¢:loignez-la de la machine comme illustre. • I_ur fixer la rallonge Poussez la rallonge jusqu' ace qu'elle s'encliquete sur la machine. Raltonge de plateau Patte Trou Patte Bras tibre • Boi te a accessoires Ouvrez le couvercte - Kenmore 18221 | Owners Manual - Page 22
turning the handwheel counterclockwise, toward you, and lowering the presser foot. Loosen the needle clamp screw£1_ by [] turning it counterclockwise counterclockwise with a screwdriver. • "b attach Match the hole in the foot holder _2_with the threaded hole in the presser bar _3_:.Fit the thumb - Kenmore 18221 | Owners Manual - Page 23
'_2_P' ince l'aiguitte [] €:teignez la machine. Faites monter l'aiguitte te plus haut possible & t'aide du tournevis. hstallation Alignez le trou du support de pied _2_avec te trou fitete de la barre du y pulse el bot6n rojo '_1_situado en la parte trasera del enmangue. • I_ra poner Coloque un - Kenmore 18221 | Owners Manual - Page 24
on each side of the zipper. The edges of the foot guide the zipper and keep the seam straight. For: Zipper sewing (page 42) Foot E: Prensatelas E: Pied E: Blind hem stitch foot ( Foot G) Use this foot for perfect blind hemming and topstitching. The foot has ridges on the bottom to keep the fabric - Kenmore 18221 | Owners Manual - Page 25
para guiar la parte doblada de su dobladitto. Para: Dobladillo invisible (pagina 57) • Pied a point d'ourlet invisible ( Pied G) Avec ce pied, vous ferez des ourtets parfaits, sans que le fit apparaisse. Des petites nervures sous te pied emp6chent le tissu de gtisser de c6te et le guide-bord donne - Kenmore 18221 | Owners Manual - Page 26
brush and wire guides help control the fabric, hold the raw edge in place and keep it from puckering, especially when sewing on knit fabrics. For: Overcasting (Page 54) Foot C: Prensatelas C: Pied C Serging (Page 70) Buttonhole foot (B) (Option) Use this foot for manual buttonholing. It is - Kenmore 18221 | Owners Manual - Page 27
hacer ojales a mano. Esta marcado para ayudarte a medir exactamente los ojales. Para: Ojal manual (pagina 83) • Pied a point boutonniere ( Pied B) (Option) Utitisez ce pied pour puntadas. Para: Acolchador (pagina 41) • Matelasser Le guide & matelasser vous aide & coudre des lignes paralleles. Pour - Kenmore 18221 | Owners Manual - Page 28
set, there is one each of sizes 11, 14, 16, and 18, and a blue needle. Use the blue needle to eliminate skipped stitches when sewing knits and synthetic fabrics. Special needles should be used on certain fabrics. A denim needle with a sharp tip effectively pierces dense fabrics such as denim and - Kenmore 18221 | Owners Manual - Page 29
Seleccibn de hilo y tela Para el cosido general se utitizan agujas del tamafio 11 o 14. Los hilos y agujas delgados deberan utitizarse para coser tejidos ligeros evitando asi que estos se puedan echar a perder. Cosa tejidos gruesos con una aguja Io suficientemente gruesa como para que pueda - Kenmore 18221 | Owners Manual - Page 30
Choix de I'aiguille et tissu Pour les coutures normales, utilisez une aiguille n°11 ou 14. On devrait utitiser du fil fin et une aiguille fine avec les tissus legers pour ne pastes endommager. Les tissus lourds necessitent une aiguitte assez grosse pour percer te tissu sans effitocher te fit de l' - Kenmore 18221 | Owners Manual - Page 31
(blankpage) (paginbalanca) (pageblanche) 19 - Kenmore 18221 | Owners Manual - Page 32
j Additional spool pin \/Additional spool pin _2_Spool pin hole ,(3_S, pool pin felt The additional spool pin _1_is for bobbin winding, without unthreading the machine, and for twin needle sewing. Insert the additional spool pin_l_, into the hole _Z'. Place the felt _3_and a spool on the pin. 20 - Kenmore 18221 | Owners Manual - Page 33
-bobine supplementaire _2_Trou de porte-bobine (3_Feutre du porte-bobine Le porte-bobine supplementaire _1_permet de remplir des canettes supplementaires sans desenfiler ta machine. Placez le porte-bobine supptementaire _'1_dans te trou ,,_, Placez dessus la rondelle de feutre _3_e, t la bobine. 21 - Kenmore 18221 | Owners Manual - Page 34
spool pin [] Thread through the hole in the bobbin from the inside to the outside. [] Put the bobbin on the bobbin winder spindle. [] Push the bobbin to the right. [] With the free end of the thread held in your hand, depress the foot control. Stop the machine when it has made a few turns, and - Kenmore 18221 | Owners Manual - Page 35
hilo como se muestra. [] Empuje ta volante manual a ta izquierda. La maquina no cosera hasta ta bobine. [] Passez te fit autour du guide fit. _A_Pour porte-bobine horizontal _B_Pour porte-bobine & [] Poussez te volant vers I'interieur. La machine ne fonctionnera pas tant que I'embrayage n'est pas - Kenmore 18221 | Owners Manual - Page 36
\ LI_ End of thread (2_ Notch [] (3_.Notch (47Threading diagram [] Place a bobbin in the bobbin holder with the thread running off counterclockwise. / / [] Guide the thread into notch _2_,onthe front side of [] the bobbin holder. Draw the thread to the left, sliding it between the tension - Kenmore 18221 | Owners Manual - Page 37
d'enfilage [] Placez ta canette dans son support, le fil se deroulant en sens antihoraire. [] Pase del hito por la ranura _2_en la parte frontal de portacanittas. Tire del hito hacia la enctiquetez-la en place. Vous trouverez un guide d'enfilage _4_ de la canette sur le couvercle de navette. 25 - Kenmore 18221 | Owners Manual - Page 38
the machine * Raise the thread take-up lever to its highest position by turning the handwheel counterclockwise. * Raise the presser foot lifter. * Place a spool on the spool pin, with the thread coming off as shown. [] Draw the end of the thread around the upper thread guide. [] While - Kenmore 18221 | Owners Manual - Page 39
saliendo, tal como se muestra. Enfilage de la machine • Enfilage de la machine * Faites monter te levier releveur tendeur de fil [] En faisant attention au point de l'aiguitte, faire passer le fil autour du guide _ et sous le crochet _. [] Suelte el tirador lentamente mientras sujeta el extremo - Kenmore 18221 | Owners Manual - Page 40
and rotate the handwheel counterclockwise for one complete turn. [] Bring the bobbin thread up by pulling the needle thread [] up. [_Pull both threads 4" to 6" (10.0 to 15.0 cm) under and behind the presser foot. Adjust the Needle Thread Tension for a Straight Stitch • Correct tension _1_Needle - Kenmore 18221 | Owners Manual - Page 41
_4_Para apretar para La puntada recta ideal cierra los hitos entre tas dos telas tal como se ve en la figura (ampliada). Si observa la parte superior e inferior de ta costura, se dara cuenta de que no hay hitos flojos o apretados. Todas las puntadas son uniformes e iguales. AI ajustar ta tensi6n - Kenmore 18221 | Owners Manual - Page 42
the wrong side (Bottom side) of the fabric without causing excessive puckering, or causing the bobbin thread to show on the right side (Top side) of the fabric. Results vary with fabric, thread and sewing conditions. J Tension is too tight _, Right side (Top side) of fabric ,,2)Wrong side (Bottom - Kenmore 18221 | Owners Manual - Page 43
Envers du tissu Reduzca al minimo el hito de ta aguja visible en la parte de abajo de ta tela sin que se frunza en forma excesiva o haciendo que el tela Las esquinas de cada zig-zag quedaran demasiado tensas y amontonadas en la parte de arriba de la tel& • Si la tension est trop elevee _i_ Endroit - Kenmore 18221 | Owners Manual - Page 44
indicating panel is selected when the stitch length control is set at the stretch stitch position. Recommended stitch width, stitch length are shown in the sewing guide display. When you turn the stitch selector, the information in the display changes automatically. Use the color in the - Kenmore 18221 | Owners Manual - Page 45
en la pantalta de guia de costura que corresponde al color de la puntada seleccionada. Bouton de sdlection de points ( sdlectionner les points) (_ €:cran guide de couture (_0 Marque rouge (_) Bouton de selection de points Tourner te bouton de selection de points, jusqu' & ce que la marque rouge - Kenmore 18221 | Owners Manual - Page 46
at S.S. when using a stretch stitch. The higher the number, the greater the stitch length. The _ mark shows the adjustment range when sewing the buttonhole. * Raise the presser foot before sliding the stitch length control. /,\Jj Sti,tch length control STRETCH T 0_1_2m3m4 LENGTH \\\ J 34 - Kenmore 18221 | Owners Manual - Page 47
Control de la anchure de puntada ( cbmo ajustar la anchure de las puntadas) Deslice el control de ta anchura hasta al nQmero deseado. Nemeros mas altos proporcionaran mayor anchura de puntada. '_esta marca indica el radio de ajustes cuando use una aguja doble. La zona azul es el radio de ajustes - Kenmore 18221 | Owners Manual - Page 48
Stitch Balance f _1_Feed balancing dial If the stretch stitch patterns are uneven when you sew on a particular fabric, adjust them with the feed balancing dial_l_. To adjust the dial in the "+" direction. [] [] J Reverse Stitch Control S Press the stitch control to sew in reverse. 36 - Kenmore 18221 | Owners Manual - Page 49
tournant le bouton en direction du "+" Control de puntada invertida La maquina cosera hacia atras hasta que suelte el bot6n. Bouton de marche arri_re La machine coud en marche arriere tant que I'on appuie sur le bouton de marche arriere. 37 - Kenmore 18221 | Owners Manual - Page 50
, make sure to use center needle position. Otherwise the needle may strike the sewing foot and possibly break. Starting to sew Raise the presser foot and position the fabric next to a seam guide line on the needle plate (5/8" (1.6 cm) is most common). Lower the needle to the point where you want - Kenmore 18221 | Owners Manual - Page 51
de la prochaine couture. Uso de las guias de costura Utilisation des guides de couture \ / Centro de ta posici6n de ta aguja _1_Position centrale : 1. Arr6tez de coudre lorsque le bord du tissu arrive au lignes du guide-virage. 2. Abaissez t'aiguitte en tournant le volant dans le sens inverse des - Kenmore 18221 | Owners Manual - Page 52
, make sure to use the center needle position, otherwise the needle may strike the presser foot and possibly break. Use the seam guide lines on the needle plate, and the free- f or o ou J arm, to help determine the distance between quilting stitches. The quilter will help keep the stitching line - Kenmore 18221 | Owners Manual - Page 53
l'aiguille est en position centrale. Autrement elle heurtera le pied et se cassera. Le guide a matelasser vours aidera a coudre des tignes paralteles. [] Desserrz ta vis, enfitez te guide a matelasser dans t'ouverture jusqu'a ta largeur souhaitee, puis resserrez ta vis. [] Effectuez votre couture - Kenmore 18221 | Owners Manual - Page 54
with margin edge. Return thread tension and stitch length to original settings. Sew a seam the entire length of zipper tape, removing pins as you go. Before reaching pull-tab, stop the machine with needle in the fabric and raise the foot, then unzip a few inches to clear a path for the stitch - Kenmore 18221 | Owners Manual - Page 55
parte izquierdo del pasador. I_ur fixer le pied a fermeture a glissiere _1_Encoche ',_2_Broche _3_Quand on coud le c6te gauche @ Quand on coud le c6te droit Placez la broche du pied dans t'encoche du support . Avant d'atteindre la tirette, arr6ter ta machine, t'aiguitte dans le tissu, et soulever te - Kenmore 18221 | Owners Manual - Page 56
fabric to about 3/8" to 1/2" distance from the basting stitch line. Turn fabric 90 ° and sew a seam the entire length of zipper tape. Before reaching pull-tab, stop the machine with needle in fabric and raise the foot. Use seam ripper to open a few inches of basting stitch, then unzip a few inches - Kenmore 18221 | Owners Manual - Page 57
de b&ti. Tourner te tissu & 90 ° et coudre sur toute ta Iongueur du ruban de ta fermeture eclair. Avant d'atteindre la tirette, arr6ter la machine, t'aiguille darts te tissu, et soulever te pied. Avec un decouvit, defaire quelques centimetres de point de b&ti, puis ouvrir la fermeture eclair sur - Kenmore 18221 | Owners Manual - Page 58
Raise the Feed Dogs f The drop feed dogs lever is located underneath the free arm bed on the back side of the machine. _1:To drop the feed dogs, push the lever in the direction of the arrow, as illustrated. _2_To raise the feed dogs, push the lever in the direction - Kenmore 18221 | Owners Manual - Page 59
para los dientes del transporte esta debajo del brazo tibre colocabo en la parte del reves de ta maquina. (13 Para bajar los dientes del d'entrafnement est situe sous le berceau du bras tibre& l'arriere de la machine. _1) Pour faire descendre les griffes d'entrafnement, poussez le levier dans - Kenmore 18221 | Owners Manual - Page 60
2S_titch width: _3_Stitch length: _4_Needle thread tension: _5_Presser foot A: 3 1 to 6.5 Red zone 3 to 5 Zigzag foot The zigzag stitch is one of the most common and versatile f stitches. It can be a utility stitch for button sewing, buttonhole making, hemming, overcasting, mending and darning. It - Kenmore 18221 | Owners Manual - Page 61
te bord des couvertures du linge de maison des nappes, des serviettes de table, etc. II convient aussi tres bien pour tes appliques. Lorsque vortre machine est reglee pour ta couture, faites un essai sur te tissu que vous allez utitiser. Si le point est trop serr¢, vos risquez de plisser - Kenmore 18221 | Owners Manual - Page 62
(i) Stitch selector: 7 f :1 a ,(_ Stitch width: 6.5 (37 Stitch length: Gold stretch stitch position (4_ Needle thread tension: 2to6 (59 Presser foot F: Satin stitch foot (63 Pressure adjusting lever: 2 Baste applique pieces on the fabric, or fuse the applique /- pieces with an iron-on - Kenmore 18221 | Owners Manual - Page 63
4_ Tension du fit de l'aiguille: _5_:Pied presseur F: _6_Levier de reglage de la tension: 3 3 0.5 a 1 1a 4 Pied & point lance 1 ou 2 Coloque ta entretela por ta parte de abajo de la tela. Dibuje tas letras sobre ta tela utitizando tiza de costura. Forme cada modelo ajustando el ancho de la puntada - Kenmore 18221 | Owners Manual - Page 64
, pockets and straps of lingerie. Sew four (4) to six (6) stitches. _1_B' ar tack Embroidery _1_Stitch selector: _2_Stitch width: _ Stitch length: _4_Needle thread tension: .(5_Feed dogs: * Presser foot: 3 1 to 6.5 Any 2 to 6 Dropped Remove f fJ-\ ) S_ _4_, Drop the feed dogs, and then remove - Kenmore 18221 | Owners Manual - Page 65
cuidadosamente con la mano. Cuando haya terminado el bordado, sube los dientes de transporte para costura normal. Abaissez tes griffes d'entrafnement et retirez te support de pied. Regtez ta largeur du point comme vous te souhaitez. Dessinez un motif sur le tissu & la craie de taitteur. Tendez le - Kenmore 18221 | Owners Manual - Page 66
the needle. Turn the handwheel, so that the needle is in its leftmost position, and then drop the needle through the left buttonhole. 4. Press the foot control and sew about 10 stitches. 5. Sew the other row of holes (if applicable) using the steps above. Trim excess threads from both sides - Kenmore 18221 | Owners Manual - Page 67
costura. Quite el hito de ta aguja para que sea mas facil la determinaci6n de la anchura de zigzag. 3. Enhebre ta aguja. Gire ta rueda manual para que ta aguja quede totalmente a la izquierda y luego baje la aguja por el agujero izquierdo del bot6n. 4. Oprime el pedal y cosa aproximadamente 10 - Kenmore 18221 | Owners Manual - Page 68
the fold. If the needle pierces too far left, the stitches will show on the right side of the fabric. Lower the presser foot. Sew, guiding the folded edge along the guide in the foot _7).As you sew, the right side of the stitch forms a chain stitch to the right of the fabric fold. l -x [] / 56 - Kenmore 18221 | Owners Manual - Page 69
t_Itimo d6blelas de ta forma indicada en la ilustraci6n. k!/Parte de abajo de la tela _0.4 a 0.7 cm (.8"_L,e bord plie Placez le tissu sur la machine, de fagon 4 ce que I'aiguille ne perce Piquez en dirigeant le bord plie te tong du guide. Pour obtenir un ourtet 4 I'allure professionnelte,reduisez - Kenmore 18221 | Owners Manual - Page 70
Zigzag Stitch _1_S, titch selector: _2_Stitch width: _3_S, titch length: @ Needle thread tension: _5_Presser foot A: 2 5 to 6.5 0.5 to 1 2 to 6 Zigzag foot J S /-\ \ !j } • _• 0--1 --2_=4=5_6.5 WIDTH STRETCH LENGTH J @ J • Seam finishing /- This stitch is used to finish the - Kenmore 18221 | Owners Manual - Page 71
de couture de 1.5 cm (5/8"). Recoupez ta ressource a la fin de la piqOre. Faites attention de ne pas couper les points. • Zurciendo o remendando Coloque ta parte rota debajo de la aguja para que la puntada alcance ambos lados. • Repriser Placez la dechirure sous l'aiguille de maniere & ce que le - Kenmore 18221 | Owners Manual - Page 72
F: Satin stitch foot Use a lightweight fabric (tricot, for example). Fold the fabric f in bias and stitch on the fold. Allow the needle to just clear the folded edge to create a shelled edge. You may need to increase the needle thread tension slightly. If you sew rows of shell stitches, space the - Kenmore 18221 | Owners Manual - Page 73
Puntada en forma de concha (i3 Selector de patr6n: _2_Anchura de ta puntada: 9 3a6.5 _3_Longitud de la puntada: _4_T; ensi6n del hito de la aguja: _5_Prensatelas F: Zona roja 4a9 Prensatelas decorativa para puntada Point coquille (!_, Setecteur de point: :_2_Largeur de point: :_3_Longueur du - Kenmore 18221 | Owners Manual - Page 74
edges to paper or tear-away backing 1/8" (0.3 cm) apart. Sew slowly, guiding the fabric so the needle catches the folded edge on each side. zone ._4_Needle thread tension: 3to8 @ Presser foot A: (6_,Presser foot F: Zigzag foot Satin stitch foot For a delicate appearance on fabric such as - Kenmore 18221 | Owners Manual - Page 75
Puntada para deshilachados (i 3 Selector de patr6n: :,_2A) nchura de ta puntada: :,_3)Longitud de puntada: _4_Tensi6n del hito de la aguja: _5_:Prensatelas A: 10 5 a 6.5 0.5 a 2 3 a8 Prensatelas para zig-zag Couture ajour_e _.i_Setecteur de point: '_2_Largeur du point: '_3_Longueur du point: _4_T - Kenmore 18221 | Owners Manual - Page 76
thread tension: or green zone 3to7 _5_Presser foot A: Zigzag foot (6_ Presser foot F: _7_Needle: Satin stitch foot @ Twin needle (optional item) Select stitch width within the indicated twin needle sewing zone (_). _1_Upper thread guide S _2_Check spring holder ,(:3T_;hread take-up - Kenmore 18221 | Owners Manual - Page 77
_5). Hile cada una de las agujas de adelante a atras. €:teignez ta machine. Ajoutez te porte-bobine supplementaire dans te trou qui lui est destin& Placez un jumelees, suivez te guide en vous assurant que vous separez les deux ills, en passant chacun d'eux dans chaque guide sur tes c6tes de - Kenmore 18221 | Owners Manual - Page 78
X 0--1 --2--3=4=5=6.5 (2_,Stitch width: 2 to 6.5 (3_ Stitch length: (4_ Needle thread tension: Gold stretch stitch position 2to6 _5_Presser foot A: Zigzag foot S_ J Sew on stretch fabrics in any area that you might use a ? -x zigzag stitch. This stitch is used as a decorative topstitch - Kenmore 18221 | Owners Manual - Page 79
SECCION Vl. PU NTADAS E LASTICAS Puntada recta triple _1_Selector de patr6n: _2_A, nchura de ta puntada: _3_L, ongitud de la puntada: _4_Tensi6n del hito de la aguja: _5) Prensatelas A: 4a6 6.5 Posici6n oro de puntada elastica 2a6 Prensatelas para zig-zag ,_6)Prensatelas H: Prensatelas para - Kenmore 18221 | Owners Manual - Page 80
_,o, o_..___=__=E_r2. _5_Presser foot A: Zigzag foot sx (6_,Presser foot F: Satin stitch foot NOTE: Loosen the needle thread tension to the other edge, pull the bobbin threads (bottom threads) to distribute the gathers evenly and secure the threads. Sew the smocking stitches between the - Kenmore 18221 | Owners Manual - Page 81
del hilo de la aguja para facilitar el fruncido. REMARQU E: Rel&chez la tension du fil de l'aiguille pour faciliter les fronces. • Para coser _ Parte de arriba de la tela _2_ Borde Esta es una puntada decorativa delicada, empleada en prendas de nifios o blusas de sefioras. Elija una tela ligera - Kenmore 18221 | Owners Manual - Page 82
on S medium to heavy weight woven fabrics where you want a narrow seam. It is also great for sewing spandex swim wear. Place the fabric under the presser foot [ A] so that the stitches are made over the raw edge. L/\1JX @ 0--1 --2--3=4=5_6.5 $1 RE_C_ V--0_1_2--3--4 LENGTH @, J J Elastic - Kenmore 18221 | Owners Manual - Page 83
aiguille 3 &6 _5) Pied presseur A: Pied zig-zag Etija esta puntada para colocar elasticos en prendas. Divida y marque el elastico en cuatro partes iguales y haga que tas marcas coincidan con las costuras central trasera, central delantera y taterales. Coloque el centro del elastico en el centro - Kenmore 18221 | Owners Manual - Page 84
selector: 11 to 13 _2_Stitch width: 3 to 6.5 _3_Stitch length: Gold stretch stitch position _4_Needle thread tension: 2 to 6 _5_Presser foot A: Zigzag foot Decorative stretch patterns are used for adding a creative f and personalized touch to items. You can decorate children's clothes - Kenmore 18221 | Owners Manual - Page 85
Dise_os decorativos el_sticos ,,_ihSelector de puntada: 11 a 13 ,(2]:Anchura de ta puntada: 3a6.5 ,_3_Longitud de la puntada: Posici6n oro de puntada elastica ,_4)Tension del hito de la aguja: LS) Prensatelas A: 2a6 Prensatelas para zig-zag Motifs ddcoratifs extensibles _1_S: etecteur de - Kenmore 18221 | Owners Manual - Page 86
25 to 1.0 2to6 Automatic buttonhole foot • Preparation for sewing f (i) Groove _2_Pin Attach the automatic buttonhole foot R. Make sure the groove on the foot holder catches the pin on the foot when lowering the presser foot. 0--1 --2--3_4_5_6,5 _;_'°" o---.=... _2__" J -x J to$ ew -x 'J_ - Kenmore 18221 | Owners Manual - Page 87
El tamafio del ojal se toma automaticamente colocando el bot6n en la parte trasera del pie prensatelas para ojales automaticos. En el alojamiento del vos reglages. Utitisez une triplure sur tes tissus extensibles. [] Tirez le support du bouton i1_ vers l'arriere, et placez-y le bouton. Resserrez-le - Kenmore 18221 | Owners Manual - Page 88
and lower the needle into the fabric to the starting point. Then lower the automatic buttonhole foot. Sew slowly and stop the machine at the starting point when the buttonhole is completed. / /' / [] Remove the fabric and place a pin just before the bartack at each end, to prevent cutting - Kenmore 18221 | Owners Manual - Page 89
au point de depart. Puis, abaissez le pied a boutonniere automatique. Appuyez doucement sur la pedale de contr61e. Le resey teritement et arr_tez ta machine au point de depart, lorszue la bouturniese est terminie. [] Saque ta prenda y coloque un alfiler justo antes de cada presitta para prevenir un - Kenmore 18221 | Owners Manual - Page 90
If the button is extremely thick, make a test buttonhole. f If it is difficult to fit the button through the test buttonhole, lengthen the buttonhole by pulling the button holder back to create a gap _1_ . _1_Gap y jr- ..... -. 'J_ _\, \\ LJ i / i-_w to adjust buttonhole stitch density - Kenmore 18221 | Owners Manual - Page 91
epais, faites une boutonniere d'essai. S'il est difficite de passer te bouton dans t'ouverture, augmentez ta longueur de ta boutonniere en tirant sur le support du bouton & l'arriere du pied. _1_ #cart • Como ajustar la densidad de los ojales Destice el control de longitud de puntadas para ajustar - Kenmore 18221 | Owners Manual - Page 92
. _1_Spur _2_F' orks f [] / [] Depress the foot control gently, and sew the buttonhole. [] Each side of the buttonhole and the bartacks will be sewn over the cord. Remove the fabric from the machine, and cut the sewing threads only. _3_Needle thread (Top thread) _4_Bobbin thread (Bottom thread - Kenmore 18221 | Owners Manual - Page 93
Enganche el cord6n del tazo en la guia que se encuentra en la parte frontal del prensatelas [ R] para ojales automaticos para que queden tensos debajo les arrets seront cousus par-dessus te cordonnet. Retirez le tissu de la machine et coupez les ills de couture seulement. _3_Fit de t'aiguilte (Fil - Kenmore 18221 | Owners Manual - Page 94
lower the foot. J = i J J [] Sew the front bartack and left row, then stop. [] Click the buttonhole lever toward you. J [] Sew the back bartack and right row, then stop the -x machine at the starting point. To cut the opening and to reset for sewing the next buttonhole, refer to instructions - Kenmore 18221 | Owners Manual - Page 95
Ojal manual (Opcibn) Selector de puntada: _2_Anchura de ta puntada: hacia usted. [] Cousez te premier arret et ta rangee de gauche, puis arretez la machine quand la longueur est suffisante. [] Tirez le levier pour les boutonnieres vers vous. [] -vous aux instructions []et[_] de la page 81. 83 - Kenmore 18221 | Owners Manual - Page 96
consists of the illustrated parts. _1_Guide slot ,_2_Measure marking @ Catch @ Buttonhole guide plate @ Buttonhole templates _6_Guide block _77Two pins _.8_Hook $_ Lever _0_Gear _ Base plate _-2_Buttonhole foot / / / - Kenmore 18221 | Owners Manual - Page 97
mas precisos, use el accesorio para ojales, el cual consiste de las partes ilustradas. _i) Ranura guia _2_Marcas de medida _3_ Enganche _,_4P_l'aca de guidage _2_Marques de mesure _3_Cliquet (_ Plaque-guide de boutonniere _5_Gabarits de boutonniere _6_ Blue-guide _7_'Liges _8) Crochet ,_9_L' evier , - Kenmore 18221 | Owners Manual - Page 98
foot /1 X • __ 0--1 --2--3=4=5_6,5 WID]H STRETCH LENGTH NOTE: F Best results are obtained by using # 60 or # 80 lightweight thread. It is advisable to use a # 11 blue stretch needle when sewing foot holder. Pull the bobbin thread about 3" (7.0 cm) straight back toward the rear of the machine - Kenmore 18221 | Owners Manual - Page 99
pie prensatelas. Tire del hito de ta canitta unos 7.0 cm (3") hacia la parte trasera de ta maquina. Introduzca el garfio de ta placa base _6_en el dans te sens antihoraire. Retirez le support de pied. Tirez 7.0 cm (3") de fil de canette vers l'arriere de la machine. Inserez te crochet de ta plaque - Kenmore 18221 | Owners Manual - Page 100
the gear_7_of the base plate into the template guide slot (1_so that the guide block (2)fits into the center of the guide slot. J _1_N, eedle thread F -x (2_ Bobbin thread _3_Buttonhole foot @ Gear @ Slot @ Starting point Attach the buttonhole foot _3_.Adjust the position of the gear(4_ - Kenmore 18221 | Owners Manual - Page 101
pour un style et une dimension de boutonniere, engagez-le dans ta plaque guide _3_. Tirez le ctiquet _5_v, ers vous tout en faisant gtisser te gabarit . Faites monter le fit de canette & travers la fente de ta plaque guide en tournant le volant en sens antihoraire, tout en tenant te fit superieur. - Kenmore 18221 | Owners Manual - Page 102
does not feed smoothly from the start, increase the stitch length. Lower the buttonhole foot. Start sewing slowly. Allow the machine to do the work by itself, i.e., do not try to guide fabric. Stop sewing when the needle returns to its original position. To release the buttonhole base plate, pull - Kenmore 18221 | Owners Manual - Page 103
aguja al principio del ojal. Marquez soigneusement l'emptacement de ta boutonniere sur le tissu. En passant te tissu par-derriere ta machine, glissez-le entre la plaque guide et te pied & boutonniere comme sur t'ittustration. Alignez te trace _i_' et le repere central sur te pied & boutonniere _2_ - Kenmore 18221 | Owners Manual - Page 104
. Pull out the bulb from the socket. Insert the new bulb into the opening of the socket. Close the face cover. I I I , Cleaning the Bobbin Holder [] To insure that the machine operates at its best, you need to keep the bobbin area clean at all times. Turn off the power switch and unplug the - Kenmore 18221 | Owners Manual - Page 105
que ta maquina funcione en 6ptima condici6n, necesitara mantener siempre limpias tas partes esenciales. Limpie el polvo y la pelusa de ta area de ta de ta boTte & canette. La machine peut s'user ou cogner violemment quand un fil est coinc& €:teignez ta machine et debranchez-ta. Retirez te couvercte - Kenmore 18221 | Owners Manual - Page 106
Unplug the machine. Open the face cover and oil the two points, as shown, at least once a year. One or two drops of oil is sufficient. Remove excess oil, otherwise it may stain the fabric. In case the machine has not been used for a long period, oil it before sewing. Use quality sewing machine oil - Kenmore 18221 | Owners Manual - Page 107
Levante el portacanillas _ y saquelo. _2_ Portacanillas [] Soulevez le support de ta canette _2_et retirez-le. _2_Support de la canette [] Use aceite de buena calidad para maquinas de coser. Lubrification de la machine Ouvrez te couvercte frontal et tubrifiez les deux points indiques, au moins - Kenmore 18221 | Owners Manual - Page 108
. 5. The needle thread and the bobbin thread are not set properly under the presser foot at the start of sewing. 6. The threads were not drawn to . 2. The feed dog is not raised after "drop feed" sewing. 3. The feed dog is packed with lint. 1. The machine is not plugged in. 2. A thread is caught - Kenmore 18221 | Owners Manual - Page 109
Soluciones para problemas de funcionamiento Condicion Se rompe el hilo de la aguja. Causa Probable 1. El hito de la aguja no se ha enhebrado correctamente. 2. La tensi6n del hito de ta aguja es excesiva. 3. La aguja esta despuntada o doblada. 4. La aguja no esta bien cotocada. 5. Los hitos de ta - Kenmore 18221 | Owners Manual - Page 110
En cas de probl_me f Probleme Le fil de I'aiguille se casse. Cause 1. Le fit de t'aiguilte n' 11 Page 18 Page 18 Page 27 Page 11 La couture fronce. Le tissu n'avance pas regulierement. La machine ne fonetronre pas. Les motifs sont deform6s. Le fonctionnement est bruyant. 1. La tension du fit de t' - Kenmore 18221 | Owners Manual - Page 111
parts, accessories and owner's manuals that you need to do-it-yourself. For Sears Sears Parts & Repair Service Center 1-800-488-1222 (U.S.A.) 1-800-469-4663 (Canada) Call anytime, day or night www.sears.com www.sears.ca To purchase a protection agreement on a product serviced by Sears
-
 1
1 -
 2
2 -
 3
3 -
 4
4 -
 5
5 -
 6
6 -
 7
7 -
8
-
9
-
10
-
11
-
12
-
13
-
14
-
15
-
16
-
17
-
18
-
19
-
20
-
21
-
22
-
23
-
24
-
25
-
26
-
27
-
28
-
29
-
30
-
31
-
32
-
33
-
34
-
35
-
36
-
37
-
38
-
39
-
40
-
41
-
42
-
43
-
44
-
45
-
46
-
47
-
48
-
49
-
50
-
51
-
52
-
53
-
54
-
55
-
56
-
57
-
58
-
59
-
60
-
61
-
62
-
63
-
64
-
65
-
66
-
67
-
68
-
69
-
70
-
71
-
72
-
73
-
74
-
75
-
76
-
77
-
78
-
79
-
80
-
81
-
82
-
83
-
84
-
85
-
86
-
87
-
88
-
89
-
90
-
91
-
92
-
93
-
94
-
95
-
96
-
97
-
98
-
99
-
100
-
101
-
102
-
103
-
104
-
105
-
106
-
107
-
108
-
109
-
110
-
111
 |
 |
®
SEWING
MACHINE
Owner's
Manual
MAQUINA
DE
COSER
Manual de
Instrucciones
MACHINE
.ik
COUDRE
Manuel d'instructions
Model, Modelo, Modele 385.18221
I
0
505-800-226
Sears,
Roebuck
and Co.,
Hoffman
Estates,
IL 60179
U.S.A.
www.sears.com