Kenmore 18221 Owners Manual - Page 44
Stitch, Selector, how to select, stitches
 |
View all Kenmore 18221 manuals
Add to My Manuals
Save this manual to your list of manuals |
Page 44 highlights
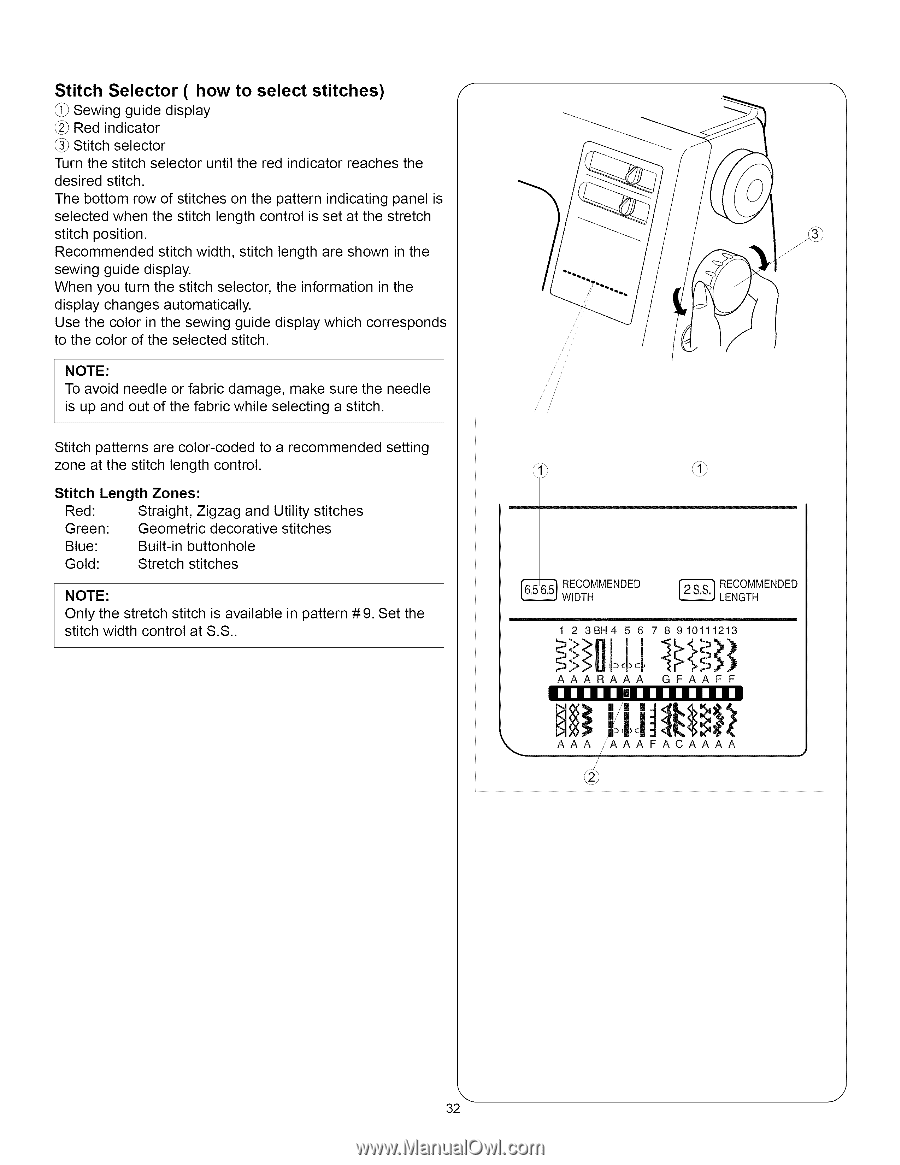
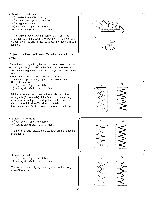
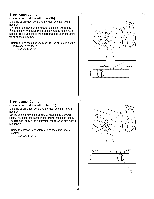
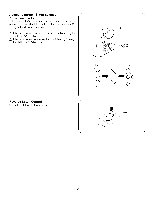
Stitch Selector ( how to select stitches) / _i_ Sewing guide display _2}Red indicator _3}Stitch selector Turn the stitch selector until the red indicator reaches the desired stitch. The bottom row of stitches on the pattern indicating panel is selected when the stitch length control is set at the stretch stitch position. Recommended stitch width, stitch length are shown in the sewing guide display. When you turn the stitch selector, the information in the display changes automatically. Use the color in the sewing guide display which corresponds to the color of the selected stitch. NOTE: To avoid needle or fabric damage, make sure the needle is up and out of the fabric while selecting a stitch. Stitch patterns are color-coded to a recommended setting zone at the stitch length control. Stitch Length Zones: Red: Straight, Zigzag and Utility stitches Green: Geometric decorative stitches Blue: Built-in buttonhole Gold: Stretch stitches NOTE: Only the stretch stitch is available in pattern #9. Set the stitch width control at S.S.. x J E _Z-.-:._'C-JI_WRlDETCHOMMENDED s_.RELECNOGMTMHENDED 1 2 3BH4 5 6 7 8 910111213 AAARAAA GFAAF F lllllI|llllllll IIIIII//'| | J at| (t K, _,_ ( AAA i'A ,/ // A A F AC AA A A J 32
-
 1
1 -
2
-
3
-
4
-
5
-
6
-
7
-
8
-
9
-
10
-
11
-
12
-
13
-
14
-
15
-
16
-
17
-
18
-
19
-
20
-
21
-
22
-
23
-
24
-
25
-
26
-
27
-
28
-
29
-
30
-
31
-
32
-
33
-
34
-
35
-
36
-
37
-
38
-
 39
39 -
 40
40 -
 41
41 -
 42
42 -
 43
43 -
 44
44 -
 45
45 -
 46
46 -
 47
47 -
 48
48 -
 49
49 -
50
-
51
-
52
-
53
-
54
-
55
-
56
-
57
-
58
-
59
-
60
-
61
-
62
-
63
-
64
-
65
-
66
-
67
-
68
-
69
-
70
-
71
-
72
-
73
-
74
-
75
-
76
-
77
-
78
-
79
-
80
-
81
-
82
-
83
-
84
-
85
-
86
-
87
-
88
-
89
-
90
-
91
-
92
-
93
-
94
-
95
-
96
-
97
-
98
-
99
-
100
-
101
-
102
-
103
-
104
-
105
-
106
-
107
-
108
-
109
-
110
-
111
 |
 |