Kenmore 18221 Owners Manual - Page 20
Pressure, Adjusting, Lever, Presser, Lifter, Thread, Cutter, Extension, Table - free arm
 |
View all Kenmore 18221 manuals
Add to My Manuals
Save this manual to your list of manuals |
Page 20 highlights
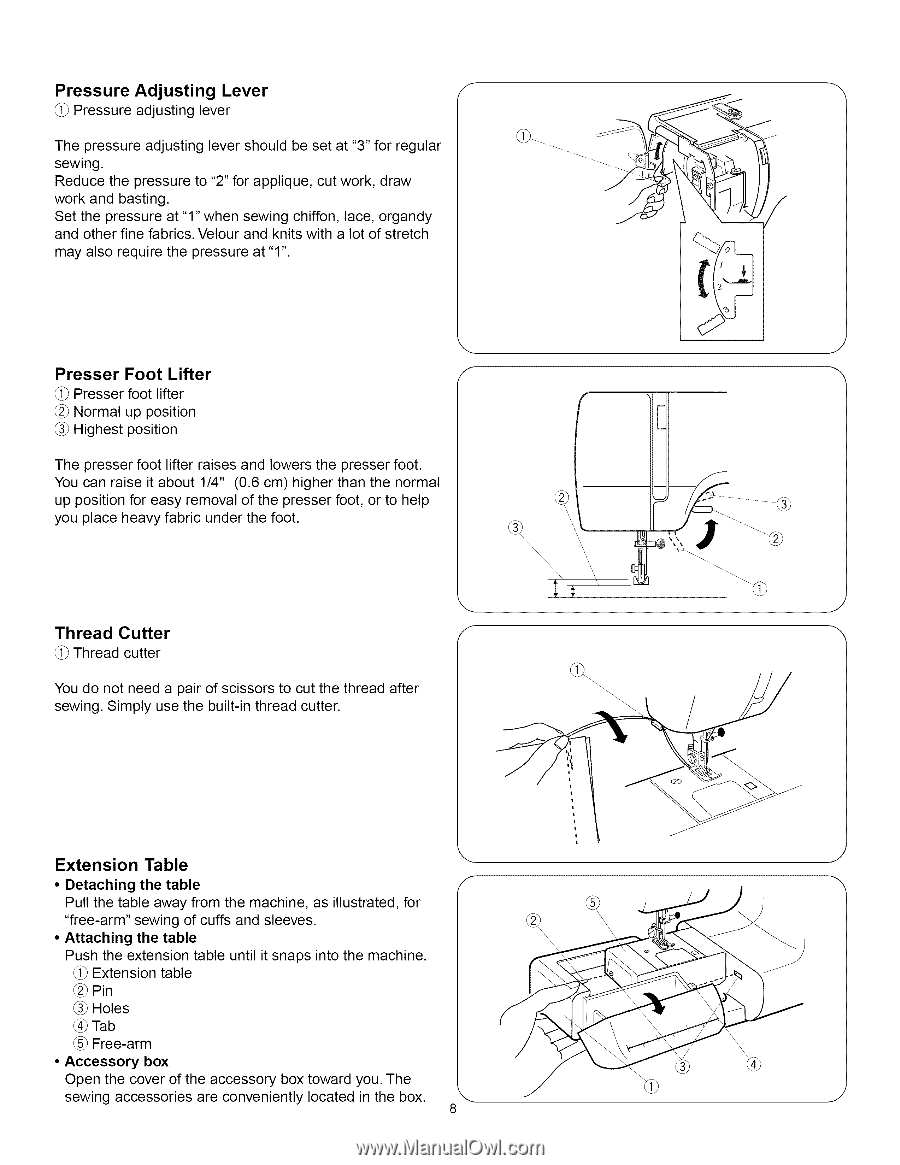
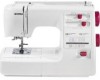
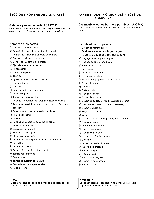
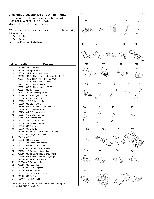
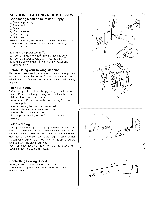
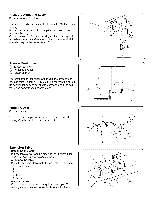
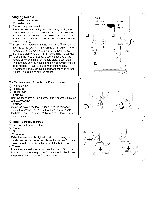
Pressure Adjusting Lever f _i_ Pressure adjusting lever The pressure adjusting lever should be set at "3" for regular sewing. Reduce the pressure to "2" for applique, cut work, draw work and basting. Set the pressure at "1" when sewing chiffon, lace, organdy and other fine fabrics. Velour and knits with a lot of stretch may also require the pressure at "1". J Presser Foot Lifter /- m _i_ Presser foot lifter _2_Normal up position _3_Highest position The presser foot lifter raises and lowers the presser foot. You can raise it about 1/4" (0.6 cm) higher than the normal up position for easy removal of the presser foot, or to help you place heavy fabric under the foot. \\\\ \\\\\\\\\ ", J Thread Cutter f -x _i_Thread cutter You do not need a pair of scissors to cut the thread after sewing. Simply use the built-in thread cutter. Extension Table • Detaching the table Pull the table away from the machine, as illustrated, for "free-arm" sewing of cuffs and sleeves. • Attaching the table Push the extension table until it snaps into the machine. _i_ Extension table _2_Pin _3_Holes _4_Tab _5_Free-arm • Accessory box Open the cover of the accessory box toward you. The sewing accessories are conveniently located in the box.
-
 1
1 -
2
-
3
-
4
-
5
-
6
-
7
-
8
-
9
-
10
-
11
-
12
-
13
-
14
-
 15
15 -
 16
16 -
 17
17 -
 18
18 -
 19
19 -
 20
20 -
 21
21 -
 22
22 -
 23
23 -
 24
24 -
 25
25 -
26
-
27
-
28
-
29
-
30
-
31
-
32
-
33
-
34
-
35
-
36
-
37
-
38
-
39
-
40
-
41
-
42
-
43
-
44
-
45
-
46
-
47
-
48
-
49
-
50
-
51
-
52
-
53
-
54
-
55
-
56
-
57
-
58
-
59
-
60
-
61
-
62
-
63
-
64
-
65
-
66
-
67
-
68
-
69
-
70
-
71
-
72
-
73
-
74
-
75
-
76
-
77
-
78
-
79
-
80
-
81
-
82
-
83
-
84
-
85
-
86
-
87
-
88
-
89
-
90
-
91
-
92
-
93
-
94
-
95
-
96
-
97
-
98
-
99
-
100
-
101
-
102
-
103
-
104
-
105
-
106
-
107
-
108
-
109
-
110
-
111
 |
 |