Kenmore 18221 Owners Manual - Page 34
in. The machine will not sew until
 |
View all Kenmore 18221 manuals
Add to My Manuals
Save this manual to your list of manuals |
Page 34 highlights
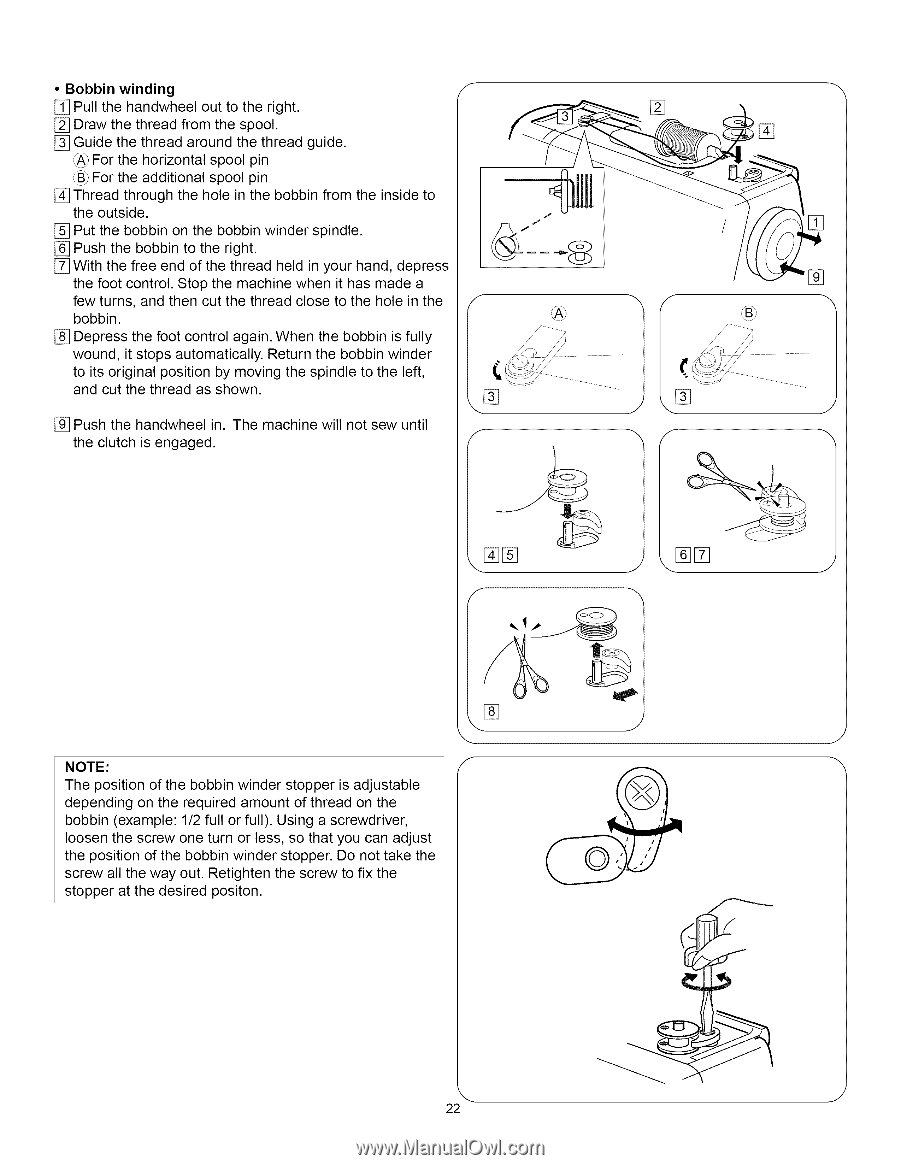
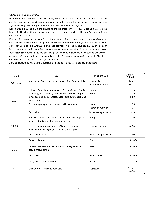
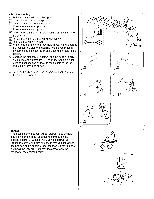
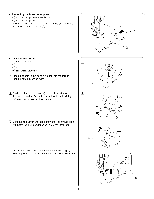
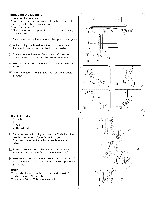
• Bobbin winding f [] Pull the handwheel out to the right. [] Draw the thread from the spool. [] Guide the thread around the thread guide. _A_For the horizontal spool pin _B_For the additional spool pin [] Thread through the hole in the bobbin from the inside to the outside. [] Put the bobbin on the bobbin winder spindle. [] Push the bobbin to the right. [] With the free end of the thread held in your hand, depress the foot control. Stop the machine when it has made a few turns, and then cut the thread close to the hole in the bobbin. [] Depress the foot control again. When the bobbin is fully wound, it stops automatically. Return the bobbin winder to its original position by moving the spindle to the left, and cut the thread as shown. [] Push the handwheel in. The machine will not sew until the clutch is engaged. [] °Z!........ [] ......... []% %% [] J NOTE: / The position of the bobbin winder stopper is adjustable depending on the required amount of thread on the bobbin (example: 1/2 full or full). Using a screwdriver, loosen the screw one turn or less, so that you can adjust the position of the bobbin winder stopper. Do not take the screw all the way out. Retighten the screw to fix the stopper at the desired positon. _ J 22
-
 1
1 -
2
-
3
-
4
-
5
-
6
-
7
-
8
-
9
-
10
-
11
-
12
-
13
-
14
-
15
-
16
-
17
-
18
-
19
-
20
-
21
-
22
-
23
-
24
-
25
-
26
-
27
-
28
-
 29
29 -
 30
30 -
 31
31 -
 32
32 -
 33
33 -
 34
34 -
 35
35 -
 36
36 -
 37
37 -
 38
38 -
 39
39 -
40
-
41
-
42
-
43
-
44
-
45
-
46
-
47
-
48
-
49
-
50
-
51
-
52
-
53
-
54
-
55
-
56
-
57
-
58
-
59
-
60
-
61
-
62
-
63
-
64
-
65
-
66
-
67
-
68
-
69
-
70
-
71
-
72
-
73
-
74
-
75
-
76
-
77
-
78
-
79
-
80
-
81
-
82
-
83
-
84
-
85
-
86
-
87
-
88
-
89
-
90
-
91
-
92
-
93
-
94
-
95
-
96
-
97
-
98
-
99
-
100
-
101
-
102
-
103
-
104
-
105
-
106
-
107
-
108
-
109
-
110
-
111
 |
 |