Xerox 6400XF WorkCentre 6400 System Administrator Guide - Page 60
Manually Configuring Control Panel Authentication, Device Instructional Blocking Window
 |
UPC - 095205759334
View all Xerox 6400XF manuals
Add to My Manuals
Save this manual to your list of manuals |
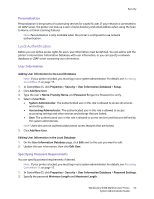
Page 60 highlights
Security Manually Configuring Control Panel Authentication If you are using a card reader system, and you want to allow users to access the printer when they have lost or misplaced their identification card, you can configure the printer to allow them to log in at the control panel. In this case, the remote server still has the responsibility for authenticating the user. Before you begin, ensure that the Xerox Secure Access authentication server has been configured to point to the printer. 1. At the Authentication Configuration screen click the Configure button next to Device User Interface Authentication Xerox Secure Access. 2. If the Authentication Solution has been configured correctly the Authentication Solution server address information displays. If the information is incomplete or incorrect, click Manually Configure. 3. Under Server Communication, select the address type and port number. Options are IPv4 Address or Host name. 4. Type the appropriately formatted address and port number. 5. Type the details in the Path field. Note: Type the HTTP path public/dce/xeroxvalidation/convauth and port number of 1824 to facilitate communication. 6. If you are using Network Accounting and you want the printer to automatically obtain accounting information for the user from the Authentication server when the user authenticates, select Automatically apply Accounting Codes from the server. This reduces the number of screens that the user sees when they log in at the control panel. If you want the user to provide accounting data manually at the control panel, select User must manually enter accounting codes at the device. 7. In the Device Instructional Blocking Window area, type text in the Window Title field to define a title that will display on the printer's touch screen. 8. Type text in the Instructional Text field to define a prompt that will show on the printer's touch screen to tell the user what they need to do to access the printer. Note: If the Title and Prompt have been configured on the Xerox Partner authentication server, then any instructional text that you type will be ignored. 9. Click Save. 60 WorkCentre 6400 Multifunction Printer System Administrator Guide
-
 1
1 -
2
-
3
-
4
-
5
-
6
-
7
-
8
-
9
-
10
-
11
-
12
-
13
-
14
-
15
-
16
-
17
-
18
-
19
-
20
-
21
-
22
-
23
-
24
-
25
-
26
-
27
-
28
-
29
-
30
-
31
-
32
-
33
-
34
-
35
-
36
-
37
-
38
-
39
-
40
-
41
-
42
-
43
-
44
-
45
-
46
-
47
-
48
-
49
-
50
-
51
-
52
-
53
-
54
-
 55
55 -
 56
56 -
 57
57 -
 58
58 -
 59
59 -
 60
60 -
 61
61 -
 62
62 -
 63
63 -
 64
64 -
 65
65 -
66
-
67
-
68
-
69
-
70
-
71
-
72
-
73
-
74
-
75
-
76
-
77
-
78
-
79
-
80
-
81
-
82
-
83
-
84
-
85
-
86
-
87
-
88
-
89
-
90
-
91
-
92
-
93
-
94
-
95
-
96
-
97
-
98
-
99
-
100
-
101
-
102
-
103
-
104
-
105
-
106
-
107
-
108
-
109
-
110
-
111
-
112
-
113
-
114
-
115
-
116
-
117
-
118
-
119
-
120
-
121
-
122
-
123
-
124
-
125
-
126
-
127
-
128
-
129
-
130
-
131
-
132
-
133
-
134
-
135
-
136
-
137
-
138
-
139
-
140
-
141
-
142
-
143
-
144
-
145
-
146
-
147
-
148
-
149
-
150
-
151
-
152
-
153
-
154
-
155
-
156
-
157
-
158
-
159
-
160
-
161
-
162
-
163
-
164
-
165
-
166
-
167
-
168
-
169
-
170
-
171
-
172
-
173
-
174
-
175
-
176
-
177
-
178
-
179
-
180
-
181
-
182
-
183
-
184
 |
 |
