Canon PIXMA MP500 MP500 User's Guide - Page 62
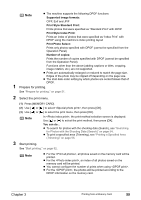
Printing by Using the Photo Index Sheet
 |
View all Canon PIXMA MP500 manuals
Add to My Manuals
Save this manual to your list of manuals |
Page 62 highlights
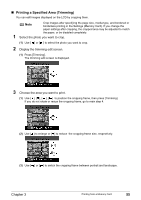
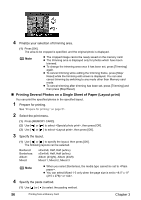
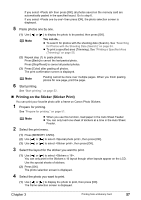
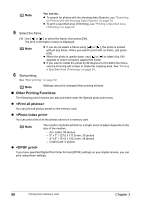
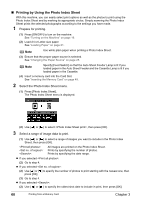
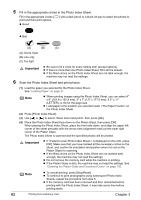
„ Printing by Using the Photo Index Sheet With this machine, you can easily select print options as well as the photos to print using the Photo Index Sheet and by marking its appropriate circles. Simply scanning the Photo Index Sheet prints the selected photographs according to the settings you have made. 1 Prepare for printing. (1) Press [ON/OFF] to turn on the machine. See "Turning on the Machine" on page 19. (2) Load A4 or Letter-size paper. See "Loading Paper" on page 21. Note Use white plain paper when printing a Photo Index Sheet. (3) Ensure that the proper paper source is selected. See "Changing the Paper Source" on page 25. Note Specify [Feed Switch] so that the Auto Sheet Feeder Lamp is lit if you loaded paper in the Auto Sheet Feeder and the Cassette Lamp is lit if you loaded paper in the Cassette. (4) Insert a memory card into the Card Slot. See "Inserting the Memory Card" on page 49. 2 Select the Photo Index Sheet menu. (1) Press [Photo Index Sheet]. The Photo Index Sheet menu is displayed. (2) Use [ ] or [ ] to select , then press [OK]. 3 Select a range of image data to print. (1) Use [ ] or [ ] to select a range of images you want to include in the Photo Index Sheet, then press [OK]. : : : All images are printed on the Photo Index Sheet. Prints by specifying the number of photos. Prints by specifying the date range. z If you selected : (2) Go to step 4. z If you selected : (2) Use [ ] or [ ] to specify the number of photos to print starting with the newest one, then press [OK]. (3) Go to step 4. z If you selected : (2) Use [ ] or [ ] to specify the oldest shot date to include in print, then press [OK]. 60 Printing from a Memory Card Chapter 3
-
 1
1 -
2
-
3
-
4
-
5
-
6
-
7
-
8
-
9
-
10
-
11
-
12
-
13
-
14
-
15
-
16
-
17
-
18
-
19
-
20
-
21
-
22
-
23
-
24
-
25
-
26
-
27
-
28
-
29
-
30
-
31
-
32
-
33
-
34
-
35
-
36
-
37
-
38
-
39
-
40
-
41
-
42
-
43
-
44
-
45
-
46
-
47
-
48
-
49
-
50
-
51
-
52
-
53
-
54
-
55
-
56
-
 57
57 -
 58
58 -
 59
59 -
 60
60 -
 61
61 -
 62
62 -
 63
63 -
 64
64 -
 65
65 -
 66
66 -
 67
67 -
68
-
69
-
70
-
71
-
72
-
73
-
74
-
75
-
76
-
77
-
78
-
79
-
80
-
81
-
82
-
83
-
84
-
85
-
86
-
87
-
88
-
89
-
90
-
91
-
92
-
93
-
94
-
95
-
96
-
97
-
98
-
99
-
100
-
101
-
102
-
103
-
104
-
105
-
106
-
107
-
108
-
109
-
110
-
111
-
112
-
113
-
114
-
115
-
116
-
117
-
118
-
119
-
120
-
121
-
122
-
123
-
124
-
125
-
126
-
127
-
128
-
129
-
130
-
131
-
132
-
133
-
134
-
135
-
136
-
137
-
138
-
139
-
140
-
141
-
142
-
143
-
144
-
145
-
146
-
147
-
148
-
149
-
150
-
151
-
152
-
153
-
154
-
155
-
156
 |
 |
