Dell PowerConnect J-SRX100 Hardware Guide - Page 60
Installing the J-SRX100 Services Gateway on a Desk
 |
View all Dell PowerConnect J-SRX100 manuals
Add to My Manuals
Save this manual to your list of manuals |
Page 60 highlights
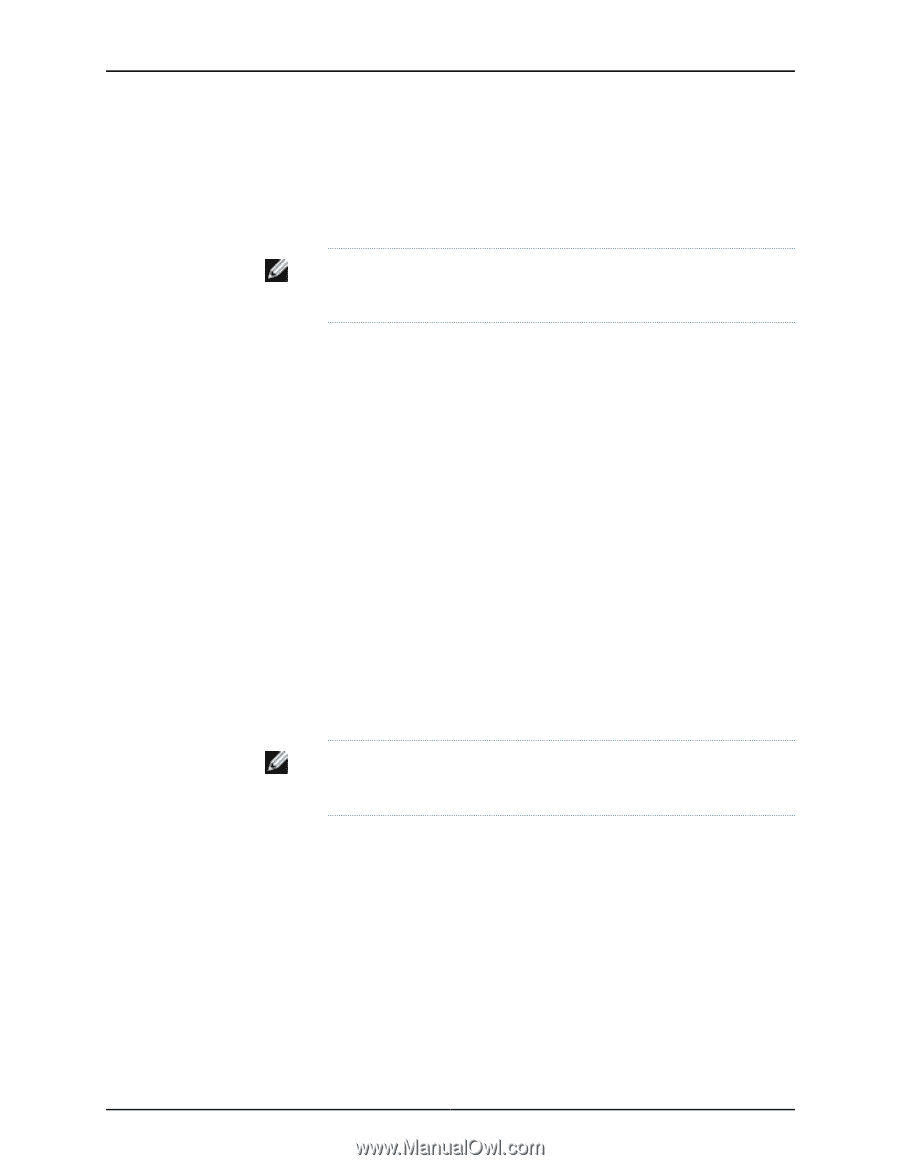
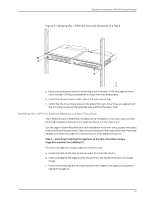
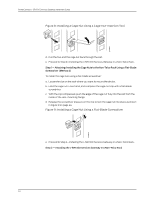
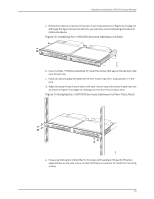
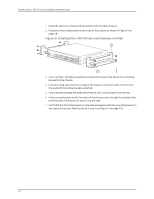
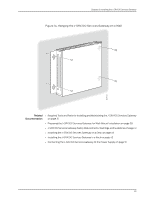
PowerConnect J-SRX100 Services Gateway Hardware Guide f. Install the second set of 10-32 screws with washers in each side of the rack-mount tray. g. Verify that the mounting screws on one side of the rack-mount tray are aligned with the mounting screws on the opposite side and that the tray is level. NOTE: The rack-mounting kit is not shipped with the device and must be ordered separately. Related • Required Tools and Parts for Installing and Maintaining the J-SRX100 Services Gateway Documentation on page 31 • Preparing the J-SRX100 Services Gateway for Rack-Mount Installation on page 37 • J-SRX100 Services Gateway Rack Requirements on page 23 • Connecting the J-SRX100 Services Gateway to the Power Supply on page 51 • Clearance Requirements for Airflow and Hardware Maintenance of the J-SRX100 Services Gateway on page 24 • J-SRX100 Services Gateway Safety Requirements, Warnings, and Guidelines on page 41 • Installing the J-SRX100 Services Gateway on a Desk on page 46 • Installing the J-SRX100 Services Gateway on a Wall on page 47 Installing the J-SRX100 Services Gateway on a Desk You can install the J-SRX100 Services Gateway on a desk, table, or other level surface. The device is shipped with the rubber feet attached. The rubber feet are necessary to stabilize the device on the desk. You can install the device in a horizontal or vertical position. NOTE: The desk-mounting kit is not shipped with the device and must be ordered separately. Horizontal Desk Mounting The horizontal position is the standard installation position and does not require the vertical installation kit. To install the device in a horizontal position: 1. Make sure that the rubber feet are attached to the chassis. 2. Place the device on a desk with the logo facing up. Vertical Desk Mounting 46
-
 1
1 -
2
-
3
-
4
-
5
-
6
-
7
-
8
-
9
-
10
-
11
-
12
-
13
-
14
-
15
-
16
-
17
-
18
-
19
-
20
-
21
-
22
-
23
-
24
-
25
-
26
-
27
-
28
-
29
-
30
-
31
-
32
-
33
-
34
-
35
-
36
-
37
-
38
-
39
-
40
-
41
-
42
-
43
-
44
-
45
-
46
-
47
-
48
-
49
-
50
-
51
-
52
-
53
-
54
-
 55
55 -
 56
56 -
 57
57 -
 58
58 -
 59
59 -
 60
60 -
 61
61 -
 62
62 -
 63
63 -
 64
64 -
 65
65 -
66
-
67
-
68
-
69
-
70
-
71
-
72
-
73
-
74
-
75
-
76
-
77
-
78
-
79
-
80
-
81
-
82
-
83
-
84
-
85
-
86
-
87
-
88
-
89
-
90
-
91
-
92
-
93
-
94
-
95
-
96
-
97
-
98
-
99
-
100
-
101
-
102
-
103
-
104
-
105
-
106
-
107
-
108
-
109
-
110
-
111
-
112
-
113
-
114
-
115
-
116
-
117
-
118
-
119
-
120
-
121
-
122
-
123
-
124
-
125
-
126
-
127
-
128
-
129
-
130
-
131
-
132
-
133
-
134
-
135
-
136
-
137
-
138
-
139
-
140
-
141
-
142
-
143
-
144
-
145
-
146
-
147
-
148
-
149
-
150
-
151
-
152
-
153
-
154
-
155
-
156
-
157
-
158
 |
 |