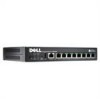
Dell PowerConnect J-SRX100 Hardware Guide - Page 61
Installing the J-SRX100 Services Gateway on a Wall
 |
View all Dell PowerConnect J-SRX100 manuals
Add to My Manuals
Save this manual to your list of manuals |
Page 61 highlights
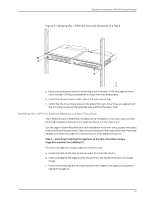
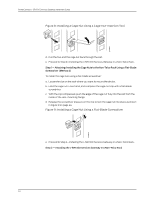
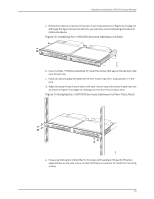
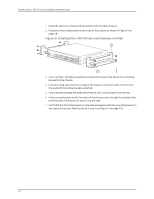
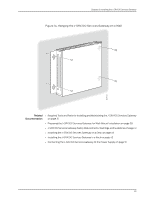
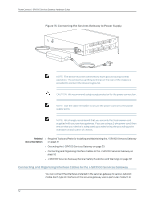
J-SRX100 Chapter 8: Installing the J-SRX100 Services Gateway The vertical position requires the vertical installation kit, which consists of a vertical installation stand. To install the device in a vertical position: 1. Place the device on a flat and level surface with the logo facing up, as shown in Figure 12 on page 47. Figure 12: Installing the J-SRX100 Services Gateway on a Desk J-SRX100 2. Attach the vertical stand to the right side of the chassis as shown in Figure 12 on page 47. 3. Place the chassis vertically on the desk with the stand resting on the desk. Related • Required Tools and Parts for Installing and Maintaining the J-SRX100 Services Gateway Documentation on page 31 • Preparing the J-SRX100 Services Gateway for Desk-Mount Installation on page 38 • J-SRX100 Services Gateway Safety Requirements, Warnings, and Guidelines on page 41 • Installing the J-SRX100 Services Gateway in a Rack on page 42 • Installing the J-SRX100 Services Gateway on a Wall on page 47 Installing the J-SRX100 Services Gateway on a Wall You can install the J-SRX100 Services Gateway on a wall. The device is shipped with the rubber feet attached. The rubber feet help stabilize the device on the wall and enhance airflow. NOTE: The wall-mounting kit is not shipped with the device and must be ordered separately. To install the device on a wall: 47
-
 1
1 -
2
-
3
-
4
-
5
-
6
-
7
-
8
-
9
-
10
-
11
-
12
-
13
-
14
-
15
-
16
-
17
-
18
-
19
-
20
-
21
-
22
-
23
-
24
-
25
-
26
-
27
-
28
-
29
-
30
-
31
-
32
-
33
-
34
-
35
-
36
-
37
-
38
-
39
-
40
-
41
-
42
-
43
-
44
-
45
-
46
-
47
-
48
-
49
-
50
-
51
-
52
-
53
-
54
-
55
-
 56
56 -
 57
57 -
 58
58 -
 59
59 -
 60
60 -
 61
61 -
 62
62 -
 63
63 -
 64
64 -
 65
65 -
 66
66 -
67
-
68
-
69
-
70
-
71
-
72
-
73
-
74
-
75
-
76
-
77
-
78
-
79
-
80
-
81
-
82
-
83
-
84
-
85
-
86
-
87
-
88
-
89
-
90
-
91
-
92
-
93
-
94
-
95
-
96
-
97
-
98
-
99
-
100
-
101
-
102
-
103
-
104
-
105
-
106
-
107
-
108
-
109
-
110
-
111
-
112
-
113
-
114
-
115
-
116
-
117
-
118
-
119
-
120
-
121
-
122
-
123
-
124
-
125
-
126
-
127
-
128
-
129
-
130
-
131
-
132
-
133
-
134
-
135
-
136
-
137
-
138
-
139
-
140
-
141
-
142
-
143
-
144
-
145
-
146
-
147
-
148
-
149
-
150
-
151
-
152
-
153
-
154
-
155
-
156
-
157
-
158
 |
 |
