Dell PowerConnect J-SRX100 Hardware Guide - Page 91
Performing Initial Software Configuration on the J-SRX100 Services Gateway Using the J-Web Interface
 |
View all Dell PowerConnect J-SRX100 manuals
Add to My Manuals
Save this manual to your list of manuals |
Page 91 highlights
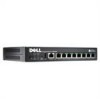
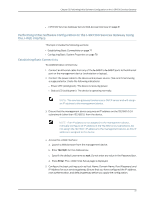
Chapter 13: Performing Initial Software Configuration on the J-SRX100 Services Gateway • J-SRX100 Services Gateway Secure Web Access Overview on page 81 Performing Initial Software Configuration on the J-SRX100 Services Gateway Using the J-Web Interface This topic includes the following sections: • Establishing Basic Connectivity on page 77 • Configuring Basic System Properties on page 78 Establishing Basic Connectivity To establish basic connectivity: 1. Connect an Ethernet cable from any of the fe-0/0/1 to fe-0/0/7 ports to the Ethernet port on the management device (workstation or laptop). 2. Connect the power cable to the device and a power source. (We recommend using a surge protector.) Note the following indications: • Power LED (solid green): The device is receiving power. • Status LED (solid green): The device is operating normally. NOTE: The services gateway functions as a DHCP server and will assign an IP address to the management device. 3. Ensure that the management device acquires an IP address on the 192.168.1.0/24 subnetwork (other than 192.168.1.1) from the device. NOTE: If an IP address is not assigned to the management device, manually configure an IP address in the 192.168.1.0/24 subnetwork. Do not assign the 192.168.1.1 IP address to the management device, as this IP address is assigned to the device. 4. Access the J-Web interface: a. Launch a Web browser from the management device. b. Enter 192.168.1.1 in the Address box. c. Specify the default username as root. Do not enter any value in the Password box. d. Press Enter. The J-Web Initial Setup page is displayed. 5. Configure the basic settings such as Host Name, Domain Name, Root Password, and IP Address for your services gateway. Ensure that you have configured the IP address, root authentication, and default gateway before you apply the configuration. 77
-
 1
1 -
2
-
3
-
4
-
5
-
6
-
7
-
8
-
9
-
10
-
11
-
12
-
13
-
14
-
15
-
16
-
17
-
18
-
19
-
20
-
21
-
22
-
23
-
24
-
25
-
26
-
27
-
28
-
29
-
30
-
31
-
32
-
33
-
34
-
35
-
36
-
37
-
38
-
39
-
40
-
41
-
42
-
43
-
44
-
45
-
46
-
47
-
48
-
49
-
50
-
51
-
52
-
53
-
54
-
55
-
56
-
57
-
58
-
59
-
60
-
61
-
62
-
63
-
64
-
65
-
66
-
67
-
68
-
69
-
70
-
71
-
72
-
73
-
74
-
75
-
76
-
77
-
78
-
79
-
80
-
81
-
82
-
83
-
84
-
85
-
 86
86 -
 87
87 -
 88
88 -
 89
89 -
 90
90 -
 91
91 -
 92
92 -
 93
93 -
 94
94 -
 95
95 -
 96
96 -
97
-
98
-
99
-
100
-
101
-
102
-
103
-
104
-
105
-
106
-
107
-
108
-
109
-
110
-
111
-
112
-
113
-
114
-
115
-
116
-
117
-
118
-
119
-
120
-
121
-
122
-
123
-
124
-
125
-
126
-
127
-
128
-
129
-
130
-
131
-
132
-
133
-
134
-
135
-
136
-
137
-
138
-
139
-
140
-
141
-
142
-
143
-
144
-
145
-
146
-
147
-
148
-
149
-
150
-
151
-
152
-
153
-
154
-
155
-
156
-
157
-
158
 |
 |