Dell PowerConnect J-SRX100 Hardware Guide - Page 69
Powering On and Powering Off the J-SRX100 Services Gateway
 |
View all Dell PowerConnect J-SRX100 manuals
Add to My Manuals
Save this manual to your list of manuals |
Page 69 highlights
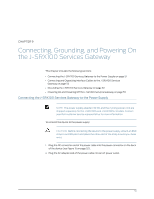
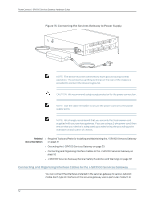
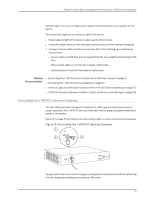
Chapter 9: Connecting, Grounding, and Powering On the J-SRX100 Services Gateway Related Documentation • Connecting the J-SRX100 Services Gateway to the Power Supply on page 51 • Connecting and Organizing Interface Cables to the J-SRX100 Services Gateway on page 52 • J-SRX100 Services Gateway General Safety Guidelines and Warnings on page 101 • Powering On and Powering Off the J-SRX100 Services Gateway on page 55 • Using the Reset Config Button on the J-SRX100 Services Gateway on page 93 • Changing the Reset Config Button Behavior on the J-SRX100 Services Gateway on page 94 Powering On and Powering Off the J-SRX100 Services Gateway This topic describes the following procedures: • Powering On the J-SRX100 Services Gateway on page 55 • Powering Off the J-SRX100 Services Gateway on page 55 Powering On the J-SRX100 Services Gateway To power on the services gateway: 1. Ensure that you have connected the power supply to the device. 2. Insert the plug of the power supply adapter into an AC power source receptacle. 3. Turn on the power to the AC power receptacle. The device starts automatically as the power supply completes its startup sequence. The Power LED lights during startup and remains on steadily when the device is operating normally. NOTE: After the power supply is turned on, it can take up to 60 seconds for status indicators-such as the Status and Power LEDs-to show that the power supply is functioning normally. Ignore error indicators that appear during the first 60 seconds. NOTE: If the system is completely powered off when you turn on the power supply, the device starts as the power supply completes its startup sequence. If the device finishes starting and you need to power off the system again, first issue the CLI request system power-off command. Powering Off the J-SRX100 Services Gateway You can power off the services gateway in one of the following ways: 55
-
 1
1 -
2
-
3
-
4
-
5
-
6
-
7
-
8
-
9
-
10
-
11
-
12
-
13
-
14
-
15
-
16
-
17
-
18
-
19
-
20
-
21
-
22
-
23
-
24
-
25
-
26
-
27
-
28
-
29
-
30
-
31
-
32
-
33
-
34
-
35
-
36
-
37
-
38
-
39
-
40
-
41
-
42
-
43
-
44
-
45
-
46
-
47
-
48
-
49
-
50
-
51
-
52
-
53
-
54
-
55
-
56
-
57
-
58
-
59
-
60
-
61
-
62
-
63
-
 64
64 -
 65
65 -
 66
66 -
 67
67 -
 68
68 -
 69
69 -
 70
70 -
 71
71 -
 72
72 -
 73
73 -
 74
74 -
75
-
76
-
77
-
78
-
79
-
80
-
81
-
82
-
83
-
84
-
85
-
86
-
87
-
88
-
89
-
90
-
91
-
92
-
93
-
94
-
95
-
96
-
97
-
98
-
99
-
100
-
101
-
102
-
103
-
104
-
105
-
106
-
107
-
108
-
109
-
110
-
111
-
112
-
113
-
114
-
115
-
116
-
117
-
118
-
119
-
120
-
121
-
122
-
123
-
124
-
125
-
126
-
127
-
128
-
129
-
130
-
131
-
132
-
133
-
134
-
135
-
136
-
137
-
138
-
139
-
140
-
141
-
142
-
143
-
144
-
145
-
146
-
147
-
148
-
149
-
150
-
151
-
152
-
153
-
154
-
155
-
156
-
157
-
158
 |
 |