HP 4650 HP Color LaserJet 4650 - Software Technical Reference (External) - Page 131
User Name, Job Name, PIN, Using Job Storage features when printing
 |
UPC - 829160046426
View all HP 4650 manuals
Add to My Manuals
Save this manual to your list of manuals |
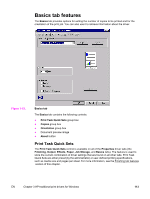
Page 131 highlights
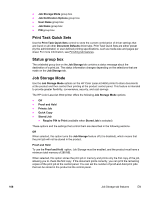
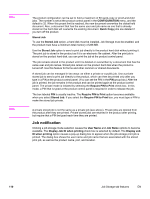
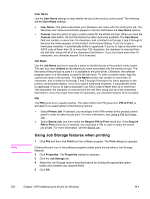
Note User Name Use the User Name settings to help identify the job at the product control panel. The following are the User Name settings: ● User Name. This option associates your Windows user name with the stored print job. The Windows user name automatically appears in the text field below the User Name options. ● Custom. Use this option to type a custom name for the stored print job. When you click the Custom radio button, the text field below the option becomes available. The User Name field can contain no more than 16 characters, and is limited to A through Z and 0 through 9 because the name appears on the product control-panel display. If you try to type a lowercase character, it automatically shifts to uppercase. If you try to type a character in an ASCII code of fewer than 32 or more than 126 characters, the character is removed from the edit field, along with all of the characters that follow it. If you try to type more than 16 characters, any character beyond 16 is truncated. Job Name Use the Job Name text box to specify a name to identify the job at the product control panel. This text box uses Untitled as the default job name associated with the stored print job. The file name of the print job is used if it is available to the print driver. Otherwise, the software program name or a time stamp is used for the job name. To enter a custom name, type the custom job name in the text box. The Job Name text box can contain no more than 16 characters, and is limited to A through Z and 0 through 9 because the name appears on the product control-panel display. If you try to type a lowercase character, it automatically shifts to uppercase. If you try to type a character in an ASCII code of fewer than 32 or more than 126 characters, the character is removed from the edit field, along with all of the characters that follow it. If you try to type more than 16 characters, any character beyond 16 is truncated. PIN The PIN group box is usually inactive. The option within the PIN group box, PIN to Print, is activated if you select either of the following options: ● Select Private Job. If selected, you must type in the PIN number at the product control panel in order to make the job print. For more information, see Using a PIN for Private Job . ● Select Stored Job, and then select the Require PIN to Print check box. If the Require PIN to Print check box is selected, you must type a PIN in order to make the stored job private. For more information, see the Stored Job. Using Job Storage features when printing 1 Click File and then click Print from the software program. The Print dialog box appears. Clicking the print icon in the software program toolbar prints the job without Job Storage features. 2 Click Properties. The Properties dialog box appears. 3 Click the Job Storage tab. 4 Select the Job Storage options described above by clicking the appropriate option button and complete any required fields. 5 Click OK. EN Chapter 3 HP traditional print drivers for Windows 111
-
 1
1 -
2
-
3
-
4
-
5
-
6
-
7
-
8
-
9
-
10
-
11
-
12
-
13
-
14
-
15
-
16
-
17
-
18
-
19
-
20
-
21
-
22
-
23
-
24
-
25
-
26
-
27
-
28
-
29
-
30
-
31
-
32
-
33
-
34
-
35
-
36
-
37
-
38
-
39
-
40
-
41
-
42
-
43
-
44
-
45
-
46
-
47
-
48
-
49
-
50
-
51
-
52
-
53
-
54
-
55
-
56
-
57
-
58
-
59
-
60
-
61
-
62
-
63
-
64
-
65
-
66
-
67
-
68
-
69
-
70
-
71
-
72
-
73
-
74
-
75
-
76
-
77
-
78
-
79
-
80
-
81
-
82
-
83
-
84
-
85
-
86
-
87
-
88
-
89
-
90
-
91
-
92
-
93
-
94
-
95
-
96
-
97
-
98
-
99
-
100
-
101
-
102
-
103
-
104
-
105
-
106
-
107
-
108
-
109
-
110
-
111
-
112
-
113
-
114
-
115
-
116
-
117
-
118
-
119
-
120
-
121
-
122
-
123
-
124
-
125
-
 126
126 -
 127
127 -
 128
128 -
 129
129 -
 130
130 -
 131
131 -
 132
132 -
 133
133 -
 134
134 -
 135
135 -
 136
136 -
137
-
138
-
139
-
140
-
141
-
142
-
143
-
144
-
145
-
146
-
147
-
148
-
149
-
150
-
151
-
152
-
153
-
154
-
155
-
156
-
157
-
158
-
159
-
160
-
161
-
162
-
163
-
164
-
165
-
166
-
167
-
168
-
169
-
170
-
171
-
172
-
173
-
174
-
175
-
176
-
177
-
178
-
179
-
180
-
181
-
182
-
183
-
184
-
185
-
186
-
187
-
188
-
189
-
190
-
191
-
192
-
193
-
194
-
195
-
196
-
197
-
198
-
199
-
200
-
201
-
202
-
203
-
204
-
205
-
206
-
207
-
208
-
209
-
210
-
211
-
212
-
213
-
214
-
215
-
216
-
217
-
218
-
219
-
220
-
221
-
222
-
223
-
224
-
225
-
226
-
227
-
228
-
229
-
230
-
231
-
232
-
233
-
234
-
235
-
236
-
237
-
238
-
239
-
240
-
241
-
242
-
243
-
244
-
245
-
246
-
247
-
248
-
249
-
250
-
251
-
252
-
253
-
254
-
255
-
256
-
257
-
258
-
259
-
260
-
261
-
262
-
263
-
264
-
265
-
266
-
267
-
268
-
269
-
270
-
271
-
272
-
273
-
274
-
275
-
276
-
277
-
278
-
279
-
280
-
281
-
282
-
283
-
284
-
285
-
286
-
287
-
288
-
289
-
290
-
291
-
292
-
293
-
294
-
295
-
296
-
297
-
298
-
299
-
300
-
301
-
302
-
303
-
304
-
305
-
306
-
307
-
308
-
309
 |
 |