HP d640 HP D640 High-Volume Printer - User Manual (Printer and Accessories), C - Page 51
To make configuring the Imageshift and Customsize settings easier, set the units
 |
View all HP d640 manuals
Add to My Manuals
Save this manual to your list of manuals |
Page 51 highlights
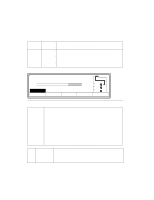
Control Panel Configuration Menu Settings Customsize.height = 5155 (min) 12240 12240(max) This setting specifies the width dimensions of custom paper. The table below lists the minimum and maximum custom paper height in units, an incremental adjustment. The factory default unit scale is 1/720", but you can reset the unit size with the unit setting (see "Unit" on page 2-17). customsize.height Minimum Maximum inch milli meter 1/100" Unit Size Setting 1/200" 1/300" 1/600" 1/720" MM 7.17 17.0 182 431.8 716 1700 1432 3400 2148 5100 4296 5155 182 10,200 12,240 432 Unit Dpi 1/100" 1/200" 1/300" 1/600" 1/720" MM 200 dpi 300 dpi =600 dpi OFF =ON Clip =ON Jamrecovery OFF =OFF ON Economode Sets the unit values used in customsize and imageshift. Sets the print resolution for graphic images in dots per inch (dpi). The D640 is able to print an image across the entire surface of the physical paper. The image is clipped to prevent an image from printing within 1/6th inch of any paper edge. This ensures optimum print quality for the printed image. If you don't want this automatic clipping, you can set the printer to Clip = OFF. Even with Clip = OFF, the image will only print to the edge of the paper if your print job contains the appropriate commands. See "Setting Up Edge-to-Edge Printing" on page 6-23 for more information. When a paper jam occurs, the printer reprints all pages that did not completely exit the printer's paper path. If you do not want pages to automatically reprint after a paper jam is cleared, set Jamrecovery = OFF. This setting specifies economy mode. When it is used for printing drafts, you can save up to 30 percent of your toner consumption. In economy mode solid black areas are filled in with a hatched pattern. When economode is ON, the economode mark (e) appears in the Control Panel, as shown in Figure 2-15. Tip To make configuring the Imageshift and Customsize settings easier, set the units to "MM" and make a coarse setting. Then, use a finer unit setting to fine tune the adjustment. Control Panel 2-17
-
 1
1 -
2
-
3
-
4
-
5
-
6
-
7
-
8
-
9
-
10
-
11
-
12
-
13
-
14
-
15
-
16
-
17
-
18
-
19
-
20
-
21
-
22
-
23
-
24
-
25
-
26
-
27
-
28
-
29
-
30
-
31
-
32
-
33
-
34
-
35
-
36
-
37
-
38
-
39
-
40
-
41
-
42
-
43
-
44
-
45
-
 46
46 -
 47
47 -
 48
48 -
 49
49 -
 50
50 -
 51
51 -
 52
52 -
 53
53 -
 54
54 -
 55
55 -
 56
56 -
57
-
58
-
59
-
60
-
61
-
62
-
63
-
64
-
65
-
66
-
67
-
68
-
69
-
70
-
71
-
72
-
73
-
74
-
75
-
76
-
77
-
78
-
79
-
80
-
81
-
82
-
83
-
84
-
85
-
86
-
87
-
88
-
89
-
90
-
91
-
92
-
93
-
94
-
95
-
96
-
97
-
98
-
99
-
100
-
101
-
102
-
103
-
104
-
105
-
106
-
107
-
108
-
109
-
110
-
111
-
112
-
113
-
114
-
115
-
116
-
117
-
118
-
119
-
120
-
121
-
122
-
123
-
124
-
125
-
126
-
127
-
128
-
129
-
130
-
131
-
132
-
133
-
134
-
135
-
136
-
137
-
138
-
139
-
140
-
141
-
142
-
143
-
144
-
145
-
146
-
147
-
148
-
149
-
150
-
151
-
152
-
153
-
154
-
155
-
156
-
157
-
158
-
159
-
160
-
161
-
162
-
163
-
164
-
165
-
166
-
167
-
168
-
169
-
170
-
171
-
172
-
173
-
174
-
175
-
176
-
177
-
178
-
179
-
180
-
181
-
182
-
183
-
184
-
185
-
186
-
187
-
188
-
189
-
190
-
191
-
192
-
193
-
194
-
195
-
196
-
197
-
198
-
199
-
200
-
201
-
202
-
203
-
204
-
205
-
206
-
207
-
208
-
209
-
210
-
211
-
212
-
213
-
214
-
215
-
216
-
217
-
218
-
219
-
220
-
221
-
222
-
223
-
224
-
225
-
226
-
227
-
228
-
229
-
230
-
231
-
232
-
233
-
234
-
235
-
236
-
237
-
238
-
239
-
240
-
241
-
242
-
243
-
244
-
245
-
246
-
247
-
248
-
249
-
250
-
251
-
252
-
253
-
254
-
255
-
256
-
257
-
258
-
259
-
260
-
261
-
262
-
263
-
264
-
265
-
266
-
267
-
268
-
269
-
270
-
271
-
272
-
273
-
274
-
275
-
276
-
277
-
278
-
279
-
280
-
281
-
282
-
283
-
284
-
285
-
286
-
287
-
288
-
289
-
290
-
291
-
292
-
293
 |
 |
