Konica Minolta AccurioPress C2060 IC-314 User Guide - Page 171
Selecting the IPDS workflow mode, Enabling end of job timeout, Creating and editing an IPDS printer
 |
View all Konica Minolta AccurioPress C2060 manuals
Add to My Manuals
Save this manual to your list of manuals |
Page 171 highlights
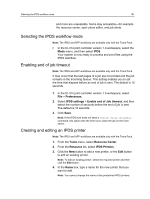
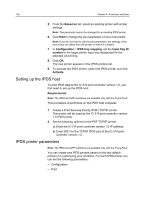
Selecting the IPDS workflow mode 161 and more are unavailable. Some stay accessible-for example, the resource center, spot colors editor, and job alerts. Selecting the IPDS workflow mode Note: The IPDS and AFP workflows are available only with the Trans Pack. In the IC‑314 print controller version 1.0 workspace, select the Mode menu, and then select IPDS. Your system is now ready to process and print files using the IPDS workflow. Enabling end of job timeout Note: The IPDS and AFP workflows are available only with the Trans Pack. It may occur that the last pages of a job are not printed and the job remains in the Incoming Queue. This setting enables you to set the time that elapses before an end of job is sent. The default is 10 seconds. 1. In the IC‑314 print controller version 1.0 workspace, select File > Preferences. 2. Select IPDS settings > Enable end of Job timeout, and then select the number of seconds before the end of job is sent. The default is 10 seconds. 3. Click Save. Note: If the IPDS host does not send a Define Group Boundary command, this option sets the time out to close the job on the Creo server. Creating and editing an IPDS printer Note: The IPDS and AFP workflows are available only with the Trans Pack. 1. From the Tools menu, select Resource Center. 2. From the Resource list, select IPDS Printers. 3. Click the New button to add a new printer, or the Edit button to edit an existing printer. Note: To edit an existing printer, select the required printer and then click the Edit button. 4. In the Name box, type a name for the new printer that you want to add. Note: You cannot change the name of the predefined IPDS printers.
-
 1
1 -
2
-
3
-
4
-
5
-
6
-
7
-
8
-
9
-
10
-
11
-
12
-
13
-
14
-
15
-
16
-
17
-
18
-
19
-
20
-
21
-
22
-
23
-
24
-
25
-
26
-
27
-
28
-
29
-
30
-
31
-
32
-
33
-
34
-
35
-
36
-
37
-
38
-
39
-
40
-
41
-
42
-
43
-
44
-
45
-
46
-
47
-
48
-
49
-
50
-
51
-
52
-
53
-
54
-
55
-
56
-
57
-
58
-
59
-
60
-
61
-
62
-
63
-
64
-
65
-
66
-
67
-
68
-
69
-
70
-
71
-
72
-
73
-
74
-
75
-
76
-
77
-
78
-
79
-
80
-
81
-
82
-
83
-
84
-
85
-
86
-
87
-
88
-
89
-
90
-
91
-
92
-
93
-
94
-
95
-
96
-
97
-
98
-
99
-
100
-
101
-
102
-
103
-
104
-
105
-
106
-
107
-
108
-
109
-
110
-
111
-
112
-
113
-
114
-
115
-
116
-
117
-
118
-
119
-
120
-
121
-
122
-
123
-
124
-
125
-
126
-
127
-
128
-
129
-
130
-
131
-
132
-
133
-
134
-
135
-
136
-
137
-
138
-
139
-
140
-
141
-
142
-
143
-
144
-
145
-
146
-
147
-
148
-
149
-
150
-
151
-
152
-
153
-
154
-
155
-
156
-
157
-
158
-
159
-
160
-
161
-
162
-
163
-
164
-
165
-
 166
166 -
 167
167 -
 168
168 -
 169
169 -
 170
170 -
 171
171 -
 172
172 -
 173
173 -
 174
174 -
 175
175 -
 176
176 -
177
-
178
-
179
-
180
-
181
-
182
-
183
-
184
-
185
-
186
-
187
-
188
-
189
-
190
-
191
-
192
-
193
-
194
-
195
-
196
-
197
-
198
-
199
-
200
-
201
-
202
-
203
-
204
-
205
-
206
-
207
-
208
-
209
-
210
-
211
-
212
-
213
-
214
-
215
-
216
-
217
-
218
-
219
-
220
-
221
-
222
-
223
-
224
-
225
-
226
-
227
-
228
-
229
-
230
-
231
-
232
-
233
-
234
-
235
-
236
-
237
-
238
-
239
-
240
-
241
-
242
-
243
-
244
-
245
-
246
-
247
-
248
-
249
-
250
-
251
-
252
-
253
-
254
-
255
-
256
-
257
-
258
-
259
-
260
-
261
-
262
-
263
-
264
-
265
-
266
-
267
-
268
-
269
-
270
-
271
-
272
-
273
-
274
-
275
-
276
-
277
-
278
-
279
-
280
-
281
 |
 |
