Konica Minolta AccurioPress C2060 IC-314 User Guide - Page 96
Calibration, Linked, Number of copies, Print, Measure, Save in, Create Profile, Profile Name, Other
 |
View all Konica Minolta AccurioPress C2060 manuals
Add to My Manuals
Save this manual to your list of manuals |
Page 96 highlights
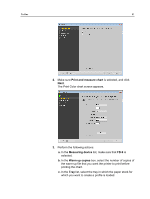
86 Chapter 7-Managing color e. In the Calibration list, select the relevant calibration table. Linked is the default setting (highly recommended). f. In the Number of copies box, select the number of copies of the chart that you want to print. 5. Click Print. The color measurement chart and the warm-up file are printed. 6. Place the color measurement chart on a clean flat surface. 7. Click Measure and perform the following actions. a. Press the button located on the measurement device. b. When you hear a beep, scan the device across strip 1 in the following manner: Note: To avoid measurement failures, perform the following steps to scan the strip: 1. Position the measurement device at the start of the white box in the strip. 2. Scan from the left white box across to the right white box. A green check mark is displayed when the measurement is successful. A red x mark is displayed if the measurement fails. c. Continue to scan the remaining strips on the color chart pages. 8. (Optional) To save the measurement file and load it at a later time, locate a folder and in the Save in box, type a name for the measurement file. 9. (Optional) Click Save. 10. Click Next. 11. Click Create Profile. This process might take a few minutes 12. In the Profile Name box, type a new name for the profile, or leave the name that the Profiling Tool automatically created based on the screening method. 13. To define the location for saving the destination profile, select one of the following options: ○ Profile Manager-The profile automatically appears in the Profile Manager area. ○ Other-The profile is saved in a specified location, and you can later import the profile to the Profile Manager area in the Resource Center.
-
 1
1 -
2
-
3
-
4
-
5
-
6
-
7
-
8
-
9
-
10
-
11
-
12
-
13
-
14
-
15
-
16
-
17
-
18
-
19
-
20
-
21
-
22
-
23
-
24
-
25
-
26
-
27
-
28
-
29
-
30
-
31
-
32
-
33
-
34
-
35
-
36
-
37
-
38
-
39
-
40
-
41
-
42
-
43
-
44
-
45
-
46
-
47
-
48
-
49
-
50
-
51
-
52
-
53
-
54
-
55
-
56
-
57
-
58
-
59
-
60
-
61
-
62
-
63
-
64
-
65
-
66
-
67
-
68
-
69
-
70
-
71
-
72
-
73
-
74
-
75
-
76
-
77
-
78
-
79
-
80
-
81
-
82
-
83
-
84
-
85
-
86
-
87
-
88
-
89
-
90
-
 91
91 -
 92
92 -
 93
93 -
 94
94 -
 95
95 -
 96
96 -
 97
97 -
 98
98 -
 99
99 -
 100
100 -
 101
101 -
102
-
103
-
104
-
105
-
106
-
107
-
108
-
109
-
110
-
111
-
112
-
113
-
114
-
115
-
116
-
117
-
118
-
119
-
120
-
121
-
122
-
123
-
124
-
125
-
126
-
127
-
128
-
129
-
130
-
131
-
132
-
133
-
134
-
135
-
136
-
137
-
138
-
139
-
140
-
141
-
142
-
143
-
144
-
145
-
146
-
147
-
148
-
149
-
150
-
151
-
152
-
153
-
154
-
155
-
156
-
157
-
158
-
159
-
160
-
161
-
162
-
163
-
164
-
165
-
166
-
167
-
168
-
169
-
170
-
171
-
172
-
173
-
174
-
175
-
176
-
177
-
178
-
179
-
180
-
181
-
182
-
183
-
184
-
185
-
186
-
187
-
188
-
189
-
190
-
191
-
192
-
193
-
194
-
195
-
196
-
197
-
198
-
199
-
200
-
201
-
202
-
203
-
204
-
205
-
206
-
207
-
208
-
209
-
210
-
211
-
212
-
213
-
214
-
215
-
216
-
217
-
218
-
219
-
220
-
221
-
222
-
223
-
224
-
225
-
226
-
227
-
228
-
229
-
230
-
231
-
232
-
233
-
234
-
235
-
236
-
237
-
238
-
239
-
240
-
241
-
242
-
243
-
244
-
245
-
246
-
247
-
248
-
249
-
250
-
251
-
252
-
253
-
254
-
255
-
256
-
257
-
258
-
259
-
260
-
261
-
262
-
263
-
264
-
265
-
266
-
267
-
268
-
269
-
270
-
271
-
272
-
273
-
274
-
275
-
276
-
277
-
278
-
279
-
280
-
281
 |
 |