Panasonic PT-DZ12000U Operating Instructions - Page 12
Location and function of each part
 |
UPC - 791871111550
View all Panasonic PT-DZ12000U manuals
Add to My Manuals
Save this manual to your list of manuals |
Page 12 highlights
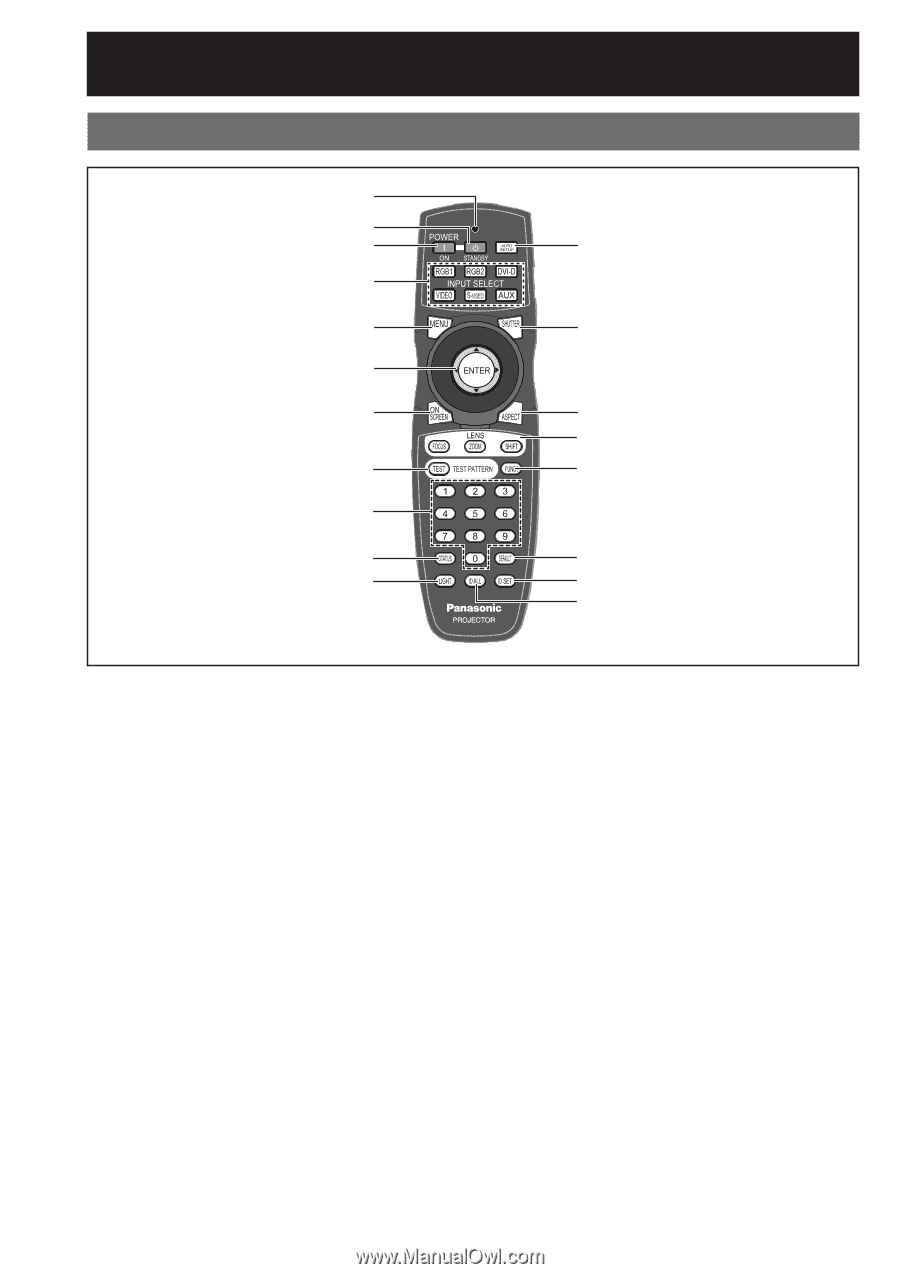
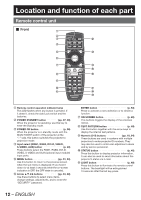
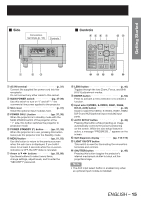
Location and function of each part Remote control unit „ Front 1 2 3 l 4 5 m 6 7 n o 8 p 9 j q k r s 1 Remote control operation indicator lamp This LED flashes when any button is pressed. If it doesn't, check the side Lock switch and the batteries. 2 POWER STANDBY button pp. 37, 39) When the projector is operating, use this key to enter the Standby mode. 3 POWER ON button p. 38) When the projector is in standby mode with the MAIN POWER switch of the projector at the " l " side, this button switches the projector to projection mode. 4 Input select (RGB1, RGB2, DVI-D, VIDEO, S-VIDEO, AUX) button p. 48) These buttons select the RGB1, RGB2, DVI-D, VIDEO, S-VIDEO and AUX (optional input module) input ports. 5 MENU button pp. 51, 53) Use this button to return to the previous screen when the sub menu is displayed. If you hold it down for at least 3 seconds while the on-screen indication is OFF, the OFF state is canceled. 6 Arrow buttons pp. 53, 88) Use these buttons to select menu items, change settings, adjust levels, and to enter the "SECURITY" password. ENTER button p. 53) Press to activate a menu selection or to initiate a function. 7 ON SCREEN button p. 48) This buttons toggles the display of the onscreen menus. 8 TEST PATTERN button p. 49) Use this button together with the arrow keys to display the internal test patterns. 9 Numeric (0-9) buttons pp. 18, 84) These buttons are used in systems with multiple projectors to enter projector ID numbers. They may also be used to enter user-adjustment values and by service personnel. j STATUS button p. 48) Press this button to display projector information. It can also be used to send information about the projector's status via E-mail. k LIGHT button p. 49) Press this button to illuminate the remote control buttons. The backlight will be extinguished 10 seconds after the last key press. 12 - ENGLISH
-
 1
1 -
2
-
3
-
4
-
5
-
6
-
 7
7 -
 8
8 -
 9
9 -
 10
10 -
 11
11 -
 12
12 -
 13
13 -
 14
14 -
 15
15 -
 16
16 -
 17
17 -
18
-
19
-
20
-
21
-
22
-
23
-
24
-
25
-
26
-
27
-
28
-
29
-
30
-
31
-
32
-
33
-
34
-
35
-
36
-
37
-
38
-
39
-
40
-
41
-
42
-
43
-
44
-
45
-
46
-
47
-
48
-
49
-
50
-
51
-
52
-
53
-
54
-
55
-
56
-
57
-
58
-
59
-
60
-
61
-
62
-
63
-
64
-
65
-
66
-
67
-
68
-
69
-
70
-
71
-
72
-
73
-
74
-
75
-
76
-
77
-
78
-
79
-
80
-
81
-
82
-
83
-
84
-
85
-
86
-
87
-
88
-
89
-
90
-
91
-
92
-
93
-
94
-
95
-
96
-
97
-
98
-
99
-
100
-
101
-
102
-
103
-
104
-
105
-
106
-
107
-
108
-
109
-
110
-
111
-
112
-
113
-
114
-
115
-
116
-
117
-
118
-
119
-
120
-
121
-
122
-
123
-
124
-
125
-
126
-
127
-
128
-
129
-
130
-
131
-
132
-
133
-
134
-
135
-
136
-
137
-
138
 |
 |