Panasonic PT-DZ12000U Operating Instructions - Page 41
Basic Operation, Adjustment range after lens position optical shift, Moving the projection lens
 |
UPC - 791871111550
View all Panasonic PT-DZ12000U manuals
Add to My Manuals
Save this manual to your list of manuals |
Page 41 highlights
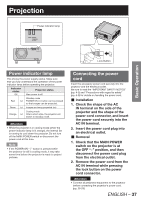
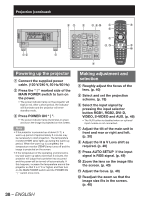
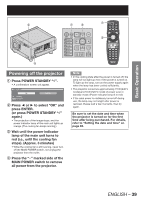
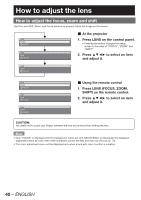
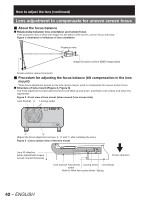
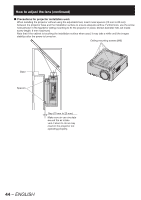
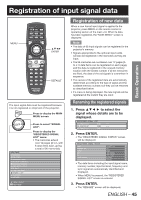
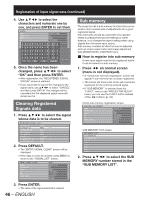
Adjustment range after lens position (optical shift) Do not move the lens beyond the bounds of the shift range as this may cause a change in the focus. This limitation is to protect the parts of the projector. Using the standard projection position as the reference, the optical axis shift function makes it possible to adjust the projection position in the ranges shown in the figures below. Model number of projection lens PT-D12000U PT-DZ12000U 0.15V 0.50V Projected 0.15V screen height, V0.15V 0.12V 0.40V 0.12V screen height, V Projected Basic Operation ET-D75LE6 0.12V Standard projection position Standard projection position 0.15V 0.50V 0.12V 0.40V 0.2H 0.2H Projected screen width, H 0.15H 0.15H Projected screen width, H Zoom Lens 0.15V 0.60V 0.15V 0.1V 0.50V screen height, V Projected Projected 0.1V screen height, V 0.1V ET-D75LE1 ET-D75LE2 ET-D75LE3 ET-D75LE4 ET-D75LE8 Standard projection position Standard projection position 0.15V 0.60V 0.15V 0.1V 0.50V 0.3H 0.3H Projected screen width, H 0.2H 0.2H Projected screen width, H Note • The ET-D75LE5 has a fixed focal point, and so shift adjustment cannot be carried out. Moving the projection lens position to the home position 1. Press and hold LENS on the projector's controls or SHIFT on the remote control for 3 seconds or more. LENS SHIFT ENTER EXECUTE MENU CANCEL 2. Press ENTER while the menu shown above is being displayed. (It will be displayed for about 5 seconds.) • "PROGRESS..." will appear in the menu, and the projection lens will move to the home position. Note • The home position for the projection lens is the lens position when the lens is being replaced or when the projector is being stored away, and it is not the optical center of the screen. ENGLISH - 41
-
 1
1 -
2
-
3
-
4
-
5
-
6
-
7
-
8
-
9
-
10
-
11
-
12
-
13
-
14
-
15
-
16
-
17
-
18
-
19
-
20
-
21
-
22
-
23
-
24
-
25
-
26
-
27
-
28
-
29
-
30
-
31
-
32
-
33
-
34
-
35
-
 36
36 -
 37
37 -
 38
38 -
 39
39 -
 40
40 -
 41
41 -
 42
42 -
 43
43 -
 44
44 -
 45
45 -
 46
46 -
47
-
48
-
49
-
50
-
51
-
52
-
53
-
54
-
55
-
56
-
57
-
58
-
59
-
60
-
61
-
62
-
63
-
64
-
65
-
66
-
67
-
68
-
69
-
70
-
71
-
72
-
73
-
74
-
75
-
76
-
77
-
78
-
79
-
80
-
81
-
82
-
83
-
84
-
85
-
86
-
87
-
88
-
89
-
90
-
91
-
92
-
93
-
94
-
95
-
96
-
97
-
98
-
99
-
100
-
101
-
102
-
103
-
104
-
105
-
106
-
107
-
108
-
109
-
110
-
111
-
112
-
113
-
114
-
115
-
116
-
117
-
118
-
119
-
120
-
121
-
122
-
123
-
124
-
125
-
126
-
127
-
128
-
129
-
130
-
131
-
132
-
133
-
134
-
135
-
136
-
137
-
138
 |
 |
