Panasonic PT-DZ12000U Operating Instructions - Page 67
Basic Operation, Frame delay
 |
UPC - 791871111550
View all Panasonic PT-DZ12000U manuals
Add to My Manuals
Save this manual to your list of manuals |
Page 67 highlights
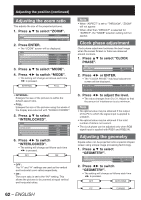
Basic Operation 10. Press ENTER. • The "BRIGHT ADJUST" screen will be displayed. BRIGHT ADJUST BRIGHT INSIDE BRIGHT OUTSIDE 11. Press ▲▼ to select "BRIGHT INSIDE". 12. Press ENTER. • The "BRIGHT INSIDE" adjustment screen will be displayed. BRIGHT INSIDE INTERLOCKED WHITE RED GREEN BLUE ON 0 0 0 0 • When "INTERLOCKED" is set to "OFF", individual adjustment of "RED", "GREEN" and "BLUE" will be possible. 13. Press ▲▼ to select an item, and press ◄► to adjust the setting. • Once adjustment is complete, press MENU to return to "BRIGHT ADJUST". 14. Press ▲▼ to select the part of "UPPER", "LOWER", "RIGHT", "LEFT". 15. Use ◄► to adjust the width for correcting the "BRIGHT INSIDE" setting (0 to 255). 16. Press ▲▼ to select "BRIGHT OUTSIDE". BRIGHT INSIDE BRIGHT OUTSIDE OUTSIDE AREA 17. Press ENTER. • The "BRIGHT OUTSIDE" adjustment screen will be displayed. BRIGHT OUTSIDE INTERLOCKED WHITE RED GREEN BLUE ON 0 0 0 0 • When "INTERLOCKED" is set to "OFF", individual adjustment of "RED", "GREEN" and "BLUE" will be possible. 18. Press ▲▼ to select an item, and press ◄► to adjust the setting. Projection Edge blending width (right) range BRIGHT adjustment (right) Marker BRIGHT OUTSIDE BRIGHT INSIDE Note • The Bright Inside adjustments are used to match the projector's main-screen-area black levels to the level within the blended area. The Bright Outside adjustments may be used to fine adjust the thin borders on either side of the blend area, but are often not needed. • When a rear screen or screen with a high gain is used, the blended areas may appear to be discontinuous depending on the viewing position. Frame delay When 1 080/60i, 1 080/50i and 1 080/24sF signals are being input, this simplifies image processing so that the video frame delay is shortened. 1. Press ▲▼ to select "FRAME DELAY". EDGE BLENDING FRAME DELAY RASTER POSITION OFF DEFAULT ENGLISH - 67
-
 1
1 -
2
-
3
-
4
-
5
-
6
-
7
-
8
-
9
-
10
-
11
-
12
-
13
-
14
-
15
-
16
-
17
-
18
-
19
-
20
-
21
-
22
-
23
-
24
-
25
-
26
-
27
-
28
-
29
-
30
-
31
-
32
-
33
-
34
-
35
-
36
-
37
-
38
-
39
-
40
-
41
-
42
-
43
-
44
-
45
-
46
-
47
-
48
-
49
-
50
-
51
-
52
-
53
-
54
-
55
-
56
-
57
-
58
-
59
-
60
-
61
-
 62
62 -
 63
63 -
 64
64 -
 65
65 -
 66
66 -
 67
67 -
 68
68 -
 69
69 -
 70
70 -
 71
71 -
 72
72 -
73
-
74
-
75
-
76
-
77
-
78
-
79
-
80
-
81
-
82
-
83
-
84
-
85
-
86
-
87
-
88
-
89
-
90
-
91
-
92
-
93
-
94
-
95
-
96
-
97
-
98
-
99
-
100
-
101
-
102
-
103
-
104
-
105
-
106
-
107
-
108
-
109
-
110
-
111
-
112
-
113
-
114
-
115
-
116
-
117
-
118
-
119
-
120
-
121
-
122
-
123
-
124
-
125
-
126
-
127
-
128
-
129
-
130
-
131
-
132
-
133
-
134
-
135
-
136
-
137
-
138
 |
 |
