Panasonic PT-DZ12000U Operating Instructions - Page 83
Special Features, Setting FUNC1, Setting the date and time, Save all user data
 |
UPC - 791871111550
View all Panasonic PT-DZ12000U manuals
Add to My Manuals
Save this manual to your list of manuals |
Page 83 highlights
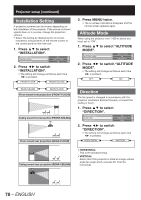
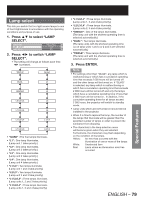
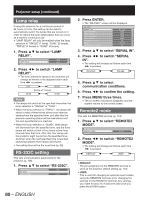
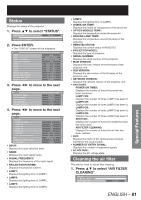
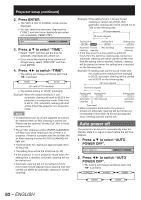
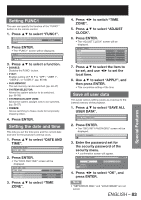
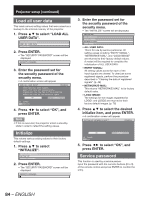
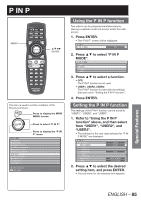
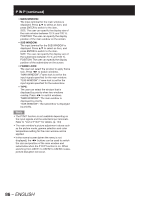
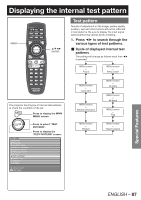
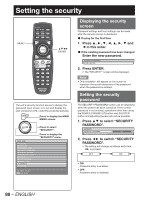
Setting FUNC1 The user can specify the function of the "FUNC1" button on the remote control. 1. Press ▲▼ to select "FUNC1". AIR FILTER CLEANING AUTO POWER OFF FUNC1 DISABLE 2. Press ENTER. • The "FUNC1" screen will be displayed. FUNC1 DISABLE C P IN P 3. Press ▲▼ to select a function. • DISABLE: Disables the FUNC1 button. • P IN P: Enables setting of P IN P to "OFF", "USER 1", "USER 2", or "USER 3". (pp. 85-86) • SUB MEMORY: The sub memory can be switched. (pp. 46-47) • SYSTEM SELECTOR: Allows the system selector to be switched. (pp. 58-59) • SYSTEM DAYLIGHT VIEW: Allows the system daylight view to be switched. (pp. 56-57) • FREEZE: Allows switching to freeze mode for temporarily stopping video. 4. Press ENTER. Setting the date and time This lets you set the time zone and the current date and time for the projector's internal clock. 1. Press ▲▼ to select "DATE AND TIME". PROJECTOR SETUP 2/2 DATE AND TIME SAVE ALL USER DATA 2. Press ENTER. • The "DATE AND TIME" screen will be displayed. DATE AND TIME TIME ZONE ADJUST CLOCK LOCAL DATE LOCAL TIME 09:00 2008/01/01 12:34:56 3. Press ▲▼ to select "TIME ZONE". 4. Press ◄► to switch "TIME ZONE". 5. Press ▲▼ to select "ADJUST CLOCK". 6. Press ENTER. • The "ADJUST CLOCK" screen will be displayed. ADJUST CLOCK YEAR MONTH DAY HOUR MINUTE APPLY 2008 2 2 13 15 7. Press ▲▼ to select the item to be set, and use ◄► to set the local time. 8. Use ▲▼ to select "APPLY", and then press ENTER. • This completes setting of the time. Save all user data This saves various setting values as a backup to the internal memory of the projector. 1. Press ▲▼ to select "SAVE ALL USER DATA". DATE AND TIME SAVE ALL USER DATA LOAD ALL USER DATA 2. Press ENTER. • The "SECURITY PASSWORD" screen will be displayed. SECURITY PASSWORD 3. Enter the password set for the security password of the security menu. • A confirmation screen will appear. SAVE ALL USER DATA? PROGRESS OK CHANGE ENTER EXECUTE CANCEL 4. Press ◄► to select "OK", and press ENTER. Note • "NETWORK/E-MAIL" and "LOGO IMAGE" are not saved. ENGLISH - 83 Special Features
-
 1
1 -
2
-
3
-
4
-
5
-
6
-
7
-
8
-
9
-
10
-
11
-
12
-
13
-
14
-
15
-
16
-
17
-
18
-
19
-
20
-
21
-
22
-
23
-
24
-
25
-
26
-
27
-
28
-
29
-
30
-
31
-
32
-
33
-
34
-
35
-
36
-
37
-
38
-
39
-
40
-
41
-
42
-
43
-
44
-
45
-
46
-
47
-
48
-
49
-
50
-
51
-
52
-
53
-
54
-
55
-
56
-
57
-
58
-
59
-
60
-
61
-
62
-
63
-
64
-
65
-
66
-
67
-
68
-
69
-
70
-
71
-
72
-
73
-
74
-
75
-
76
-
77
-
 78
78 -
 79
79 -
 80
80 -
 81
81 -
 82
82 -
 83
83 -
 84
84 -
 85
85 -
 86
86 -
 87
87 -
 88
88 -
89
-
90
-
91
-
92
-
93
-
94
-
95
-
96
-
97
-
98
-
99
-
100
-
101
-
102
-
103
-
104
-
105
-
106
-
107
-
108
-
109
-
110
-
111
-
112
-
113
-
114
-
115
-
116
-
117
-
118
-
119
-
120
-
121
-
122
-
123
-
124
-
125
-
126
-
127
-
128
-
129
-
130
-
131
-
132
-
133
-
134
-
135
-
136
-
137
-
138
 |
 |
