Panasonic PT-DZ12000U Operating Instructions - Page 68
Raster position
 |
UPC - 791871111550
View all Panasonic PT-DZ12000U manuals
Add to My Manuals
Save this manual to your list of manuals |
Page 68 highlights
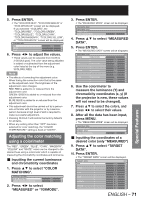
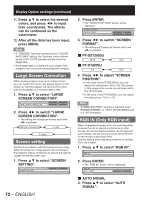
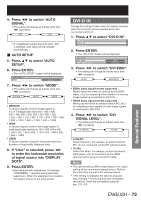
How to use ADVANCED MENU (continued) 2. Press ◄► to switch "FRAME DELAY". • The setting will change as follows each time ◄► is pressed. DEFAULT SHORT When 16:9 pictures are displayed (when HDTV or 480p pictures are input or 16:9 is selected in the SIZE mode) Pressing ▲ button will move the image upward. • DEFAULT: This is the standard setting. • SHORT: Shortens the delay at the expense of some picture quality. Note • When "FRAME DELAY" is set to "SHORT", deterioration in the picture quality will occur. Furthermore, the noise reduction function cannot be used. Raster position When the scaler is set such that the image is smaller than the display area, the image can be moved to any position inside the display area. 1. Press ▲▼ to select "RASTER POSITION". EDGE BLENDING FRAME DELAY RASTER POSITION OFF DEFAULT 2. Press ENTER. • The "RASTER POSITION" screen will be displayed. RASTER POSITION V 0 H 0 3. Press to adjust the position. „ PT-D12000U When 5:4 pictures are displayed (when SXGA signals are input) Pressing ▼ button will move the image downward. „ PT-DZ12000U When 4:3 pictures are displayed Pressing ► button will move the image to the right. Pressing ◄ button will move the image to the left. 4. Press MENU three times. • The on-screen indications disappear and the normal screen appears again. Pressing ► button will move the image to the right. Pressing ◄ button will move the image to the left. 68 - ENGLISH
-
 1
1 -
2
-
3
-
4
-
5
-
6
-
7
-
8
-
9
-
10
-
11
-
12
-
13
-
14
-
15
-
16
-
17
-
18
-
19
-
20
-
21
-
22
-
23
-
24
-
25
-
26
-
27
-
28
-
29
-
30
-
31
-
32
-
33
-
34
-
35
-
36
-
37
-
38
-
39
-
40
-
41
-
42
-
43
-
44
-
45
-
46
-
47
-
48
-
49
-
50
-
51
-
52
-
53
-
54
-
55
-
56
-
57
-
58
-
59
-
60
-
61
-
62
-
 63
63 -
 64
64 -
 65
65 -
 66
66 -
 67
67 -
 68
68 -
 69
69 -
 70
70 -
 71
71 -
 72
72 -
 73
73 -
74
-
75
-
76
-
77
-
78
-
79
-
80
-
81
-
82
-
83
-
84
-
85
-
86
-
87
-
88
-
89
-
90
-
91
-
92
-
93
-
94
-
95
-
96
-
97
-
98
-
99
-
100
-
101
-
102
-
103
-
104
-
105
-
106
-
107
-
108
-
109
-
110
-
111
-
112
-
113
-
114
-
115
-
116
-
117
-
118
-
119
-
120
-
121
-
122
-
123
-
124
-
125
-
126
-
127
-
128
-
129
-
130
-
131
-
132
-
133
-
134
-
135
-
136
-
137
-
138
 |
 |
