Samsung SGH-T839 User Manual (user Manual) (ver.f9) (English) - Page 83
Entering Text Using the QWERTY Keyboard, XT9 my words, XT9 auto-substitution - replacement screen
 |
View all Samsung SGH-T839 manuals
Add to My Manuals
Save this manual to your list of manuals |
Page 83 highlights
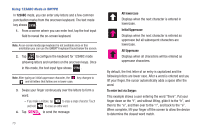
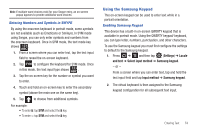
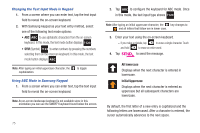
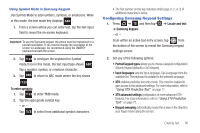
• XT9 my words allows you to add new words to the built-in XT9 dictionary. - Tap (Add word). - Use the Register to XT9 my words field to enter the new word. - Tap Done to store the new word. • XT9 auto-substitution allows you create a word rule by adding words for automatic substitution during text entry (for example youve becomes you've). - Tap the XT9 auto-substitution field. Flick up or down to review the current list of word substitutions. - Press and tap Add. - Enter the original word that will be replaced in the Shortcut field (for example, youve). - Enter the substitute word that will be used in the Substitution field (for example, you?fve). - Tap Done to save the substitution rule. 4. Press to return to the previous screen. Entering Text Using the QWERTY Keyboard Your phone has a full, slide-out QWERTY keyboard. The keyboard is located beneath the display screen and is accessed by sliding it open. This orients the phone's display to Landscape (widescreen) mode. With the QWERTY keyboard, you can type letters, numbers, punctuation, and other special characters into text entry fields or other applications as easily as on your computer. To remove the battery cover: 1. Locate the cover release latch and place your fingernail in the opening and firmly "pop" the cover off the device (similar to a soda can). 2. Remove the cover. For more information, refer to "Battery Cover" on page 7. To open the device and access the keyboard: 1. Turn the phone over to where the logo appears at the upper-right (1). 2. Carefully grasp the base of the phone with both hands. 3. While holding onto both sides of the phone, use your thumbs to push against the bottom edge of the LCD (2). After the initial push, the LCD will then quickly slide away to reveal the QWERTY keyboard (3). For more information, refer to "Accessing the QWERTY Keyboard" on page 12. Entering Text 78
-
 1
1 -
2
-
3
-
4
-
5
-
6
-
7
-
8
-
9
-
10
-
11
-
12
-
13
-
14
-
15
-
16
-
17
-
18
-
19
-
20
-
21
-
22
-
23
-
24
-
25
-
26
-
27
-
28
-
29
-
30
-
31
-
32
-
33
-
34
-
35
-
36
-
37
-
38
-
39
-
40
-
41
-
42
-
43
-
44
-
45
-
46
-
47
-
48
-
49
-
50
-
51
-
52
-
53
-
54
-
55
-
56
-
57
-
58
-
59
-
60
-
61
-
62
-
63
-
64
-
65
-
66
-
67
-
68
-
69
-
70
-
71
-
72
-
73
-
74
-
75
-
76
-
77
-
 78
78 -
 79
79 -
 80
80 -
 81
81 -
 82
82 -
 83
83 -
 84
84 -
 85
85 -
 86
86 -
 87
87 -
 88
88 -
89
-
90
-
91
-
92
-
93
-
94
-
95
-
96
-
97
-
98
-
99
-
100
-
101
-
102
-
103
-
104
-
105
-
106
-
107
-
108
-
109
-
110
-
111
-
112
-
113
-
114
-
115
-
116
-
117
-
118
-
119
-
120
-
121
-
122
-
123
-
124
-
125
-
126
-
127
-
128
-
129
-
130
-
131
-
132
-
133
-
134
-
135
-
136
-
137
-
138
-
139
-
140
-
141
-
142
-
143
-
144
-
145
-
146
-
147
-
148
-
149
-
150
-
151
-
152
-
153
-
154
-
155
-
156
-
157
-
158
-
159
-
160
-
161
-
162
-
163
-
164
-
165
-
166
-
167
-
168
-
169
-
170
-
171
-
172
-
173
-
174
-
175
-
176
-
177
-
178
-
179
-
180
-
181
-
182
-
183
-
184
-
185
-
186
-
187
-
188
-
189
-
190
-
191
-
192
-
193
-
194
-
195
-
196
-
197
-
198
-
199
-
200
-
201
-
202
-
203
-
204
-
205
-
206
-
207
-
208
-
209
-
210
-
211
-
212
-
213
-
214
-
215
-
216
-
217
-
218
-
219
-
220
-
221
-
222
-
223
-
224
-
225
-
226
-
227
-
228
-
229
-
230
-
231
-
232
-
233
-
234
-
235
-
236
-
237
-
238
-
239
-
240
-
241
-
242
-
243
-
244
-
245
-
246
-
247
-
248
-
249
-
250
-
251
-
252
-
253
-
254
-
255
-
256
-
257
-
258
-
259
 |
 |
