Brother International XL-6452 User Manual - French - Page 20
Changing, Presser, Cambio, prensatelas
 |
View all Brother International XL-6452 manuals
Add to My Manuals
Save this manual to your list of manuals |
Page 20 highlights
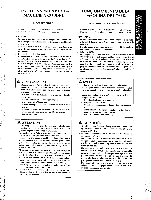
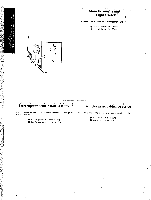
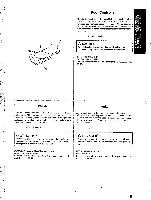
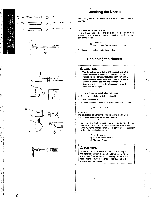
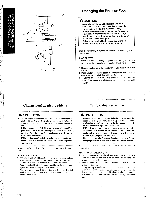
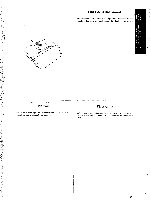
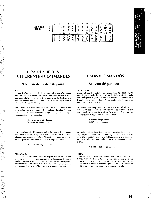
Changing the Presser Foot A CAUTION • Always turn off the power before changing he pros, er foot. If the power Is on and controller Is s' epped r n, the machine will start and may cause injury. • Always use the correct presser foot forIf e select 2d stitch pattern.If the wrong presser foot is used, ie needle may strike the presser foot and bend or break, and may cause injury. • Only use presser feet for this machine. U sing otl er presser feet may lead to accident or inj rry. t may be necessary to change the presser fool accord, ig to your sewing needs. SNAP-ON TYPE 1. Raise the needle to its highest position by turning tli balance wheel toward you (counter clockwise) and raise the cr asser foot lever. 2. Release the foot by raising the lever locate( at the L Ink of the holder. 3. Place a different presser foot on the needle plate so II at the bar on the presser foot is in line with the slot on the sha ik. 4. Lower the presser foot lever and fix the prc sser lac I onto the shank. If the presser foot is in the correct loca ion, the tar should snap in. Changement de pied-de-biche Cambio del prensatelas A ATTENTION • Mettez tonjours la machine hors tension avant de changer Ic pied-de-hiche. Si la machine est sous tension nu In pAdale cat enrollee°, la machine demarrerb el. vows risquez Ae vous Messer. • Utilisez toujours Ic pied-de-biche qui correspond an motif de point selectionne. Si vons abitilisez pas le bon model° de piedde-hiche, Pa iguille risque tie Ic toucher, de se tordre on de casser, et de rolls Messer. • Utilisez uniquement les pieds-de-hiche amens pour cent machine. Si vans ulilisez (Pouffes pieds-de-hiche, vans risquez de vials blesser. lin condign des besoins, it peni staving. nicessaire de changer Ic pied.-dc MODEI,E A CIJQUET I . Remonlcr completement l'aiguille en tournant le volant vers soi (dans Ic setts oppose ;lux aiguiIles dune inonirei et lever Ic pied-dc-hiche. Libdrer Ic pied en kraut Ic levier sited [lignite Mt support. I. Placer tin pied diffireni stir ha plaque A alpine de (elle maniere quo la tige du pied-dc-biche s'aligne avec la fame de la fixation. 1. Abaisser le levier du pied-do-biclic ci Ilxcr le pied stir [axe. Si le piedde-hiche cal min correctemeel, la tip: &Mil SC Inctfit en place (Pelle memo avec tin ddel,e. A PRECAUCION • Desenchufe siempre la maquina de la alimontacion antes do cambial. el pie prensatela. Si la malquii a de riser esti eitchurada a la corriente y pisa el pedal, la n aquina e. pondra en funcienamien to y podria hacerse &lin. • Utilice siempre el pie prensatela adecuado pare el tespunte seleccionado. Si utiliza on pie prensateli Made( !tad°, la aguja podria chocar contra el pie prensa eta y tl, blarse romperse, lo iitie poetic causar lesions. • Use el pie prensatela solo para esta maquir a de cos T. Si usa otro pie prensatela, podria causar tam avert pace se datum. Seµtin SUS necesidades de costura, puede ser n«:esario withinI el nensatelas. TIPO DE ENGANCHE DE GOLPE 1. Levante Ia aguja a so position mas alb', girand, la rued cilia hacia usted ten el sentido conlrario al de las mane [Has (lc 'An reloji y levante la palanca del prensatelas. 2. Stich(' el prensalelas Icvantando In pa lane,, µ1e hay in la parlc trasera del soporle. 3. Coloque afro prensalelas en la placa de ago is de tal iurma clue In harm del prensatelas qtiede alineada con ',mum 50p011o. 4. I3nje la ivlance del prensatelas y fije eI prens. Ides sopor c. Si el preilsalelas esti Bien colocarla, la Barra d Me cull.' iclinrse de gol pe. 11
-
 1
1 -
2
-
3
-
4
-
5
-
6
-
7
-
8
-
9
-
10
-
11
-
12
-
13
-
14
-
 15
15 -
 16
16 -
 17
17 -
 18
18 -
 19
19 -
 20
20 -
 21
21 -
 22
22 -
 23
23 -
 24
24 -
 25
25 -
26
-
27
-
28
-
29
-
30
-
31
-
32
-
33
-
34
-
35
-
36
-
37
-
38
-
39
-
40
-
41
-
42
-
43
-
44
-
45
-
46
-
47
-
48
-
49
-
50
-
51
-
52
-
53
-
54
-
55
-
56
-
57
-
58
-
59
-
60
-
61
-
62
-
63
-
64
-
65
-
66
-
67
-
68
-
69
-
70
-
71
-
72
-
73
-
74
-
75
-
76
-
77
-
78
-
79
-
80
-
81
-
82
-
83
-
84
-
85
-
86
-
87
-
88
-
89
-
90
-
91
-
92
-
93
-
94
-
95
-
96
-
97
-
98
 |
 |
