Brother International XL-6452 User Manual - French - Page 36
Brother International XL-6452 Manual
 |
View all Brother International XL-6452 manuals
Add to My Manuals
Save this manual to your list of manuals |
Page 36 highlights
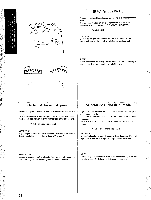
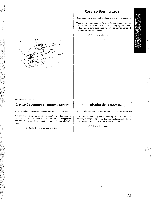
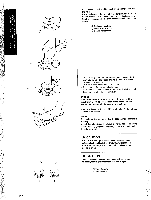
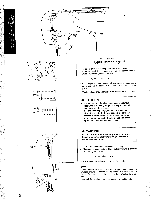
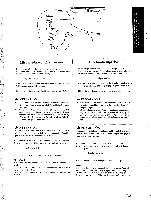
C5 CO 2. Pass the end of the thread through the hole on the bobbin from the inside. Place the bobbin onto the bobbin winder shaft and slide the bobbin winder shaft to the right. Turn the bobbin clockwise, by hand, until the spring on the shaft slides into the groove of Ihe bobbin. C) Spring on the shaft C) Groove of the bobbin C) Bobbin winder seat 27 C 3. While holding the end of the thread, gently depress the foot controller to wind the thread around the bobbin a few times. Then stop the machine. 0 Trim the excess thread above the bobbin. 4. Step down on the foot controller to start. 5. After the machine stops automatically when the bobbin is full, take your foot off of the foot controller. CAUTION When removing the bobbin, do not pull on the bobbin winder seat. Doing so could loosen or remove the bobbin winder seat, resulting In damage to the machine. 6. Cut the thread, slide the bobbin winder shaft to the left and remove the bobbin. NOTE: The needle bar does not move when the bobbin winding shaft is slid to the right. Immediately after winding the bobbin, It is normal to hear the sound of the clutch engaging when beginning to sew or manually timing the balance wheel. A CAUTION Besureto followtheprocess described.Ifthethread isnot cut completely, and the bobbin is wound, when the thread runs low it may tangle around the bobbin and cause the needle to break. A CAUTION Setting thebobbinimproperlymaycausethethreadtension to loosen, breaking the needle and resulting in injury. C) Wound evenly C) Wound poorly
-
 1
1 -
2
-
3
-
4
-
5
-
6
-
7
-
8
-
9
-
10
-
11
-
12
-
13
-
14
-
15
-
16
-
17
-
18
-
19
-
20
-
21
-
22
-
23
-
24
-
25
-
26
-
27
-
28
-
29
-
30
-
 31
31 -
 32
32 -
 33
33 -
 34
34 -
 35
35 -
 36
36 -
 37
37 -
 38
38 -
 39
39 -
 40
40 -
 41
41 -
42
-
43
-
44
-
45
-
46
-
47
-
48
-
49
-
50
-
51
-
52
-
53
-
54
-
55
-
56
-
57
-
58
-
59
-
60
-
61
-
62
-
63
-
64
-
65
-
66
-
67
-
68
-
69
-
70
-
71
-
72
-
73
-
74
-
75
-
76
-
77
-
78
-
79
-
80
-
81
-
82
-
83
-
84
-
85
-
86
-
87
-
88
-
89
-
90
-
91
-
92
-
93
-
94
-
95
-
96
-
97
-
98
 |
 |
