Brother International XL-6452 User Manual - French - Page 86
authorized
 |
View all Brother International XL-6452 manuals
Add to My Manuals
Save this manual to your list of manuals |
Page 86 highlights
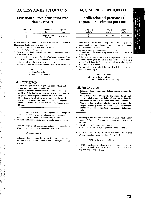
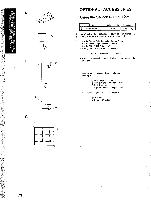
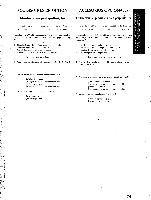
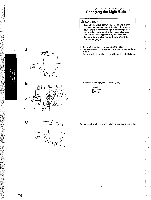
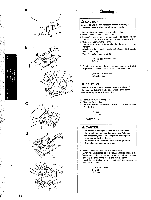
le B 3 4 0 5 6 7 Cleaning A CAUTION Be sure to unplug the machine before cleaning it. Otherwise, electric shock or injury may result. 1. Remove the power supply plug from the outlet. 2. Raise the needle and the presser foot, 3. Loosen the presser toot screw and the needle clamp screw to remove the presser foot holder and the needle. (See fig. A ) 4. Usibg a coin, remove the screws. The tab at the front of the needle plate is hooked into the machine. a Slightly raise the back of the needle plate and slide it back to remove the tab 0. Then lift the plate to remove it 0. C) Use a coin or screwdriver. C) Tab 5. Turn the balance wheel toward you until the notch of shuttle aligns with the shelf of race as shown in the illustration. C) Notch of shuttle race C) Shelf of race A CAUTION Be sure to turn the balance wheel towards the front of the machine. Turning the balance wheel in the other direction may damage the machine. 6. Remove the race. (See fig. C ) 7. Clean out lint and dust. Use soft fabric to clean the race. DO NOT OIL the race or shuttle. (See fig. D ) C Race C) Shuttle * DO NOT OIL., A CAUTION • Do not use a damaged race or shuttle. Otherwise, the thread may tangle and cause a poor finish, or the needle may break. You can get the proper parts from your authorized dealer. • Be sure to insert the race in the correct position. Otherwise, the needle may break. 8. Assemble the race first then the needle plate. When installing the race, be sure that the notch of shuttle is in the same position that it was when the shuttle hook was removed and that the shelf on the race aligns with the spring. Install the needle plate by sliding it to the left (the reverse of its removal procedure). C) Notch of shuttle C) Shell Os Spring 9 8 77
-
 1
1 -
2
-
3
-
4
-
5
-
6
-
7
-
8
-
9
-
10
-
11
-
12
-
13
-
14
-
15
-
16
-
17
-
18
-
19
-
20
-
21
-
22
-
23
-
24
-
25
-
26
-
27
-
28
-
29
-
30
-
31
-
32
-
33
-
34
-
35
-
36
-
37
-
38
-
39
-
40
-
41
-
42
-
43
-
44
-
45
-
46
-
47
-
48
-
49
-
50
-
51
-
52
-
53
-
54
-
55
-
56
-
57
-
58
-
59
-
60
-
61
-
62
-
63
-
64
-
65
-
66
-
67
-
68
-
69
-
70
-
71
-
72
-
73
-
74
-
75
-
76
-
77
-
78
-
79
-
80
-
 81
81 -
 82
82 -
 83
83 -
 84
84 -
 85
85 -
 86
86 -
 87
87 -
 88
88 -
 89
89 -
 90
90 -
 91
91 -
92
-
93
-
94
-
95
-
96
-
97
-
98
 |
 |
