Canon PIXMA MX392 Manual - Page 103
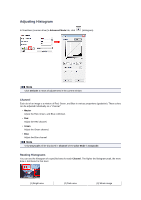
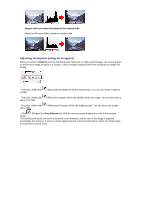
Adjusting Histograms Using the Droppers
 |
View all Canon PIXMA MX392 manuals
Add to My Manuals
Save this manual to your list of manuals |
Page 103 highlights
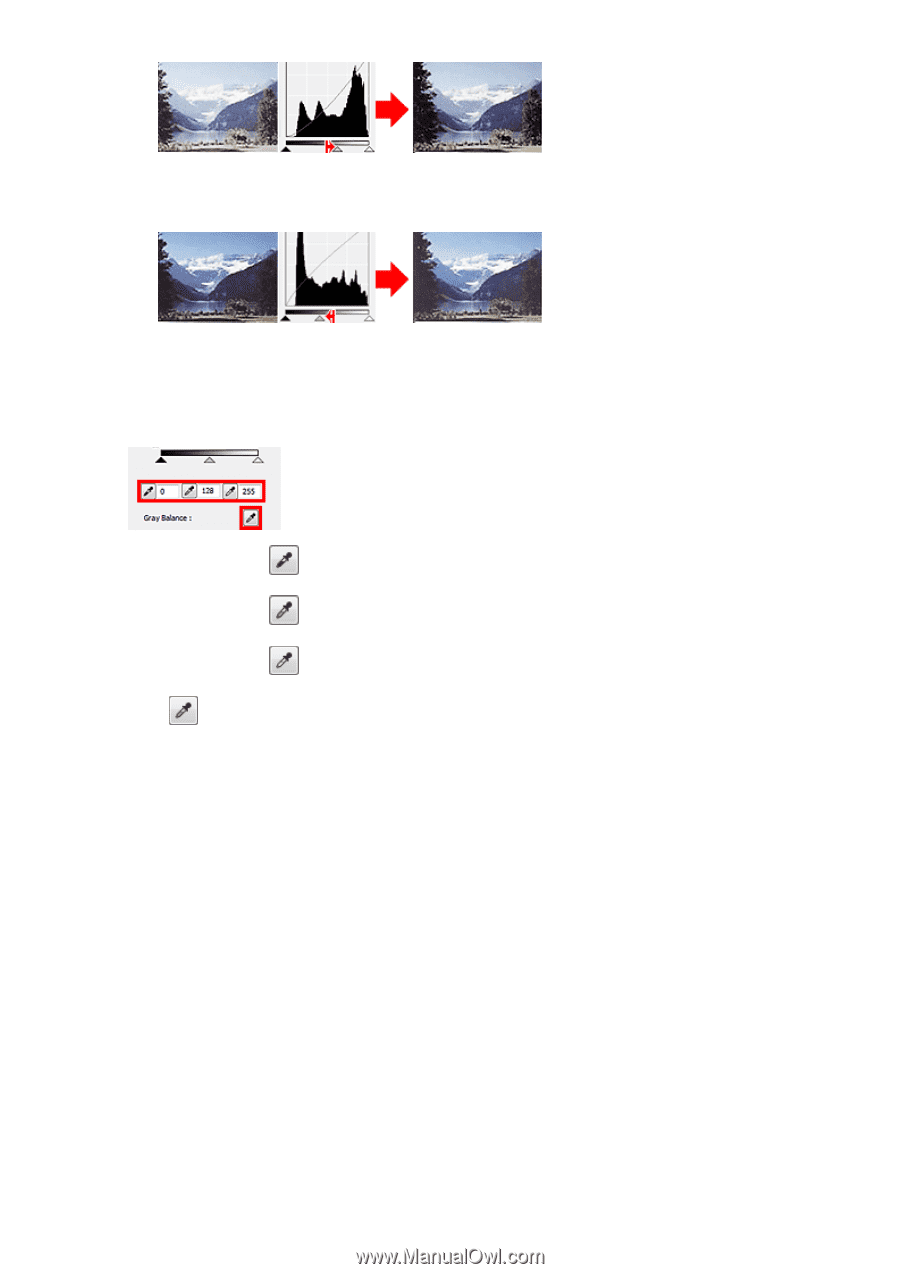
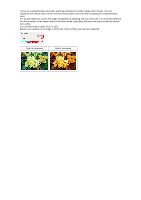
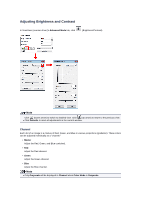
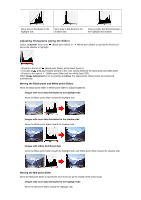
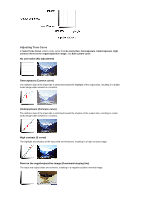
Images with more data distributed to the shadow side Move the Mid-point Slider toward the shadow side. Adjusting Histograms (Using the Droppers) When you select a Channel and click the Black-point, Mid-point, or White-point Dropper, the mouse pointer on the preview image changes to a dropper. Click a Dropper displayed below the histogram to change the setting. - The point clicked with to 245). (Black-point Dropper) will be the darkest point. You can also enter a value (0 - The point clicked with value (5 to 250). (Mid-point Dropper) will be the middle of the tonal range. You can also enter a - The point clicked with (10 to 255). (White-point Dropper) will be the brightest point. You can also enter a value - Click (Dropper) for Gray Balance and click the area you want to adjust the color in the preview image. The clicked point will be set as the achromatic color reference, and the rest of the image is adjusted accordingly. For instance, if snow in a photo appears bluish, click the bluish part to adjust the whole image and reproduce natural colors.
-
 1
1 -
2
-
3
-
4
-
5
-
6
-
7
-
8
-
9
-
10
-
11
-
12
-
13
-
14
-
15
-
16
-
17
-
18
-
19
-
20
-
21
-
22
-
23
-
24
-
25
-
26
-
27
-
28
-
29
-
30
-
31
-
32
-
33
-
34
-
35
-
36
-
37
-
38
-
39
-
40
-
41
-
42
-
43
-
44
-
45
-
46
-
47
-
48
-
49
-
50
-
51
-
52
-
53
-
54
-
55
-
56
-
57
-
58
-
59
-
60
-
61
-
62
-
63
-
64
-
65
-
66
-
67
-
68
-
69
-
70
-
71
-
72
-
73
-
74
-
75
-
76
-
77
-
78
-
79
-
80
-
81
-
82
-
83
-
84
-
85
-
86
-
87
-
88
-
89
-
90
-
91
-
92
-
93
-
94
-
95
-
96
-
97
-
 98
98 -
 99
99 -
 100
100 -
 101
101 -
 102
102 -
 103
103 -
 104
104 -
 105
105 -
 106
106 -
 107
107 -
 108
108 -
109
-
110
-
111
-
112
-
113
-
114
-
115
-
116
-
117
-
118
-
119
-
120
-
121
-
122
-
123
-
124
-
125
-
126
-
127
-
128
-
129
-
130
-
131
-
132
-
133
-
134
-
135
-
136
-
137
-
138
-
139
-
140
-
141
-
142
-
143
-
144
-
145
-
146
-
147
-
148
-
149
-
150
-
151
-
152
-
153
-
154
-
155
-
156
-
157
-
158
-
159
-
160
-
161
-
162
-
163
-
164
-
165
-
166
-
167
-
168
-
169
-
170
 |
 |