Canon PIXMA MX392 Manual - Page 12
Scanning with Favorite Settings
 |
View all Canon PIXMA MX392 manuals
Add to My Manuals
Save this manual to your list of manuals |
Page 12 highlights
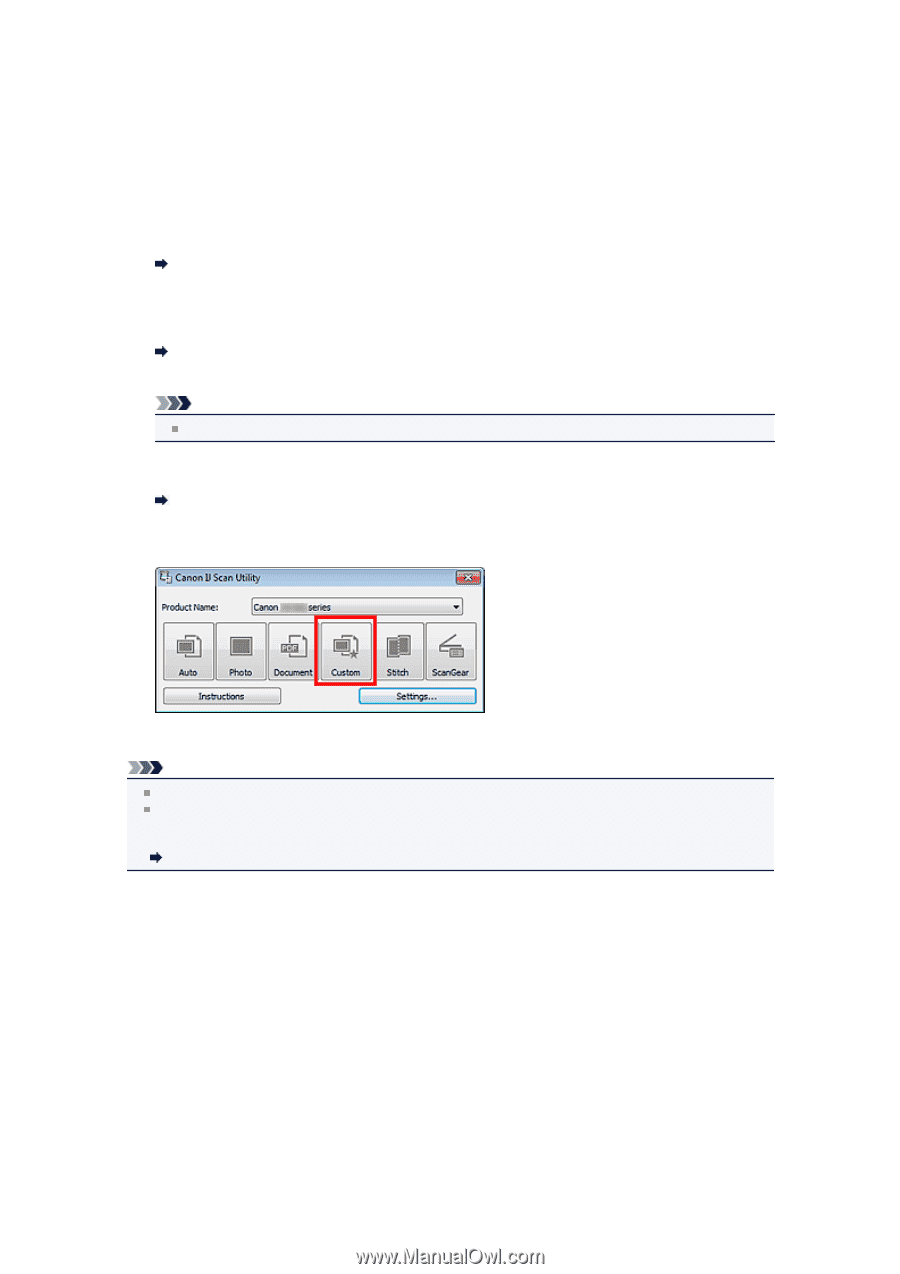
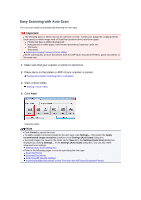
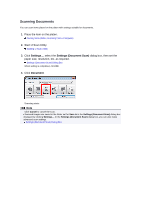
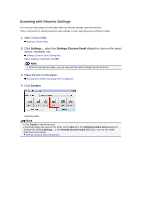
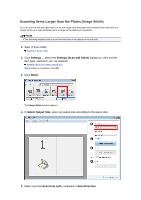
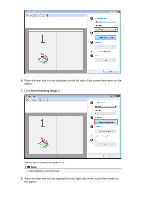
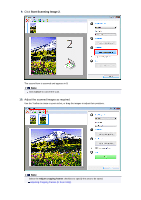
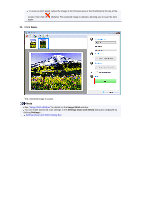
Scanning with Favorite Settings You can scan items placed on the platen with your favorite settings saved beforehand. This is convenient for saving frequently used settings or when specifying scan settings in detail. 1. Start IJ Scan Utility. Starting IJ Scan Utility 2. Click Settings..., select the Settings (Custom Scan) dialog box, then set the select source, resolution, etc. Settings (Custom Scan) Dialog Box When setting is completed, click OK. Note Once the settings are made, you can scan with the same settings from the next time. 3. Place the item on the platen. Placing Items (When Scanning from a Computer) 4. Click Custom. Scanning starts. Note Click Cancel to cancel the scan. Scanned images are saved in the folder set for Save in in the Settings (Custom Scan) dialog box displayed by clicking Settings.... In the Settings (Custom Scan) dialog box, you can also make advanced scan settings. Settings (Custom Scan) Dialog Box
-
 1
1 -
2
-
3
-
4
-
5
-
6
-
 7
7 -
 8
8 -
 9
9 -
 10
10 -
 11
11 -
 12
12 -
 13
13 -
 14
14 -
 15
15 -
 16
16 -
 17
17 -
18
-
19
-
20
-
21
-
22
-
23
-
24
-
25
-
26
-
27
-
28
-
29
-
30
-
31
-
32
-
33
-
34
-
35
-
36
-
37
-
38
-
39
-
40
-
41
-
42
-
43
-
44
-
45
-
46
-
47
-
48
-
49
-
50
-
51
-
52
-
53
-
54
-
55
-
56
-
57
-
58
-
59
-
60
-
61
-
62
-
63
-
64
-
65
-
66
-
67
-
68
-
69
-
70
-
71
-
72
-
73
-
74
-
75
-
76
-
77
-
78
-
79
-
80
-
81
-
82
-
83
-
84
-
85
-
86
-
87
-
88
-
89
-
90
-
91
-
92
-
93
-
94
-
95
-
96
-
97
-
98
-
99
-
100
-
101
-
102
-
103
-
104
-
105
-
106
-
107
-
108
-
109
-
110
-
111
-
112
-
113
-
114
-
115
-
116
-
117
-
118
-
119
-
120
-
121
-
122
-
123
-
124
-
125
-
126
-
127
-
128
-
129
-
130
-
131
-
132
-
133
-
134
-
135
-
136
-
137
-
138
-
139
-
140
-
141
-
142
-
143
-
144
-
145
-
146
-
147
-
148
-
149
-
150
-
151
-
152
-
153
-
154
-
155
-
156
-
157
-
158
-
159
-
160
-
161
-
162
-
163
-
164
-
165
-
166
-
167
-
168
-
169
-
170
 |
 |