Canon PIXMA MX392 Manual - Page 57
Settings ScanGear Dialog Box
 |
View all Canon PIXMA MX392 manuals
Add to My Manuals
Save this manual to your list of manuals |
Page 57 highlights
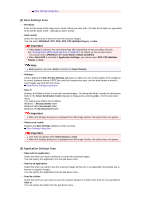
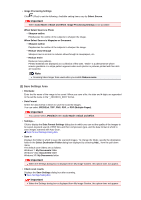
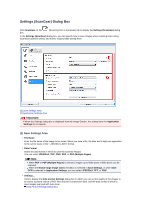
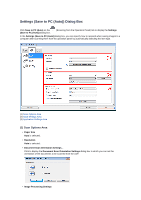
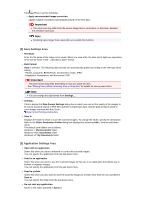
Settings (ScanGear) Dialog Box Click ScanGear on the box. (Scanning from a Computer) tab to display the Settings (ScanGear) dialog In the Settings (ScanGear) dialog box, you can specify how to save images when scanning items using ScanGear (scanner driver) and how to respond after saving them. (1) Save Settings Area (2) Application Settings Area Important When the Settings dialog box is displayed from My Image Garden, the setting items for Application Settings do not appear. (1) Save Settings Area • File Name Enter the file name of the image to be saved. When you save a file, the date and 4 digits are appended to the set file name in the "_20XX0101_0001" format. • Data Format Select the data format in which to save the scanned images. You can select JPEG/Exif, TIFF, PNG, PDF, or PDF (Multiple Pages). Note When PDF or PDF (Multiple Pages) is selected, images up to 9600 pixels x 9600 pixels can be scanned. When the Enable large image scans checkbox is selected in Save Settings, or when Start OCR is selected in Application Settings, you can select JPEG/Exif, TIFF, or PNG. • Settings... Click to display the Data Format Settings dialog box in which you can set the quality of the images to be saved, keyword search of PDF files and their compression type, and the data format in which to save images scanned with Auto Scan. Data Format Settings Dialog Box
-
 1
1 -
2
-
3
-
4
-
5
-
6
-
7
-
8
-
9
-
10
-
11
-
12
-
13
-
14
-
15
-
16
-
17
-
18
-
19
-
20
-
21
-
22
-
23
-
24
-
25
-
26
-
27
-
28
-
29
-
30
-
31
-
32
-
33
-
34
-
35
-
36
-
37
-
38
-
39
-
40
-
41
-
42
-
43
-
44
-
45
-
46
-
47
-
48
-
49
-
50
-
51
-
 52
52 -
 53
53 -
 54
54 -
 55
55 -
 56
56 -
 57
57 -
 58
58 -
 59
59 -
 60
60 -
 61
61 -
 62
62 -
63
-
64
-
65
-
66
-
67
-
68
-
69
-
70
-
71
-
72
-
73
-
74
-
75
-
76
-
77
-
78
-
79
-
80
-
81
-
82
-
83
-
84
-
85
-
86
-
87
-
88
-
89
-
90
-
91
-
92
-
93
-
94
-
95
-
96
-
97
-
98
-
99
-
100
-
101
-
102
-
103
-
104
-
105
-
106
-
107
-
108
-
109
-
110
-
111
-
112
-
113
-
114
-
115
-
116
-
117
-
118
-
119
-
120
-
121
-
122
-
123
-
124
-
125
-
126
-
127
-
128
-
129
-
130
-
131
-
132
-
133
-
134
-
135
-
136
-
137
-
138
-
139
-
140
-
141
-
142
-
143
-
144
-
145
-
146
-
147
-
148
-
149
-
150
-
151
-
152
-
153
-
154
-
155
-
156
-
157
-
158
-
159
-
160
-
161
-
162
-
163
-
164
-
165
-
166
-
167
-
168
-
169
-
170
 |
 |