Canon PIXMA MX392 Manual - Page 165
Color, Black
 |
View all Canon PIXMA MX392 manuals
Add to My Manuals
Save this manual to your list of manuals |
Page 165 highlights
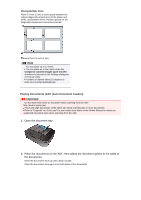
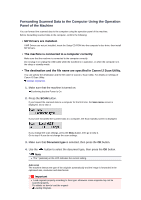
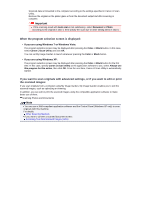
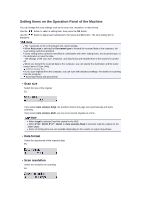
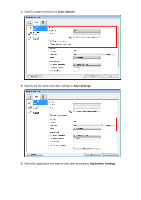
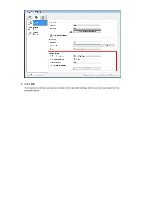
The following items can be scanned: Photos, postcards, visiting cards, magazines, newspapers, documents, BD/DVD/CDs The following items cannot be scanned properly. A4 sized photos Documents smaller than 5 inches x 7 inches (127 mm x 178 mm) such as a paperback with its backbone cut off Originals on thin white paper Long and narrow originals such as panoramic photographs When you scan originals from the ADF, it may take longer to scan the first page. Document Scans the original on the platen glass or in the ADF applying the optimized settings for scanning a document. Photo Scans the original on the platen glass as a photo data applying the optimized settings for scanning a photo. 5. Specify the scan settings. Specify each scan setting in order. Note For details on each setting item: Setting Items on the Operation Panel of the Machine Go to step 6 when Auto scan is selected for Document type. 1. Make sure that Scan size is selected, then press the OK button. 2. Use the button to select the scan size, then press the OK button. 3. Make sure that Data format is selected, then press the OK button. 4. Use the button to select the data format, then press the OK button. 5. Make sure that Scan resolution is selected, then press the OK button. 6. Use the button to select the scan resolution, then press the OK button. The Scan standby screen is displayed after all the settings have been specified. 6. Load the original document on the platen glass or in the ADF. Loading Originals 7. Press the Color button for color scanning, or the Black button for black & white scanning. Note If the original is not loaded properly, a message is displayed on the LCD. Load the original on the platen glass or in the ADF according to the scan settings. • If you load the original in the ADF: The machine starts scanning and scanned data is forwarded to the computer. • If you load the original on the platen glass: • When you select JPEG or TIFF for Data format, the machine starts scanning and scanned data is forwarded to the computer. • When you select PDF or Compact PDF for Data format, the confirmation screen asking you if you continue scanning is displayed after scanning is complete. Selecting Yes and pressing the OK button allow you to scan the originals continuously. Load the next document on the platen glass and start scanning. By selecting No and pressing the OK button, scanning is complete and the data is forwarded to the computer in one PDF file.
-
 1
1 -
2
-
3
-
4
-
5
-
6
-
7
-
8
-
9
-
10
-
11
-
12
-
13
-
14
-
15
-
16
-
17
-
18
-
19
-
20
-
21
-
22
-
23
-
24
-
25
-
26
-
27
-
28
-
29
-
30
-
31
-
32
-
33
-
34
-
35
-
36
-
37
-
38
-
39
-
40
-
41
-
42
-
43
-
44
-
45
-
46
-
47
-
48
-
49
-
50
-
51
-
52
-
53
-
54
-
55
-
56
-
57
-
58
-
59
-
60
-
61
-
62
-
63
-
64
-
65
-
66
-
67
-
68
-
69
-
70
-
71
-
72
-
73
-
74
-
75
-
76
-
77
-
78
-
79
-
80
-
81
-
82
-
83
-
84
-
85
-
86
-
87
-
88
-
89
-
90
-
91
-
92
-
93
-
94
-
95
-
96
-
97
-
98
-
99
-
100
-
101
-
102
-
103
-
104
-
105
-
106
-
107
-
108
-
109
-
110
-
111
-
112
-
113
-
114
-
115
-
116
-
117
-
118
-
119
-
120
-
121
-
122
-
123
-
124
-
125
-
126
-
127
-
128
-
129
-
130
-
131
-
132
-
133
-
134
-
135
-
136
-
137
-
138
-
139
-
140
-
141
-
142
-
143
-
144
-
145
-
146
-
147
-
148
-
149
-
150
-
151
-
152
-
153
-
154
-
155
-
156
-
157
-
158
-
159
-
 160
160 -
 161
161 -
 162
162 -
 163
163 -
 164
164 -
 165
165 -
 166
166 -
 167
167 -
 168
168 -
 169
169 -
 170
170
 |
 |