Canon PIXMA MX392 Manual - Page 24
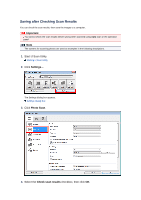
Saving after Checking Scan Results
 |
View all Canon PIXMA MX392 manuals
Add to My Manuals
Save this manual to your list of manuals |
Page 24 highlights
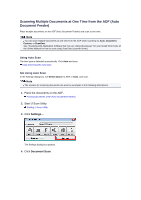
Saving after Checking Scan Results You can check the scan results, then save the images to a computer. Important You cannot check the scan results before saving when scanned using Auto scan or the operation panel. Note The screens for scanning photos are used as examples in the following descriptions. 1. Start IJ Scan Utility. Starting IJ Scan Utility 2. Click Settings.... The Settings dialog box appears. Settings Dialog Box 3. Click Photo Scan. 4. Select the Check scan results checkbox, then click OK.
-
 1
1 -
2
-
3
-
4
-
5
-
6
-
7
-
8
-
9
-
10
-
11
-
12
-
13
-
14
-
15
-
16
-
17
-
18
-
 19
19 -
 20
20 -
 21
21 -
 22
22 -
 23
23 -
 24
24 -
 25
25 -
 26
26 -
 27
27 -
 28
28 -
 29
29 -
30
-
31
-
32
-
33
-
34
-
35
-
36
-
37
-
38
-
39
-
40
-
41
-
42
-
43
-
44
-
45
-
46
-
47
-
48
-
49
-
50
-
51
-
52
-
53
-
54
-
55
-
56
-
57
-
58
-
59
-
60
-
61
-
62
-
63
-
64
-
65
-
66
-
67
-
68
-
69
-
70
-
71
-
72
-
73
-
74
-
75
-
76
-
77
-
78
-
79
-
80
-
81
-
82
-
83
-
84
-
85
-
86
-
87
-
88
-
89
-
90
-
91
-
92
-
93
-
94
-
95
-
96
-
97
-
98
-
99
-
100
-
101
-
102
-
103
-
104
-
105
-
106
-
107
-
108
-
109
-
110
-
111
-
112
-
113
-
114
-
115
-
116
-
117
-
118
-
119
-
120
-
121
-
122
-
123
-
124
-
125
-
126
-
127
-
128
-
129
-
130
-
131
-
132
-
133
-
134
-
135
-
136
-
137
-
138
-
139
-
140
-
141
-
142
-
143
-
144
-
145
-
146
-
147
-
148
-
149
-
150
-
151
-
152
-
153
-
154
-
155
-
156
-
157
-
158
-
159
-
160
-
161
-
162
-
163
-
164
-
165
-
166
-
167
-
168
-
169
-
170
 |
 |
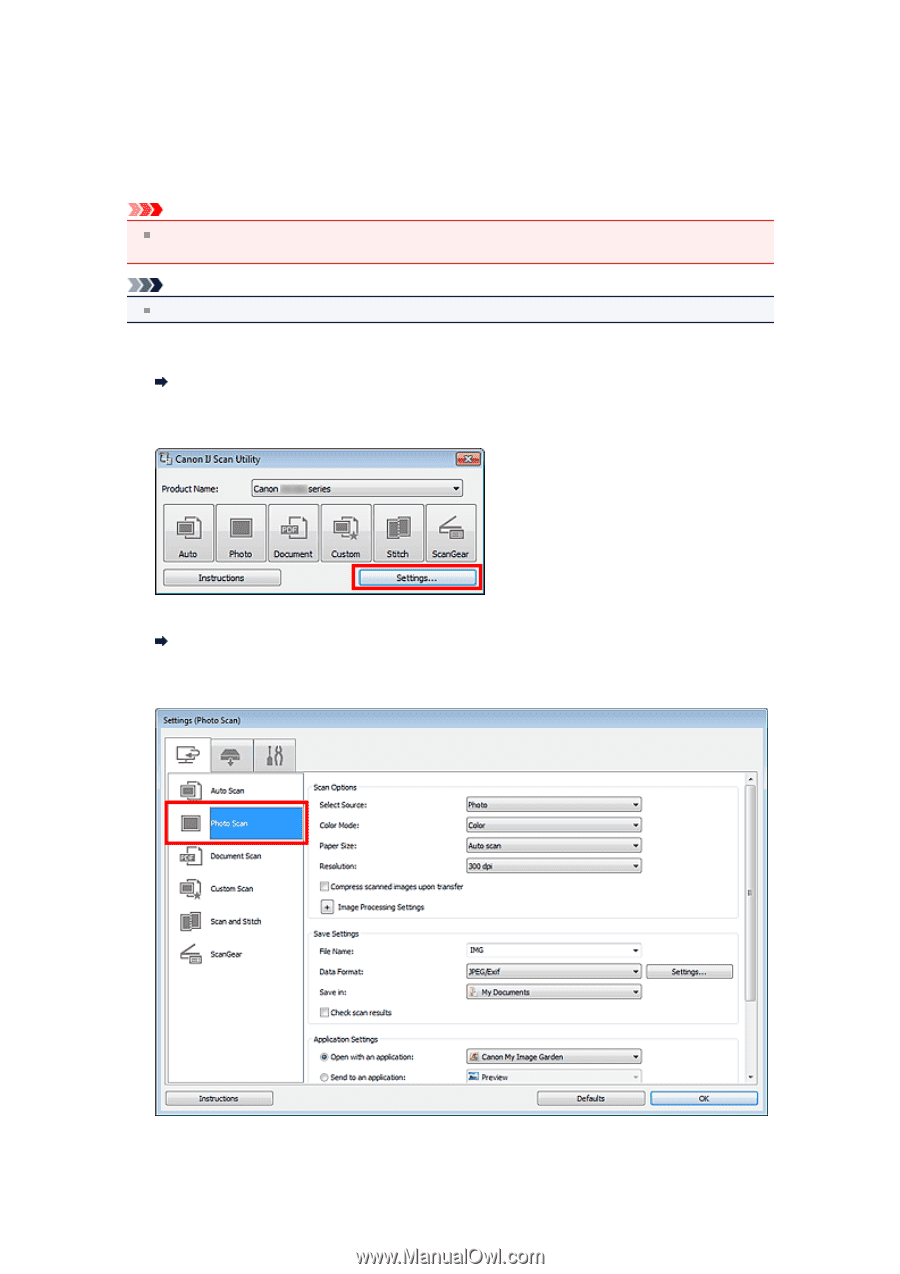
Saving after Checking Scan Results
You can check the scan results, then save the images to a computer.
Important
You cannot check the scan results before saving when scanned using
Auto
scan or the operation
panel.
Note
The screens for scanning photos are used as examples in the following descriptions.
1.
Start IJ Scan Utility.
Starting IJ Scan Utility
2.
Click
Settings...
.
The Settings dialog box appears.
Settings Dialog Box
3.
Click
Photo Scan
.
4.
Select the
Check scan results
checkbox, then click
OK
.