Canon PIXMA MX392 Manual - Page 86
Scanning Multiple Documents from the ADF Auto Document, Feeder in Advanced Mode
 |
View all Canon PIXMA MX392 manuals
Add to My Manuals
Save this manual to your list of manuals |
Page 86 highlights
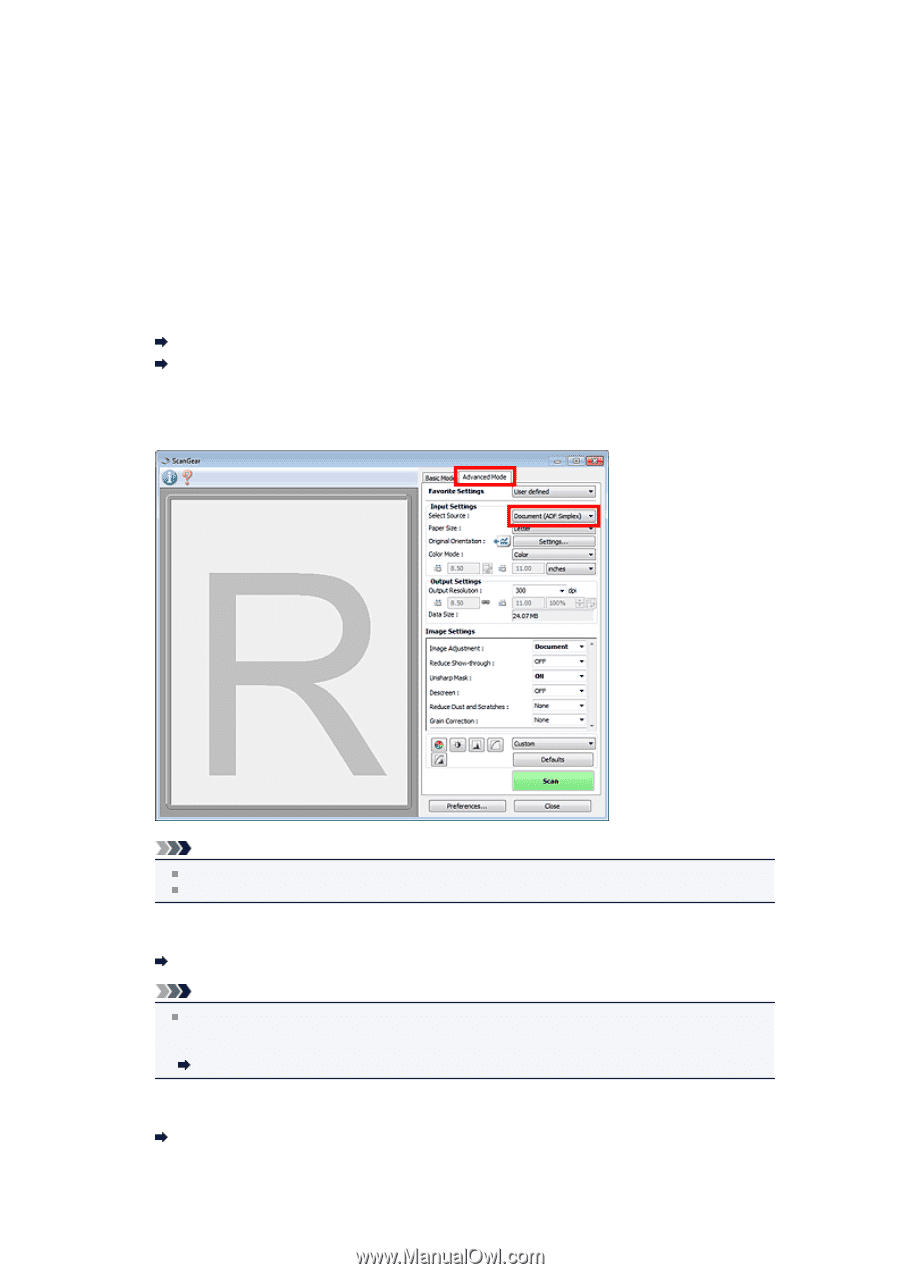
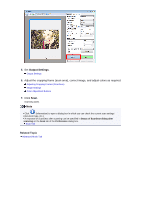
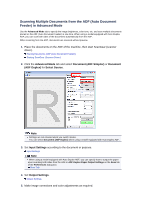
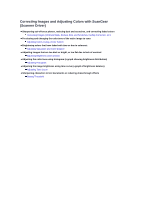
Scanning Multiple Documents from the ADF (Auto Document Feeder) in Advanced Mode Use the Advanced Mode tab to specify the image brightness, color tone, etc. and scan multiple documents placed on the ADF (Auto Document Feeder) at one time. When using a model equipped with Auto Duplex ADF, you can scan both sides of the documents automatically from the ADF. When scanning from the ADF, documents are scanned without preview. 1. Place the documents on the ADF of the machine, then start ScanGear (scanner driver). Placing Documents (ADF (Auto Document Feeder)) Starting ScanGear (Scanner Driver) 2. Click the Advanced Mode tab and select Document (ADF Simplex) or Document (ADF Duplex) for Select Source. Note Settings are not retained when you switch modes. You can select Document (ADF Duplex) when using a model equipped with Auto Duplex ADF. 3. Set Input Settings according to the document or purpose. Input Settings Note When using a model equipped with Auto Duplex ADF, you can specify how to output the paper upon scanning both sides from the ADF in ADF Duplex Paper Output Settings on the Scan tab of the Preferences dialog box. Scan Tab 4. Set Output Settings. Output Settings 5. Make image corrections and color adjustments as required.
-
 1
1 -
2
-
3
-
4
-
5
-
6
-
7
-
8
-
9
-
10
-
11
-
12
-
13
-
14
-
15
-
16
-
17
-
18
-
19
-
20
-
21
-
22
-
23
-
24
-
25
-
26
-
27
-
28
-
29
-
30
-
31
-
32
-
33
-
34
-
35
-
36
-
37
-
38
-
39
-
40
-
41
-
42
-
43
-
44
-
45
-
46
-
47
-
48
-
49
-
50
-
51
-
52
-
53
-
54
-
55
-
56
-
57
-
58
-
59
-
60
-
61
-
62
-
63
-
64
-
65
-
66
-
67
-
68
-
69
-
70
-
71
-
72
-
73
-
74
-
75
-
76
-
77
-
78
-
79
-
80
-
 81
81 -
 82
82 -
 83
83 -
 84
84 -
 85
85 -
 86
86 -
 87
87 -
 88
88 -
 89
89 -
 90
90 -
 91
91 -
92
-
93
-
94
-
95
-
96
-
97
-
98
-
99
-
100
-
101
-
102
-
103
-
104
-
105
-
106
-
107
-
108
-
109
-
110
-
111
-
112
-
113
-
114
-
115
-
116
-
117
-
118
-
119
-
120
-
121
-
122
-
123
-
124
-
125
-
126
-
127
-
128
-
129
-
130
-
131
-
132
-
133
-
134
-
135
-
136
-
137
-
138
-
139
-
140
-
141
-
142
-
143
-
144
-
145
-
146
-
147
-
148
-
149
-
150
-
151
-
152
-
153
-
154
-
155
-
156
-
157
-
158
-
159
-
160
-
161
-
162
-
163
-
164
-
165
-
166
-
167
-
168
-
169
-
170
 |
 |