Canon PIXMA MX392 Manual - Page 82
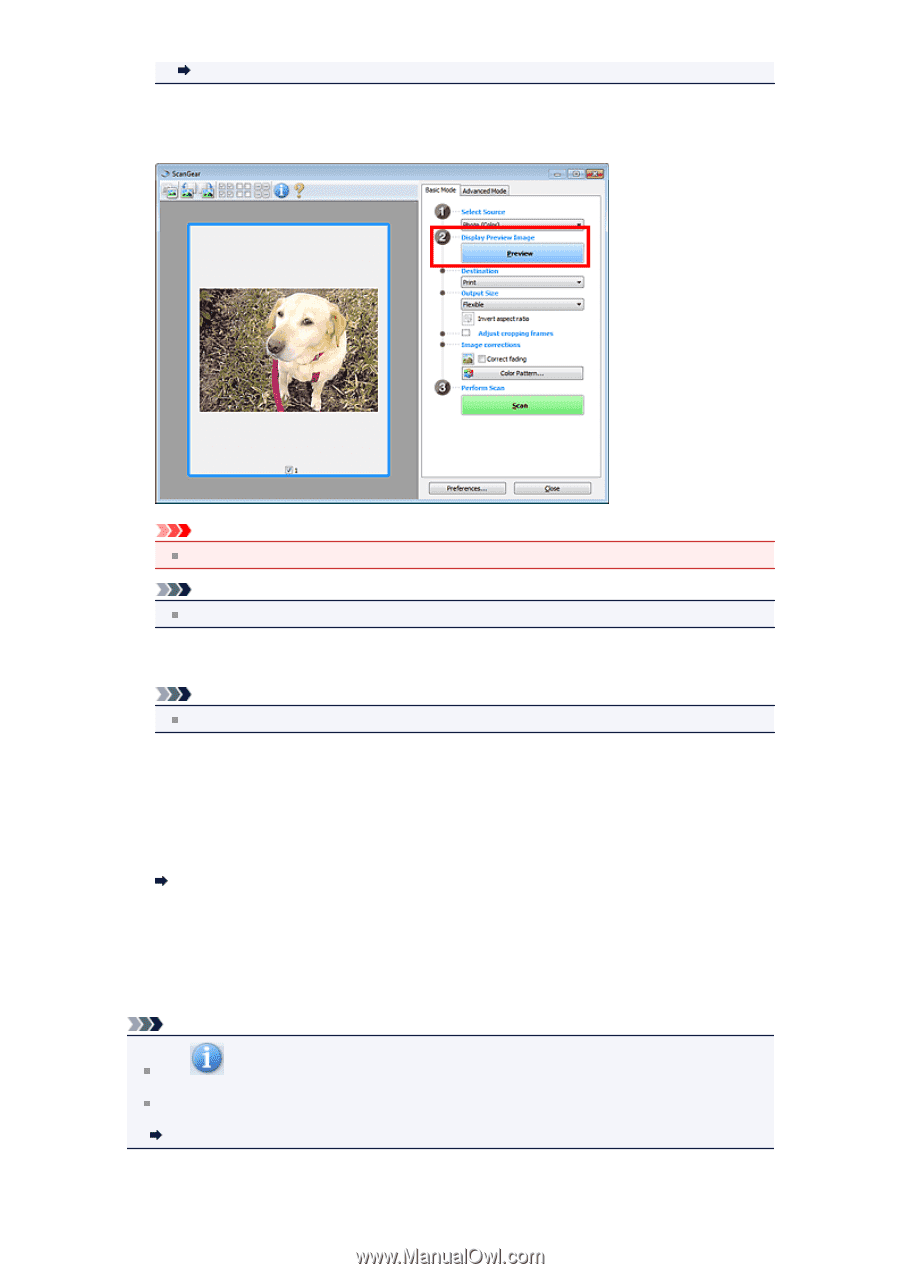
Preview, Important, Destination, Output Size, Image corrections
 |
View all Canon PIXMA MX392 manuals
Add to My Manuals
Save this manual to your list of manuals |
Page 82 highlights
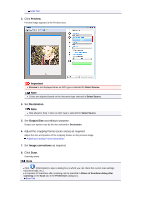
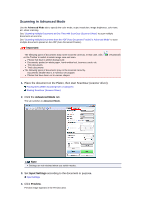
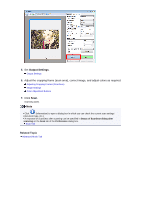
Scan Tab 3. Click Preview. Preview image appears in the Preview area. Important Preview is not displayed when an ADF type is selected for Select Source. Note Colors are adjusted based on the document type selected in Select Source. 4. Set Destination. Note Skip ahead to Step 7 when an ADF type is selected for Select Source. 5. Set Output Size according to purpose. Output size options vary by the item selected in Destination. 6. Adjust the cropping frames (scan areas) as required. Adjust the size and position of the cropping frames on the preview image. Adjusting Cropping Frames (ScanGear) 7. Set Image corrections as required. 8. Click Scan. Scanning starts. Note Click (Information) to open a dialog box in which you can check the current scan settings (document type, etc.). A response of ScanGear after scanning can be specified in Status of ScanGear dialog after scanning on the Scan tab of the Preferences dialog box. Scan Tab
-
 1
1 -
2
-
3
-
4
-
5
-
6
-
7
-
8
-
9
-
10
-
11
-
12
-
13
-
14
-
15
-
16
-
17
-
18
-
19
-
20
-
21
-
22
-
23
-
24
-
25
-
26
-
27
-
28
-
29
-
30
-
31
-
32
-
33
-
34
-
35
-
36
-
37
-
38
-
39
-
40
-
41
-
42
-
43
-
44
-
45
-
46
-
47
-
48
-
49
-
50
-
51
-
52
-
53
-
54
-
55
-
56
-
57
-
58
-
59
-
60
-
61
-
62
-
63
-
64
-
65
-
66
-
67
-
68
-
69
-
70
-
71
-
72
-
73
-
74
-
75
-
76
-
 77
77 -
 78
78 -
 79
79 -
 80
80 -
 81
81 -
 82
82 -
 83
83 -
 84
84 -
 85
85 -
 86
86 -
 87
87 -
88
-
89
-
90
-
91
-
92
-
93
-
94
-
95
-
96
-
97
-
98
-
99
-
100
-
101
-
102
-
103
-
104
-
105
-
106
-
107
-
108
-
109
-
110
-
111
-
112
-
113
-
114
-
115
-
116
-
117
-
118
-
119
-
120
-
121
-
122
-
123
-
124
-
125
-
126
-
127
-
128
-
129
-
130
-
131
-
132
-
133
-
134
-
135
-
136
-
137
-
138
-
139
-
140
-
141
-
142
-
143
-
144
-
145
-
146
-
147
-
148
-
149
-
150
-
151
-
152
-
153
-
154
-
155
-
156
-
157
-
158
-
159
-
160
-
161
-
162
-
163
-
164
-
165
-
166
-
167
-
168
-
169
-
170
 |
 |