Canon PIXMA MX392 Manual - Page 157
Adjust the quality of the scanned picture, Preview
 |
View all Canon PIXMA MX392 manuals
Add to My Manuals
Save this manual to your list of manuals |
Page 157 highlights
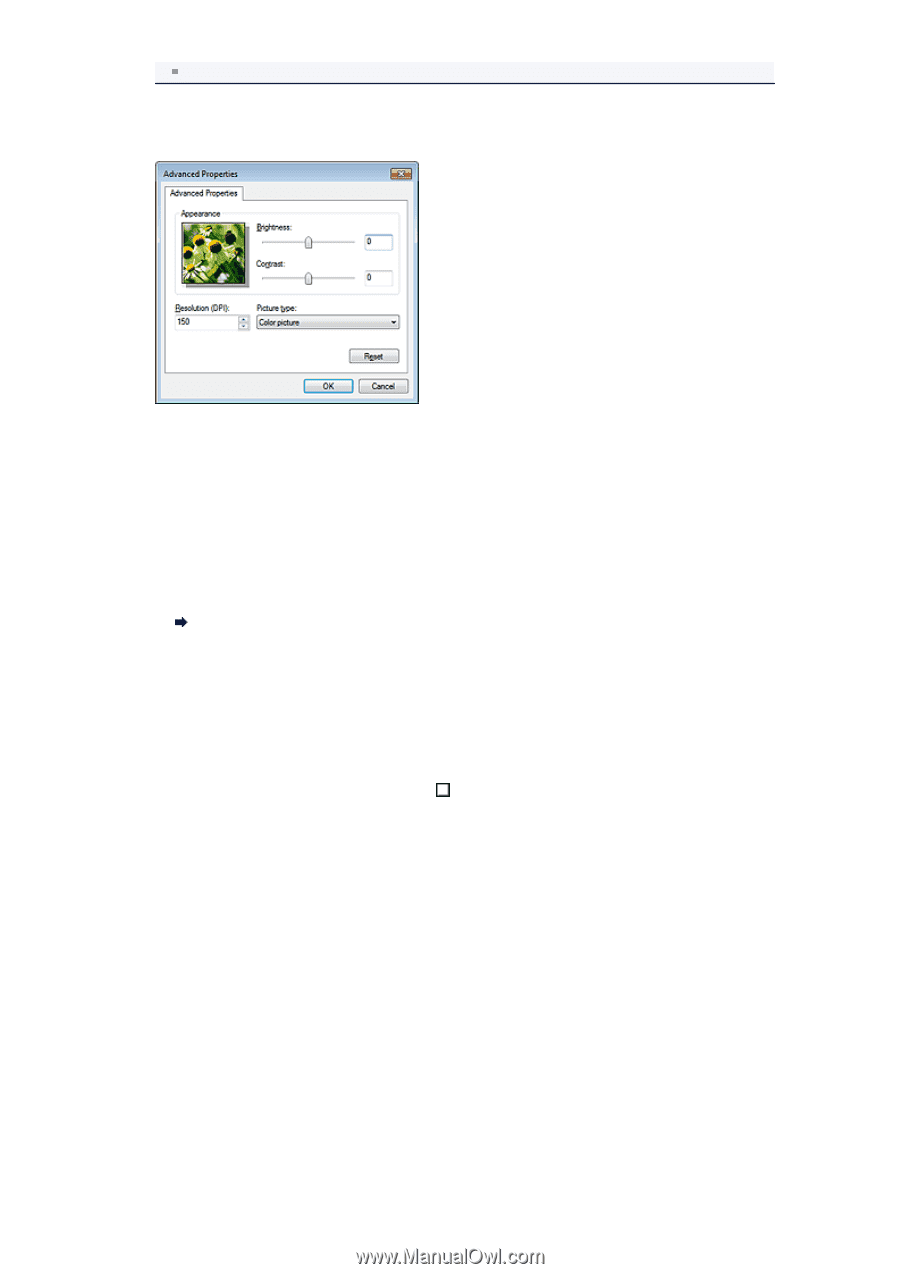
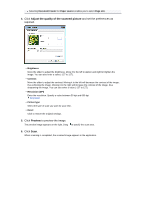
Selecting Document Feeder for Paper source enables you to select Page size. 4. Click Adjust the quality of the scanned picture and set the preferences as required. • Brightness Move the slider to adjust the brightness. Move it to the left to darken and right to brighten the image. You can also enter a value (-127 to 127). • Contrast Move the slider to adjust the contrast. Moving it to the left will decrease the contrast of the image, thus softening the image. Moving it to the right will increase the contrast of the image, thus sharpening the image. You can also enter a value (-127 to 127). • Resolution (DPI) Enter the resolution. Specify a value between 50 dpi and 600 dpi. Resolution • Picture type Select the type of scan you want for your item. • Reset Click to restore the original settings. 5. Click Preview to preview the image. The preview image appears on the right. Drag to specify the scan area. 6. Click Scan. When scanning is completed, the scanned image appears in the application.
-
 1
1 -
2
-
3
-
4
-
5
-
6
-
7
-
8
-
9
-
10
-
11
-
12
-
13
-
14
-
15
-
16
-
17
-
18
-
19
-
20
-
21
-
22
-
23
-
24
-
25
-
26
-
27
-
28
-
29
-
30
-
31
-
32
-
33
-
34
-
35
-
36
-
37
-
38
-
39
-
40
-
41
-
42
-
43
-
44
-
45
-
46
-
47
-
48
-
49
-
50
-
51
-
52
-
53
-
54
-
55
-
56
-
57
-
58
-
59
-
60
-
61
-
62
-
63
-
64
-
65
-
66
-
67
-
68
-
69
-
70
-
71
-
72
-
73
-
74
-
75
-
76
-
77
-
78
-
79
-
80
-
81
-
82
-
83
-
84
-
85
-
86
-
87
-
88
-
89
-
90
-
91
-
92
-
93
-
94
-
95
-
96
-
97
-
98
-
99
-
100
-
101
-
102
-
103
-
104
-
105
-
106
-
107
-
108
-
109
-
110
-
111
-
112
-
113
-
114
-
115
-
116
-
117
-
118
-
119
-
120
-
121
-
122
-
123
-
124
-
125
-
126
-
127
-
128
-
129
-
130
-
131
-
132
-
133
-
134
-
135
-
136
-
137
-
138
-
139
-
140
-
141
-
142
-
143
-
144
-
145
-
146
-
147
-
148
-
149
-
150
-
151
-
 152
152 -
 153
153 -
 154
154 -
 155
155 -
 156
156 -
 157
157 -
 158
158 -
 159
159 -
 160
160 -
 161
161 -
 162
162 -
163
-
164
-
165
-
166
-
167
-
168
-
169
-
170
 |
 |