Cisco 7912G Administration Guide - Page 165
Changing the Logo on the Cisco IP Phone LCD Screen
 |
UPC - 746320852409
View all Cisco 7912G manuals
Add to My Manuals
Save this manual to your list of manuals |
Page 165 highlights
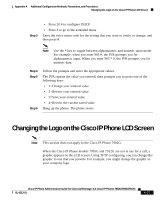
Appendix A Additional Configuration Methods, Parameters, and Procedures Changing the Logo on the Cisco IP Phone LCD Screen Step 3 • Press 20 # to configure DHCP • Press # to go to the extended menu Enter the voice menu code for the setting that you want to verify or change, and then press #. Note Use the * key to toggle between alphanumeric and numeric input mode. For example, when you enter 905 #, the IVR prompts you for alphanumeric input. When you enter 905 * #, the IVR prompts you for numeric data. Step 4 Step 5 Step 6 Follow the prompts and enter the appropriate values. The IVR repeats the value you entered, then prompts you to press one of the following keys: • 1=Change your entered value • 2=Review your entered value • 3=Save your entered value • 4=Review the current saved value Hang up the phone. The phone resets. Changing the Logo on the Cisco IP Phone LCD Screen Note This section does not apply to the Cisco IP Phone 7902G. When the Cisco IP Phone models 7905G and 7912G are not in use for a call, a graphic appears on the LCD screen. Using TFTP configuring, you can change this graphic to one that you provide. For example, you might change the graphic to your company logo. Cisco IP Phone Administration Guide for Cisco CallManager 3.3, Cisco IP Phones 7902G/7905G/7912G OL-6313-01 A-27
-
 1
1 -
2
-
3
-
4
-
5
-
6
-
7
-
8
-
9
-
10
-
11
-
12
-
13
-
14
-
15
-
16
-
17
-
18
-
19
-
20
-
21
-
22
-
23
-
24
-
25
-
26
-
27
-
28
-
29
-
30
-
31
-
32
-
33
-
34
-
35
-
36
-
37
-
38
-
39
-
40
-
41
-
42
-
43
-
44
-
45
-
46
-
47
-
48
-
49
-
50
-
51
-
52
-
53
-
54
-
55
-
56
-
57
-
58
-
59
-
60
-
61
-
62
-
63
-
64
-
65
-
66
-
67
-
68
-
69
-
70
-
71
-
72
-
73
-
74
-
75
-
76
-
77
-
78
-
79
-
80
-
81
-
82
-
83
-
84
-
85
-
86
-
87
-
88
-
89
-
90
-
91
-
92
-
93
-
94
-
95
-
96
-
97
-
98
-
99
-
100
-
101
-
102
-
103
-
104
-
105
-
106
-
107
-
108
-
109
-
110
-
111
-
112
-
113
-
114
-
115
-
116
-
117
-
118
-
119
-
120
-
121
-
122
-
123
-
124
-
125
-
126
-
127
-
128
-
129
-
130
-
131
-
132
-
133
-
134
-
135
-
136
-
137
-
138
-
139
-
140
-
141
-
142
-
143
-
144
-
145
-
146
-
147
-
148
-
149
-
150
-
151
-
152
-
153
-
154
-
155
-
156
-
157
-
158
-
159
-
 160
160 -
 161
161 -
 162
162 -
 163
163 -
 164
164 -
 165
165 -
 166
166 -
 167
167 -
 168
168 -
 169
169 -
 170
170 -
171
-
172
-
173
-
174
-
175
-
176
-
177
-
178
-
179
-
180
-
181
-
182
-
183
-
184
 |
 |