Cisco 7912G Administration Guide - Page 166
Step 1, number from 0 through 4294967296 and must be different than the identifier
 |
UPC - 746320852409
View all Cisco 7912G manuals
Add to My Manuals
Save this manual to your list of manuals |
Page 166 highlights
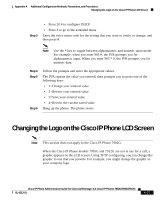
Appendix A Additional Configuration Methods, Parameters, and Procedures Changing the Logo on the Cisco IP Phone LCD Screen Before you can change the graphic on the phone, you must use a graphics program to create an image with the following attributes: • Width of 88 pixels. • Height of 27 pixels. • Monochrome (black-and-white). • Saved as bitmap file with the extension .bmp. For example, mylogo.bmp. In addition, you will need the bmp2logo.exe tool, which converts your bitmap image file to a .logo file that can be downloaded to the phone. This tool is bundled with the Cisco IP Phone software. You can also obtain it from the CCO website at the following URL. It is included with the SCCP Software Package Zip file. http://www.cisco.com/cgi-bin/tablebuild.pl/ip_phone_client To change the graphic that appears on a Cisco IP Phone, follow these steps: Procedure Step 1 Open a command window and type the following command: bmp2logo imageID image.bmp image.logo where: • imageID is a unique identifier for the new graphic. This identifier must be a number from 0 through 4294967296 and must be different than the identifier of the graphic that is currently on the phone. • image is the base file name of the image that you previously created and saved with the graphics program. Note The imageID of the image that comes with the phone is 1. Step 2 For example, if the image identifier is 10 and the base name of your image file is mylogo, type this command: bmp2logo 10 mylogo.bmp mylogo.logo Copy the image.logo file to the TFTPPATH directory on the TFTP server. A-28 Cisco IP Phone Administration Guide for Cisco CallManager 3.3, Cisco IP Phones 7902G/7905G/7912G OL-6313-01
-
 1
1 -
2
-
3
-
4
-
5
-
6
-
7
-
8
-
9
-
10
-
11
-
12
-
13
-
14
-
15
-
16
-
17
-
18
-
19
-
20
-
21
-
22
-
23
-
24
-
25
-
26
-
27
-
28
-
29
-
30
-
31
-
32
-
33
-
34
-
35
-
36
-
37
-
38
-
39
-
40
-
41
-
42
-
43
-
44
-
45
-
46
-
47
-
48
-
49
-
50
-
51
-
52
-
53
-
54
-
55
-
56
-
57
-
58
-
59
-
60
-
61
-
62
-
63
-
64
-
65
-
66
-
67
-
68
-
69
-
70
-
71
-
72
-
73
-
74
-
75
-
76
-
77
-
78
-
79
-
80
-
81
-
82
-
83
-
84
-
85
-
86
-
87
-
88
-
89
-
90
-
91
-
92
-
93
-
94
-
95
-
96
-
97
-
98
-
99
-
100
-
101
-
102
-
103
-
104
-
105
-
106
-
107
-
108
-
109
-
110
-
111
-
112
-
113
-
114
-
115
-
116
-
117
-
118
-
119
-
120
-
121
-
122
-
123
-
124
-
125
-
126
-
127
-
128
-
129
-
130
-
131
-
132
-
133
-
134
-
135
-
136
-
137
-
138
-
139
-
140
-
141
-
142
-
143
-
144
-
145
-
146
-
147
-
148
-
149
-
150
-
151
-
152
-
153
-
154
-
155
-
156
-
157
-
158
-
159
-
160
-
 161
161 -
 162
162 -
 163
163 -
 164
164 -
 165
165 -
 166
166 -
 167
167 -
 168
168 -
 169
169 -
 170
170 -
 171
171 -
172
-
173
-
174
-
175
-
176
-
177
-
178
-
179
-
180
-
181
-
182
-
183
-
184
 |
 |
