Cisco 7912G Administration Guide - Page 79
Disabling DHCP
 |
UPC - 746320852409
View all Cisco 7912G manuals
Add to My Manuals
Save this manual to your list of manuals |
Page 79 highlights
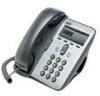
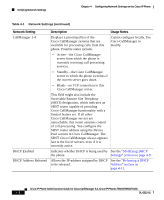
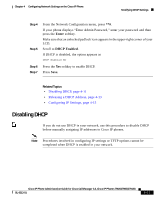
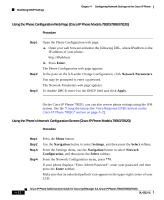
Chapter 4 Configuring Network Settings on the Cisco IP Phone Modifying DHCP Settings Step 4 Step 5 Step 6 Step 7 From the Network Configuration menu, press **#. If your phone displays "Enter Admin Password," enter your password and then press the Enter softkey. Make sure that an unlocked padlock icon appears in the upper-right corner of your LCD. Scroll to DHCP Enabled. If DHCP is disabled, the option appears as DHCP Enabled NO Press the Yes softkey to enable DHCP. Press Save. Related Topics • Disabling DHCP, page 4-11 • Releasing a DHCP Address, page 4-13 • Configuring IP Settings, page 4-15 Disabling DHCP If you do not use DHCP in your network, use this procedure to disable DHCP before manually assigning IP addresses to Cisco IP phones. Note Procedures involved in configuring IP settings or TFTP options cannot be completed when DHCP is enabled in your network. Cisco IP Phone Administration Guide for Cisco CallManager 3.3, Cisco IP Phones 7902G/7905G/7912G OL-6313-01 4-11
-
 1
1 -
2
-
3
-
4
-
5
-
6
-
7
-
8
-
9
-
10
-
11
-
12
-
13
-
14
-
15
-
16
-
17
-
18
-
19
-
20
-
21
-
22
-
23
-
24
-
25
-
26
-
27
-
28
-
29
-
30
-
31
-
32
-
33
-
34
-
35
-
36
-
37
-
38
-
39
-
40
-
41
-
42
-
43
-
44
-
45
-
46
-
47
-
48
-
49
-
50
-
51
-
52
-
53
-
54
-
55
-
56
-
57
-
58
-
59
-
60
-
61
-
62
-
63
-
64
-
65
-
66
-
67
-
68
-
69
-
70
-
71
-
72
-
73
-
 74
74 -
 75
75 -
 76
76 -
 77
77 -
 78
78 -
 79
79 -
 80
80 -
 81
81 -
 82
82 -
 83
83 -
 84
84 -
85
-
86
-
87
-
88
-
89
-
90
-
91
-
92
-
93
-
94
-
95
-
96
-
97
-
98
-
99
-
100
-
101
-
102
-
103
-
104
-
105
-
106
-
107
-
108
-
109
-
110
-
111
-
112
-
113
-
114
-
115
-
116
-
117
-
118
-
119
-
120
-
121
-
122
-
123
-
124
-
125
-
126
-
127
-
128
-
129
-
130
-
131
-
132
-
133
-
134
-
135
-
136
-
137
-
138
-
139
-
140
-
141
-
142
-
143
-
144
-
145
-
146
-
147
-
148
-
149
-
150
-
151
-
152
-
153
-
154
-
155
-
156
-
157
-
158
-
159
-
160
-
161
-
162
-
163
-
164
-
165
-
166
-
167
-
168
-
169
-
170
-
171
-
172
-
173
-
174
-
175
-
176
-
177
-
178
-
179
-
180
-
181
-
182
-
183
-
184
 |
 |