Dell 1135N User Guide - Page 111
Troubleshooting - prepare new cartridge
 |
View all Dell 1135N manuals
Add to My Manuals
Save this manual to your list of manuals |
Page 111 highlights
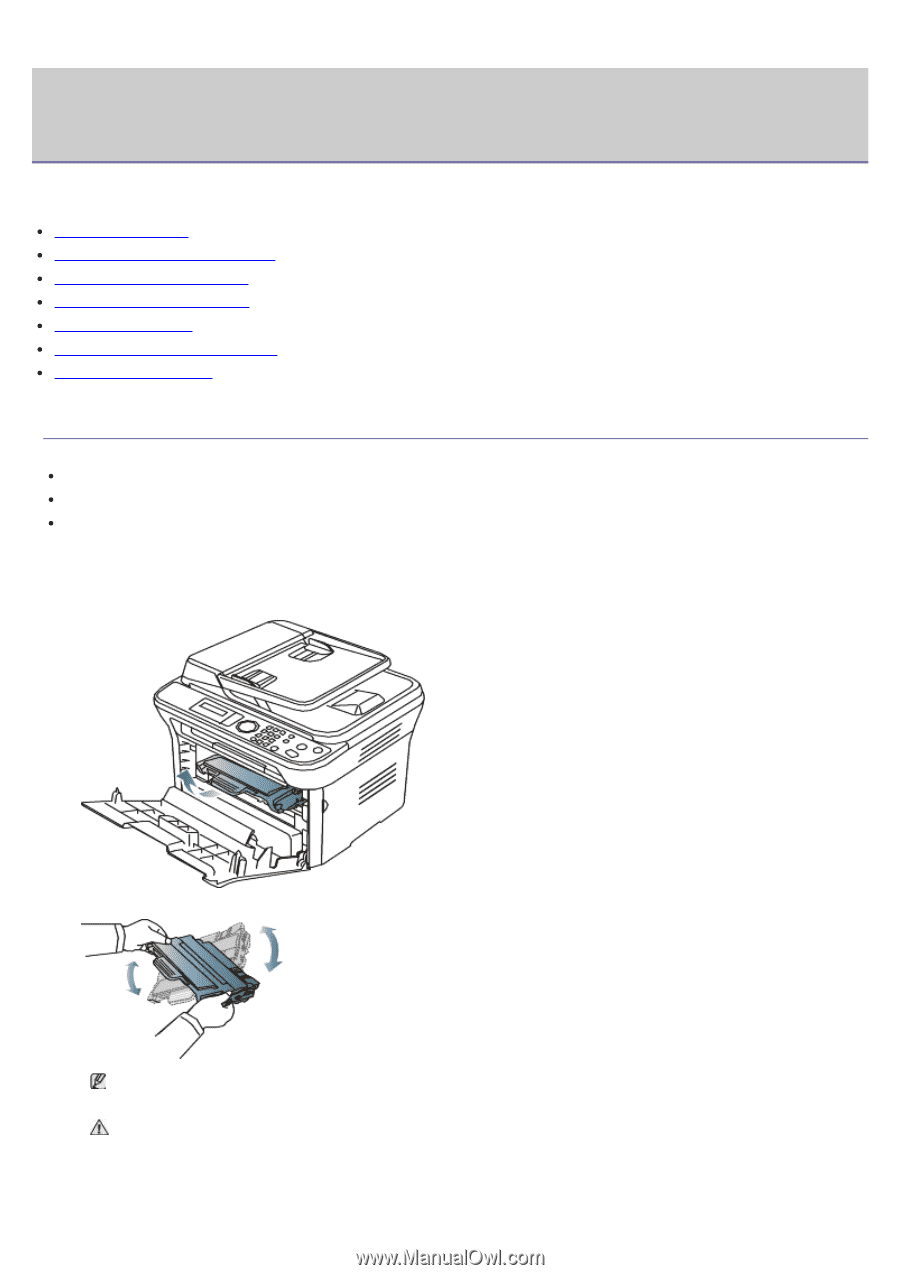
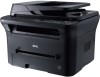
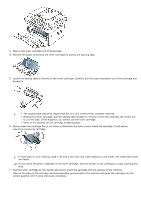
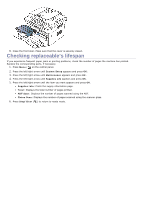
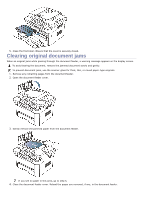
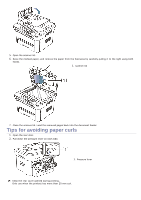
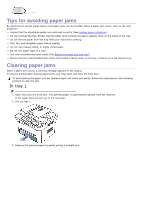
Troubleshooting This chapter gives you different troubleshooting steps. This chapter includes: Redistributing toner Clearing original document jams Tips for avoiding paper curls Tips for avoiding paper jams Clearing paper jams Understanding display messages Solving other problems Redistributing toner When the toner cartridge is near the end of its life: White streaks or light printing occurs. Prepare new cartridge appears on the display. The Status LED blinks red. If this happens, you can temporarily improve print quality by redistributing the remaining toner in the cartridge. In some cases, white streaks or light printing will still occur even after you have redistributed the toner. 1. Open the front door. 2. Pull the toner cartridge out. 3. Thoroughly roll the cartridge five or six times to distribute the toner evenly inside the cartridge. If toner gets on your clothing, wipe it off with a dry cloth and wash clothing in cold water. Hot water sets toner into fabric. Do not touch the green underside of the toner cartridge. Use the handle on the cartridge to avoid touching this area. 4. Hold the toner cartridge by the handle and slowly insert the cartridge into the opening in the machine. Tabs on the sides of the cartridge and corresponding grooves within the machine will guide the cartridge into the correct position until it locks into place completely.
-
 1
1 -
2
-
3
-
4
-
5
-
6
-
7
-
8
-
9
-
10
-
11
-
12
-
13
-
14
-
15
-
16
-
17
-
18
-
19
-
20
-
21
-
22
-
23
-
24
-
25
-
26
-
27
-
28
-
29
-
30
-
31
-
32
-
33
-
34
-
35
-
36
-
37
-
38
-
39
-
40
-
41
-
42
-
43
-
44
-
45
-
46
-
47
-
48
-
49
-
50
-
51
-
52
-
53
-
54
-
55
-
56
-
57
-
58
-
59
-
60
-
61
-
62
-
63
-
64
-
65
-
66
-
67
-
68
-
69
-
70
-
71
-
72
-
73
-
74
-
75
-
76
-
77
-
78
-
79
-
80
-
81
-
82
-
83
-
84
-
85
-
86
-
87
-
88
-
89
-
90
-
91
-
92
-
93
-
94
-
95
-
96
-
97
-
98
-
99
-
100
-
101
-
102
-
103
-
104
-
105
-
 106
106 -
 107
107 -
 108
108 -
 109
109 -
 110
110 -
 111
111 -
 112
112 -
 113
113 -
 114
114 -
 115
115 -
 116
116 -
117
-
118
-
119
-
120
-
121
-
122
-
123
-
124
-
125
-
126
-
127
-
128
-
129
-
130
-
131
-
132
-
133
-
134
-
135
-
136
-
137
-
138
 |
 |