Dell 1135N User Guide - Page 53
Using the Image Manager, To save a Job Type setting for the next scan job
 |
View all Dell 1135N manuals
Add to My Manuals
Save this manual to your list of manuals |
Page 53 highlights
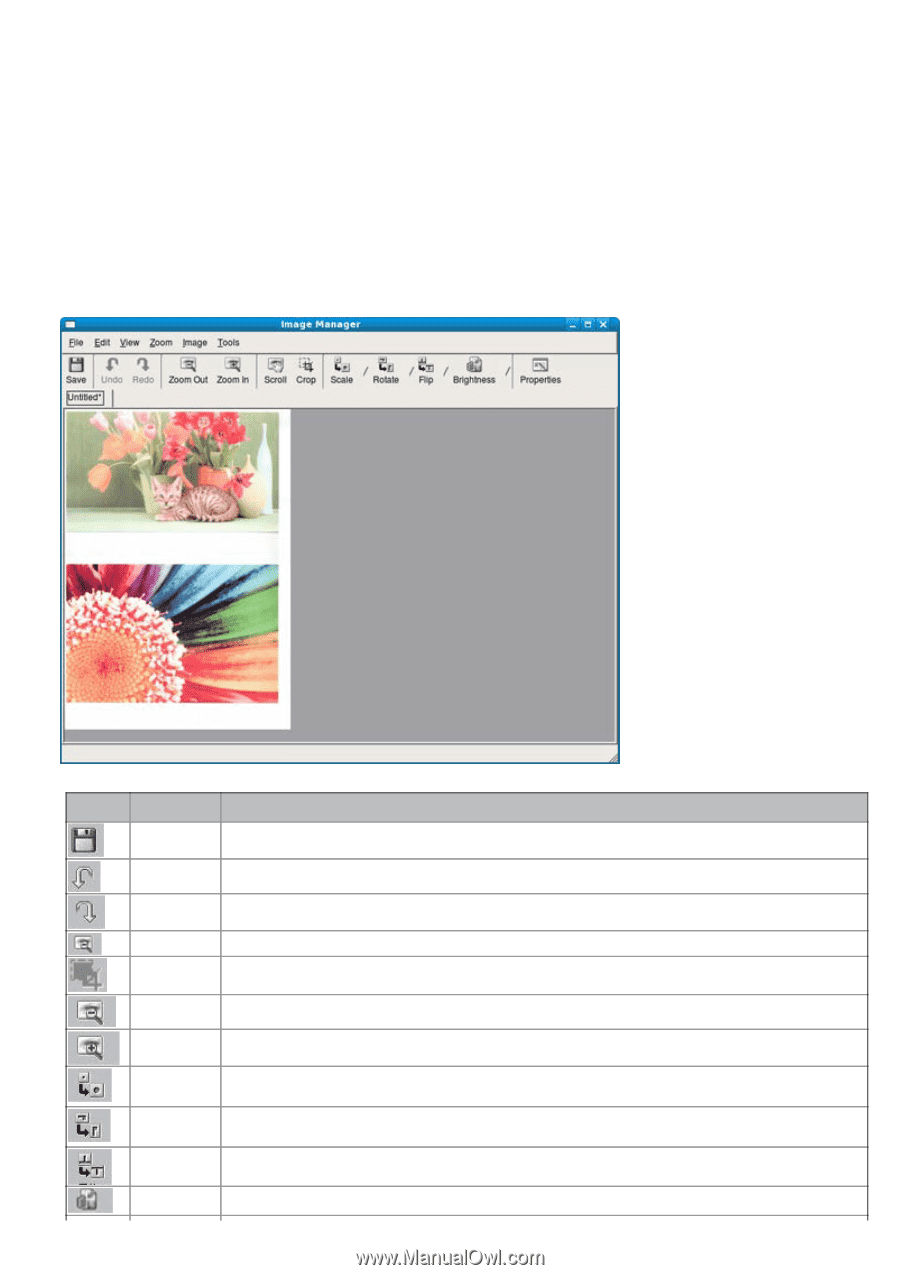
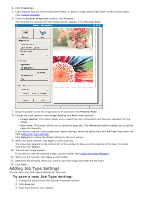
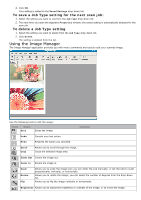
4. Click OK. Your setting is added to the Saved Settings drop-down list. To save a Job Type setting for the next scan job: 1. Select the setting you want to use from the Job Type drop-down list. 2. The next time you open the Scanner Properties window, the saved setting is automatically selected for the scan job. To delete a Job Type setting 1. Select the setting you want to delete from the Job Type drop-down list. 2. Click Delete. The setting is deleted from the list. Using the Image Manager The Image Manager application provides you with menu commands and tools to edit your scanned image. Use the following tools to edit the image: Tools Name Save Saves the image. Function Undo Redo Cancels your last action. Restores the action you canceled. Scroll Crop Allows you to scroll through the image. Crops the selected image area. Zoom Out Zooms the image out. Zoom In Zooms the image in. Scale Rotate Flip Allows you to scale the image size; you can enter the size manually, or set the rate to scale proportionally, vertically, or horizontally. Allows you to rotate the image; you can select the number of degrees from the drop-down list. Allows you to flip the image vertically or horizontally. Brightness Allows you to adjust the brightness or contrast of the image, or to invert the image.
-
 1
1 -
2
-
3
-
4
-
5
-
6
-
7
-
8
-
9
-
10
-
11
-
12
-
13
-
14
-
15
-
16
-
17
-
18
-
19
-
20
-
21
-
22
-
23
-
24
-
25
-
26
-
27
-
28
-
29
-
30
-
31
-
32
-
33
-
34
-
35
-
36
-
37
-
38
-
39
-
40
-
41
-
42
-
43
-
44
-
45
-
46
-
47
-
 48
48 -
 49
49 -
 50
50 -
 51
51 -
 52
52 -
 53
53 -
 54
54 -
 55
55 -
 56
56 -
 57
57 -
 58
58 -
59
-
60
-
61
-
62
-
63
-
64
-
65
-
66
-
67
-
68
-
69
-
70
-
71
-
72
-
73
-
74
-
75
-
76
-
77
-
78
-
79
-
80
-
81
-
82
-
83
-
84
-
85
-
86
-
87
-
88
-
89
-
90
-
91
-
92
-
93
-
94
-
95
-
96
-
97
-
98
-
99
-
100
-
101
-
102
-
103
-
104
-
105
-
106
-
107
-
108
-
109
-
110
-
111
-
112
-
113
-
114
-
115
-
116
-
117
-
118
-
119
-
120
-
121
-
122
-
123
-
124
-
125
-
126
-
127
-
128
-
129
-
130
-
131
-
132
-
133
-
134
-
135
-
136
-
137
-
138
 |
 |