Dell 1135N User Guide - Page 98
IP setting using SetIP Program Macintosh, Starting the program
 |
View all Dell 1135N manuals
Add to My Manuals
Save this manual to your list of manuals |
Page 98 highlights
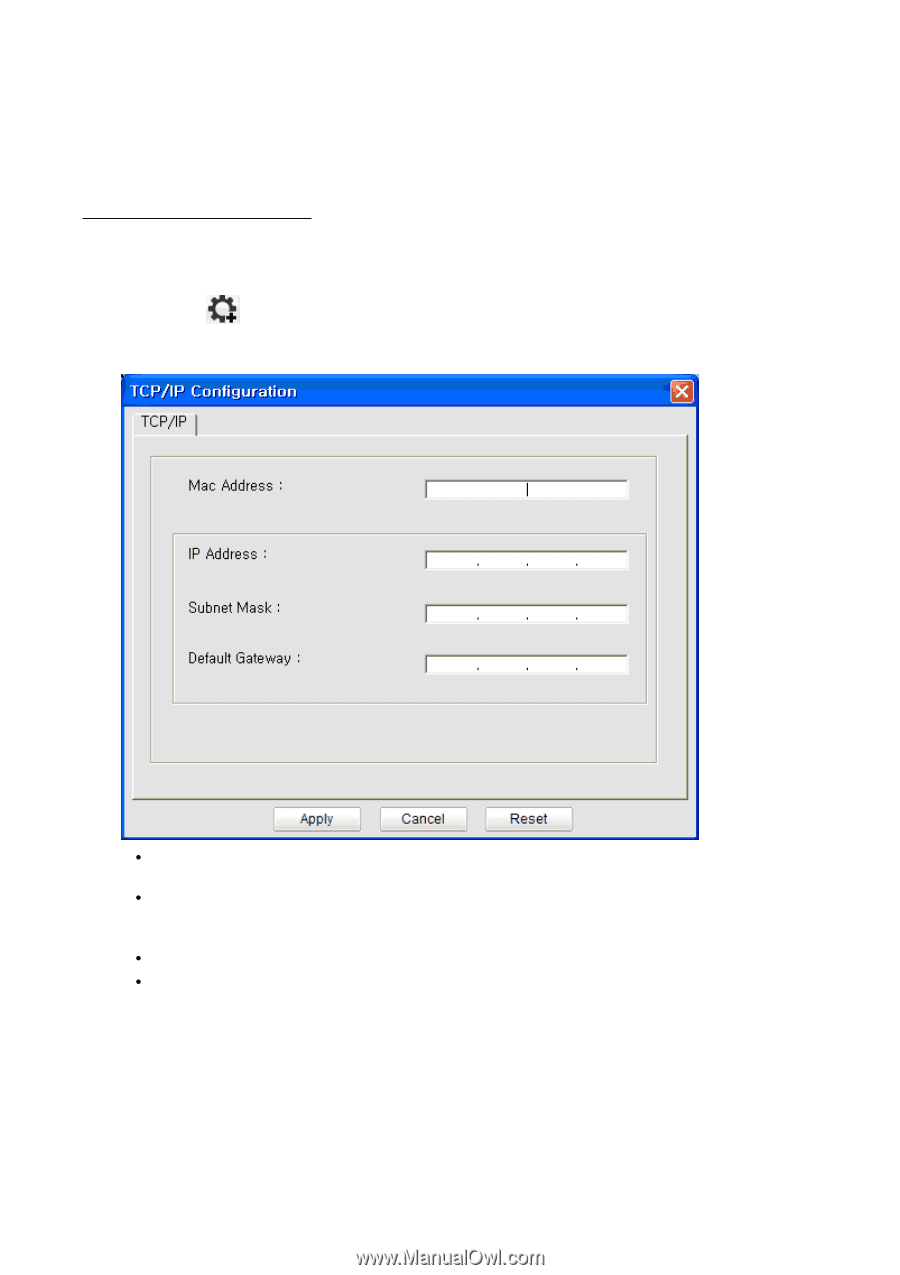
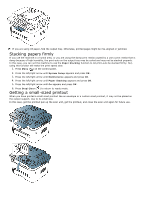
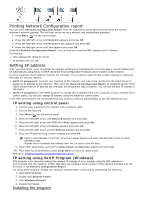
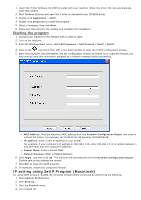
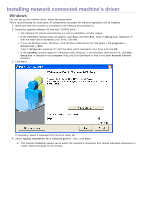
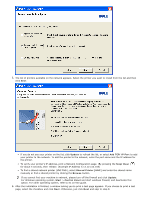
1. Insert the Printer Software CD-ROM provided with your machine. When the driver CD runs automatically, close that window. 2. Start Windows Explorer and open the X drive (X represents your CD-ROM drive). 3. Double-click Application > SetIP. 4. Double-click Setup.exe to install this program. 5. Select a language, then click Next. 6. Follow the instructions in the window and complete the installation. Starting the program 1. Connect your machine to the network with a network cable. 2. Turn on the machine. 3. From the Windows Start menu, select All Programs > Dell Printers > SetIP > SetIP. 4. Click on the icon (third from left) in the SetIP window to open the TCP/IP configuration window. 5. Enter the machine's new information into the configuration window as follows. In a corporate intranet, you may need to have this information assigned by a network manager before proceeding. MAC Address: Find the machine's MAC address from the Network Configuration Report and enter it without the colons. For example, 00:15:99:29:51:A8 becomes 0015992951A8. IP Address: Enter a new IP address for your printer. For example, if your computer's IP address is 192.168.1.150, enter 192.168.1.X (X is number between 1 and 254 other than the computer's address). Subnet Mask: Enter a Subnet Mask. Default Gateway: Enter a Default Gateway. 6. Click Apply, and then click OK. The machine will automatically print the Network Configuration Report. Confirm that all the settings are correct. 7. Click Exit to close the SetIP program. 8. If necessary, restart the computer's firewall. IP setting using SetIP Program (Macintosh) For using SetIP program, disable the computer firewall before continuing by performing the following: 1. Open System Preferences. 2. Click Security. 3. Click the Firewall menu. 4. Turn firewall off.
-
 1
1 -
2
-
3
-
4
-
5
-
6
-
7
-
8
-
9
-
10
-
11
-
12
-
13
-
14
-
15
-
16
-
17
-
18
-
19
-
20
-
21
-
22
-
23
-
24
-
25
-
26
-
27
-
28
-
29
-
30
-
31
-
32
-
33
-
34
-
35
-
36
-
37
-
38
-
39
-
40
-
41
-
42
-
43
-
44
-
45
-
46
-
47
-
48
-
49
-
50
-
51
-
52
-
53
-
54
-
55
-
56
-
57
-
58
-
59
-
60
-
61
-
62
-
63
-
64
-
65
-
66
-
67
-
68
-
69
-
70
-
71
-
72
-
73
-
74
-
75
-
76
-
77
-
78
-
79
-
80
-
81
-
82
-
83
-
84
-
85
-
86
-
87
-
88
-
89
-
90
-
91
-
92
-
 93
93 -
 94
94 -
 95
95 -
 96
96 -
 97
97 -
 98
98 -
 99
99 -
 100
100 -
 101
101 -
 102
102 -
 103
103 -
104
-
105
-
106
-
107
-
108
-
109
-
110
-
111
-
112
-
113
-
114
-
115
-
116
-
117
-
118
-
119
-
120
-
121
-
122
-
123
-
124
-
125
-
126
-
127
-
128
-
129
-
130
-
131
-
132
-
133
-
134
-
135
-
136
-
137
-
138
 |
 |