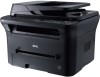
Dell 1135N User Guide - Page 27
In the computer, Setting the paper source, Windows, Macintosh, Linux - user manual
 |
View all Dell 1135N manuals
Add to My Manuals
Save this manual to your list of manuals |
Page 27 highlights
3. Press the left/right arrow until Paper Setup appears and press OK. 4. Press the left/right arrow until Paper Type appears and press OK. 5. Press the left/right arrow to select the paper tray you want and press OK. 6. Press the left/right arrow to select the paper type you want. 7. Press OK to save the selection. 8. Press Stop/Clear ( ) to return to ready mode. Setting the paper source 1. Press Menu ( ) on the control panel. 2. Press the left/right arrow until System Setup appears and press OK. 3. Press the left/right arrow until Paper Setup appears and press OK. 4. Press the left/right arrow until Paper Source appears and press OK. 5. Press the left/right arrow until Copy Tray or Fax Tray appears and press OK. 6. Press the left/right arrow to select the paper tray you want. 7. Press OK to save the selection. 8. Press Stop/Clear ( ) to return to ready mode. In the computer Windows 1. Click the Windows Start menu. 2. For Windows 2000, select Settings > Printers. For Windows XP/2003, select Printers and Faxes. For Windows 2008/Vista, select Control Panel > Hardware and Sound > Printers. For Windows 7, select Control Panel > Hardware and Sound > Devices and Printers. For Windows Server 2008 R2, select Control Panel > Hardware > Devices and Printers. 3. Right-click your machine. 4. For Windows XP/2003/2008/Vista, press Printing Preferences. For Windows 7 and Windows Server 2008 R2, from context menus, select the Printing Preferences. If Printing Preferences item has ? mark, you can select other printer drivers connected with selected printer. 5. Click Paper tab. 6. Select tray and its options, such as paper size and type. 7. Press OK. If you want to use special-sized paper such as a billing paper, select Paper tab > Size > Edit... in the Printing Preferences (See Opening printing preferences). Macintosh Macintosh users need to change the default setting manually each time they want to print using other settings. 1. Open a Macintosh application and select the file you want to print. 2. Open the File menu and click Print. 3. Go to Paper Feed pane. 4. Open the File menu and click Print. 5. Go to Paper Feed. 6. Set appropriate tray from which you want to print. 7. Go to Paper pane. 8. Set paper type to correspond to the paper loaded in the tray from which you want to print. 9. Click Print to print. Linux 1. Open Terminal Program 2. When the Terminal screen appears, type in the following: [root@localhost root]# lpr 3. Select Printer and click Properties... 4. Click Advanced tab.
-
 1
1 -
2
-
3
-
4
-
5
-
6
-
7
-
8
-
9
-
10
-
11
-
12
-
13
-
14
-
15
-
16
-
17
-
18
-
19
-
20
-
21
-
 22
22 -
 23
23 -
 24
24 -
 25
25 -
 26
26 -
 27
27 -
 28
28 -
 29
29 -
 30
30 -
 31
31 -
 32
32 -
33
-
34
-
35
-
36
-
37
-
38
-
39
-
40
-
41
-
42
-
43
-
44
-
45
-
46
-
47
-
48
-
49
-
50
-
51
-
52
-
53
-
54
-
55
-
56
-
57
-
58
-
59
-
60
-
61
-
62
-
63
-
64
-
65
-
66
-
67
-
68
-
69
-
70
-
71
-
72
-
73
-
74
-
75
-
76
-
77
-
78
-
79
-
80
-
81
-
82
-
83
-
84
-
85
-
86
-
87
-
88
-
89
-
90
-
91
-
92
-
93
-
94
-
95
-
96
-
97
-
98
-
99
-
100
-
101
-
102
-
103
-
104
-
105
-
106
-
107
-
108
-
109
-
110
-
111
-
112
-
113
-
114
-
115
-
116
-
117
-
118
-
119
-
120
-
121
-
122
-
123
-
124
-
125
-
126
-
127
-
128
-
129
-
130
-
131
-
132
-
133
-
134
-
135
-
136
-
137
-
138
 |
 |